
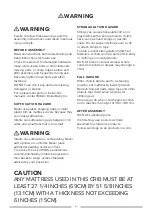
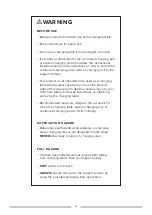
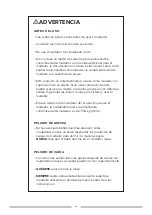

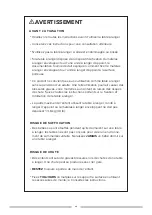


WARNING
CAUTION
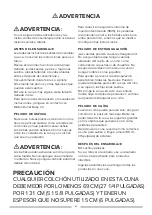
ANY MATTRESS USED IN THIS CRIB MUST BE AT
LEAST 27 1/4 INCHES (69CM) BY 51 5/8 INCHES
(131CM) WITH A THICKNESS NOT EXCEEDING
6 INCHES (15CM).
Failure to follow these warnings and the
assembly instructions could result in serious
injury or death.
BEFORE ASSEMBLY
Read all instructions before assembling crib.
Keep instructions for future use.
Check this product for damaged hardware,
loose joints, loose bolts or other fasteners,
missing parts, or sharp edges before and
after assembly and frequently during use.
Securely tighten loose bolts and other
fasteners.
DO NOT use crib if any parts are missing,
damaged, or broken.
For replacement parts or instruction
manuals, contact Million Dollar Baby Co.
SUFFOCATION HAZARD
Never use plastic shipping bags or other
plastic film as mattress covers because they
can cause suffocation.
Infants can suffocate in gaps between crib
sides and a mattress that is too small.
Infants can suffocate on soft bedding. Never
add a pillow or comforter. Never place
additional padding under an infant.
To reduce the risk of SIDS, pediatricians
recommend healthy infants be placed on
their backs to sleep, unless otherwise
advised by your physician.
STRANGULATION HAZARD
Strings can cause strangulation! Do not
place items with a string around a child’s
neck, such as hood strings or pacifier
cords. Do not suspend strings over a crib
or attach strings to toys.
To help prevent strangulation tighten all
fasteners. A child can trap parts of the body
or clothing on loose fasteners.
DO NOT place crib near window where
cords from blinds or drapes may strangle a
child.
FALL HAZARD
When child is able to pull to a standing
position, set mattress to lowest position.
Remove bumper pads, large toys and other
objects that could serve as steps for
climbing out.
Stop using crib when child begins to climb
out or reaches the height of 35 in. (89 cm).
AFTER ASSEMBLY
DO NOT substitute parts.
If refinishing, use a non-toxic finish
specified for children’s products.
Follow warnings on all products in a crib.
WARNING:
WARNING:
41
Summary of Contents for Piedmont M1991
Page 1: ...Piedmont M1991...
Page 2: ......
Page 10: ...C 1 E 1 10 2 H12 X3 X3...
Page 11: ...3 11 H20 X1 G 1...
Page 12: ...12 X4 G 1 C 1 F 1 4 H8 X4 X4 H3...
Page 13: ...5 13 H8 X2 X2 H3 X2 G 2 E 1...
Page 14: ...6 14 H8 X2 X2 H3 H9 X2 E 1 F 2 X2...
Page 15: ...15 7 X4 B G 1 G 2 X4 H1 H8 X4...
Page 16: ...X2 16 8 X2 H1 H8 X2 H12 X2 I B...
Page 18: ...18 10 X4 H1 H8 X4 X4 A A F 1 F 2...
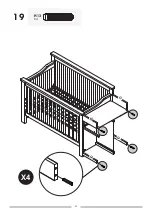
Page 19: ...19 11 X2 H1 H8 X2 H12 X2 X2 I A...
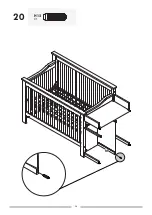
Page 20: ...20 12 X3 H1 H8 X3 H13 X3 X3 Q O Q G 2 F 2...
Page 21: ...H17 X1 H5 X1 21 13 H13 X1 F 2...
Page 22: ...22 14 H5 X1 N F 2...
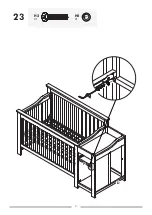
Page 23: ...23 15 H8 X1 X1 H2 P F 2...
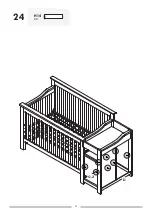
Page 24: ...24 16 H8 X1 X1 H3 H9 X1 H12 X1 M E 1...
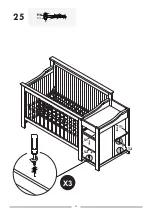
Page 25: ...L U 25 17 M E 1...
Page 26: ...R 26 18 O N...
Page 27: ...27 19 H13 X4 X4 Q O Q N...
Page 28: ...28 20 H12 X1 M...
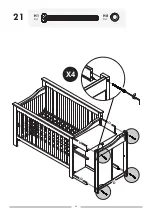
Page 29: ...29 21 X4 H1 H8 X4 D O N Q X4...
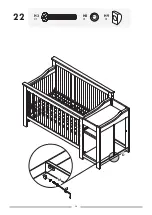
Page 30: ...30 22 H8 X1 X1 H3 H9 X1 D M...
Page 31: ...31 23 H8 X1 X1 H2 D P...
Page 32: ...32 24 H14 X8 D G 2...
Page 33: ...H6 X3 X3 S1 S2 T1 T2 33 25...
Page 34: ...H11 X2 V 34 26 X2 Y...
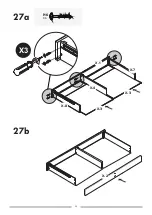
Page 35: ...27b 35 27a H6 X6 X3 X 1 X 3 X 3 X 8 X 4 X 7 X 2...
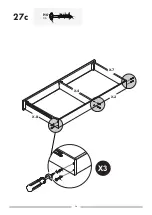
Page 36: ...36 27c H6 X6 X3 X 8 X 2 X 4 X 7...
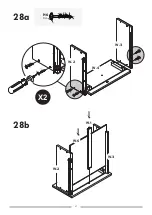
Page 37: ...W 1 W 6 37 28b 28a H6 X4 X2 W 2 W 4 W 3 W 2 W 3...
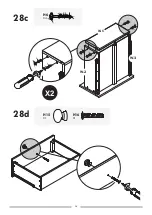
Page 38: ...H15 X1 H16 X1 38 28d 28c H6 X4 W 5 W 2 W 3 X2...
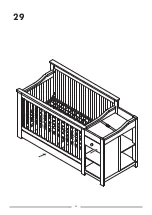
Page 39: ...39 29...
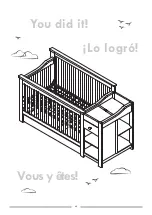
Page 40: ...You did it Lo logr Vousy tes 40...
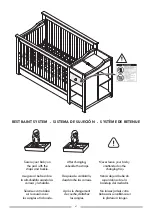
Page 49: ...49 ASSEMBLY INSTRUCTIONS MONTAJE INSTRUCCIONES ASSEMBL E INSTRUCTIONS 1 X2 V Y H11 X2...
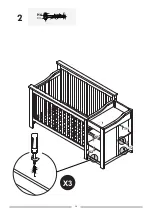
Page 50: ...50 2 H6 X3 S2 T1 T2 S1 X3...
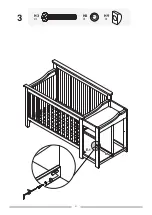
Page 51: ...3 M H8 X1 X1 H3 H9 X1 E 1 51...
Page 52: ...52 4 H8 X1 X1 H2 P F 2...
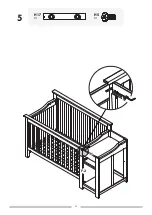
Page 53: ...53 5 H17 X1 H5 X1 N F 2...
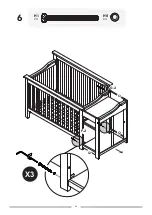
Page 54: ...6 X3 H1 H8 X3 54 F 2 X3 Q O Q G 2...
Page 55: ...55 7 X4 H1 H8 X4 X4 A F 1 F 2...
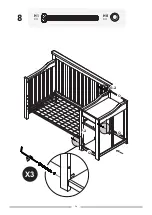
Page 56: ...X3 H1 H8 X3 56 8 X3 Q O Q G 2 F 2...
Page 57: ...9 H17 X1 H5 X1 N F 2 57...
Page 58: ...H8 X1 X1 H2 10 P F 2 58...
Page 59: ...11 M H8 X1 X1 H3 H9 X1 H12 X1 E 1 59...
Page 60: ...12 T1 T2 S1 H6 X3 S2 X3 60...
Page 61: ...61 13...
Page 62: ...62 14 M3099 X2...
Page 63: ...63 You did it Lo logr Vousy tes...
Page 69: ...69...
Page 70: ...14 JUL 2021...


