41
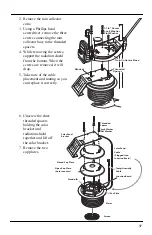
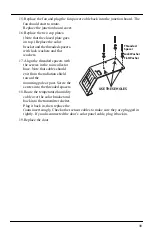
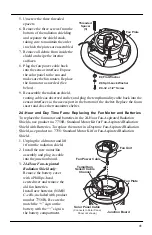
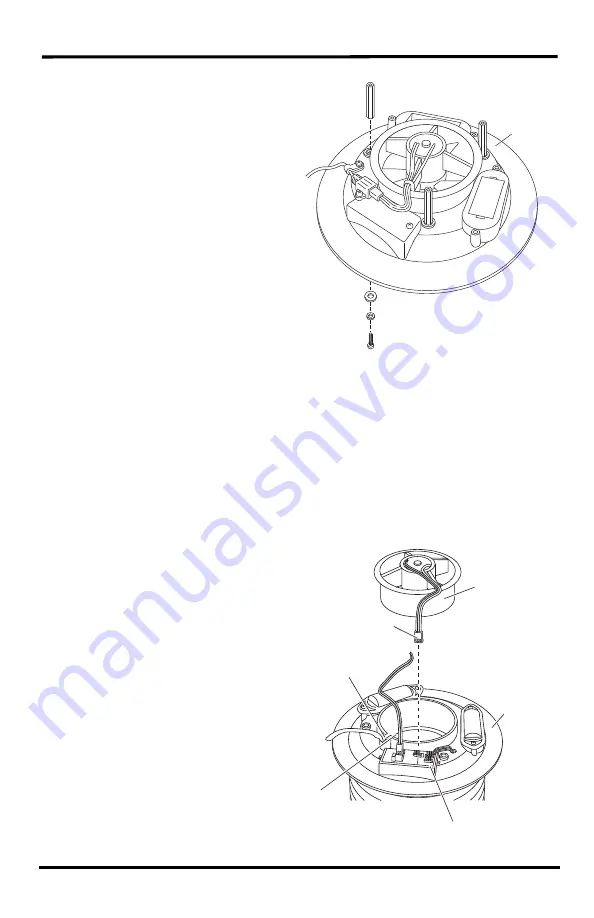
5. Unscrew the three threaded
spacers.
6. Remove the three screws from the
bottom of the radiation shielding
and separate the shield stack,
taking care to maintain the order
in which the plates are assembled.
7. Remove all debris from inside the
shield and wipe the interior
surfaces.
8. Plug the fan power cable back
into the sensor interface. Expose
the solar panel to the sun and
make sure the fan rotates. Replace
the fan motor as needed. (See
below).
9. Reassemble the radiation shield,
routing cables as observed earlier, and plug the temp/humidity cable back into the
sensor interface via the access port in the bottom of the shelter. Replace the foam
insert and close the transmitter shelter.
24-Hour and Day Time Fans: Replacing the Fan Motor and Batteries
To replace the fan motor and batteries in the 24-Hour Fan-Aspirated Radiation
Shields, use product no. 7758B: Standard Motor Kit for Fan-Aspirated Radiation
Shield with Batteries. To replace the motor in a Daytime Fan-Aspirated Radiation
Shield, use product no. 7758: Standard Motor Kit for Fan-Aspirated Radiation
Shield.
1. Unplug the old motor and lift
it from the radiation shield.
2. Install the new motor/fan
assembly and plug its cable
into the junction board.
3.
24-Hour Fan-Aspirated
Radiation Shield only
:
Remove the battery cover
with a Phillips-head
screwdriver and remove the
old fan batteries.
Install new batteries (NiMH
C-cells, included with product
number 7758B). Be sure the
match the “+” sign on the
battery with the “+” sign in
the battery compartment.
Fan Plate
Threaded
Spacer
(3)
#8 Flat Washer
#8 Split-Lock Washer
#8-32 x 1/2" Screw
Fan Unit
Fan Power Cable
Junction Board
Temp/Hum
Sensor Cable
Channel
Fan Plate
Solar Panel Cable
(Connects to Solar Panel,
Panel not shown)
Summary of Contents for 6322C
Page 47: ......


