5
Connect to the Weather Station
1. If you have not already set up your console or Weather Envoy, do so first. (See
the instruction manual that came with your console or Envoy.)
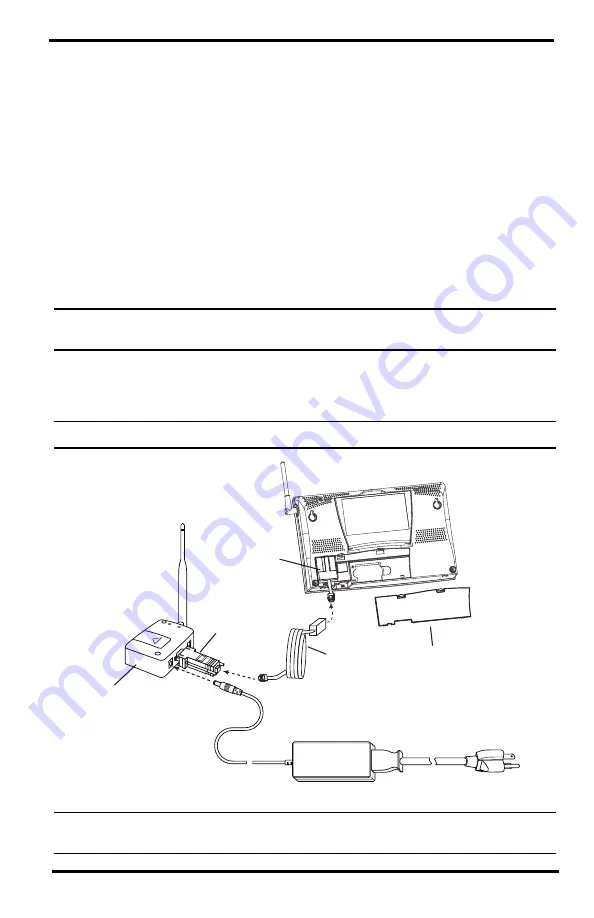
2. Make sure the data logger is installed in the console or Envoy. (See your
WeatherLink Getting Started Guide
for more information on installing the data
logger.) Attach the 8'
(
2.44 m) data logger serial cable (sold with the Weather-
Link Serial Data Logger) to the data logger.
3. If you wish to set alarms, do so now. You may set alarm thresholds for weather
conditions through the WeatherLink software or in the console (for Vantage
stations). When an alarm condition occurs, the current data will be sent to the
server. Up to ten alarm conditions will be sent to the server per day (from mid-
night to midnight). When an alarm condition occurs, the “Summary” page on
WeatherLink.com shows a snapshot of the weather condition when the alarm is
activated.
Note: See “Setting E-mail Alerts” on page 7 for information on how to receive e-mail alerts for
alarms.
4. Connect the other end of the data logger serial cable to the
Vantage Connect
adapter.
5. Plug
power cord
into the
power supply
(see illustration below).
Note: Do not power up the Retrofit Kit until after you have registered online.
Note: We recommend using the console’s AC power adapter (with battery back-up) when it is
connected to the Vantage Connect Retrofit Kit. C-batteries alone will only last 3 months.
8' (2.5 m)
Data Logger
Cable
Data Logger
Battery cover
Vantage Pro2 Console
Power Supply
Vantage Connect
Cellular Modem
Power Cord
Vantage Connect
Adapter


