71
Issued: 28.02.2005
Strider MD 4 Plus
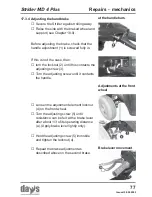
Adjusting the clamping bolts:
(1.) Loosen the locking screws (2)
(Philips head No. 2.)
➨
The clamping tightness is adjusted by
turning the clamping bolts.
The clamping tightness should be set so
that the clamping lever can be closed by
hand without requiring too much force.
Adjusting the clamping tightness:
Unlock the clamping lever (1).
➨
Unlocking the clamping
lever
Adjusting the clamping
bolts
(2.) Turn the clamping bolts in the
appropriate direction:
(a) turn to right = increase clamping
tightness
(b) turn to left = decrease clamping
tightness
(3.) Align the clamping lever (1).
In order that the clamping bolt
fits precisely into the receptacle
when coupling the drive unit (see
chapter 14.4.1), the clamping
lever (1) must be leaning slightly
to the left when it is unlocked
(oriented to around 7 o’clock)
Tools required:
1 x screwdriver; Phillips head No. 2
Repairs - mechanics
17.3.1 Adjusting the drive lock clamping bolts
17.3 Mechanics


