9
4.1.4. Put down the guard and; press
to perform a measuring spin.
4.1.5. In a few seconds the wheel is brought to operating speed and begin measuring unbalance, the unbalance values
remain on instruments 1 and 3 when the wheel stopped. Press
may check the real unbalance value under threshold.
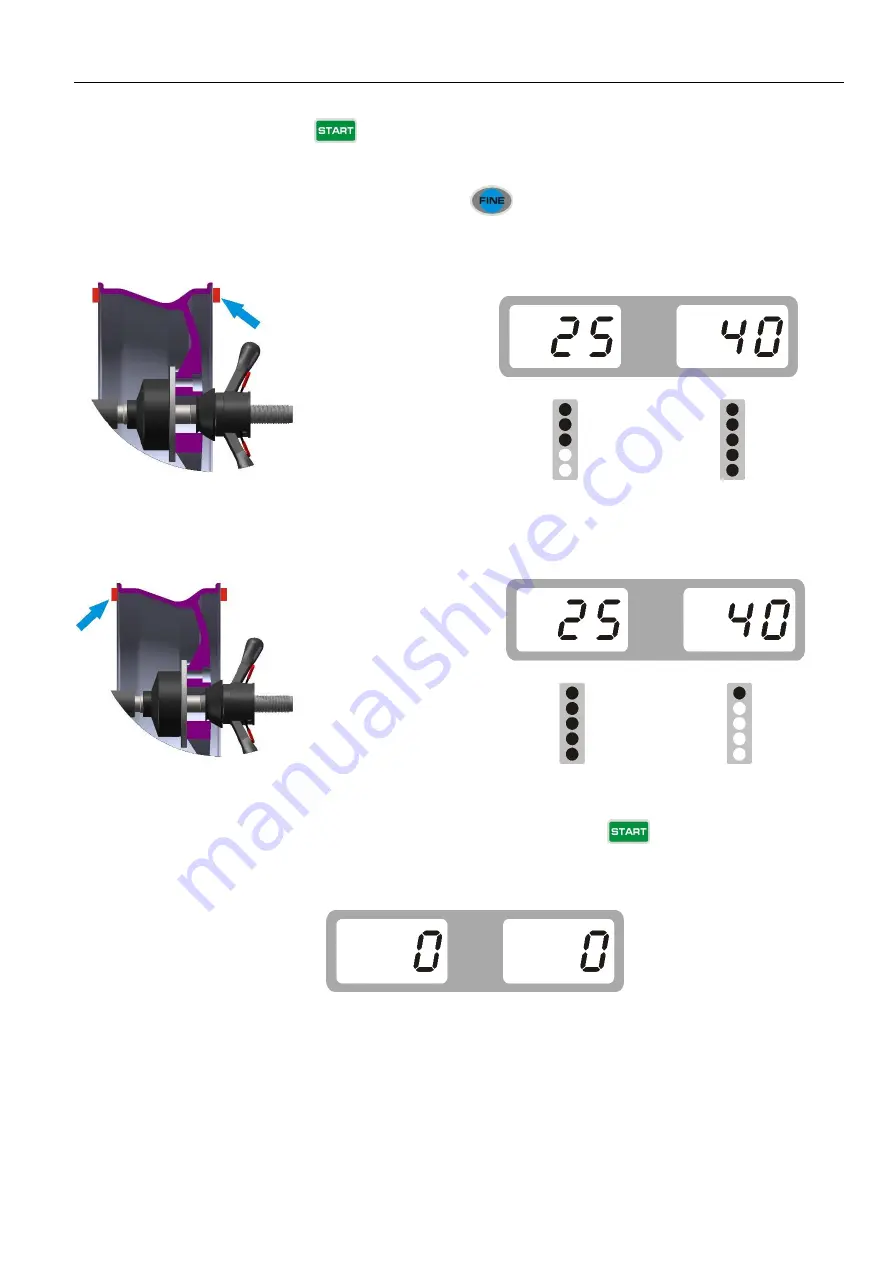
4.1.6. Anticlockwise moving wheel slowly, the displays with right LED’s lit up full indicate the correct angular position
where to mount the counterweights (12 o’clock position) outside, as Fig.3, clip the counterweight.
Fig. 3
4.1.7
.
Anticlockwise moving wheel slowly, the displays with left LED’s lit up full indicate the correct angular position
where to mount the counterweights (12 o’clock position) inside, as Fig.4, clip the counterweight.
Fig. 4
4.1.8
.
After finishing cliping the counterweights, put down the guard or press
,
to perform balancing spin
again, if comes out 00 00
,
means balancing succeed. (Fig.5)
Fig. 5
4.2
.
ALU-2 mode (ALU-1, ALU3 same operation, only the position to add weights
different)
4.2.1. Set “a” “d” “b” values


