background image

15

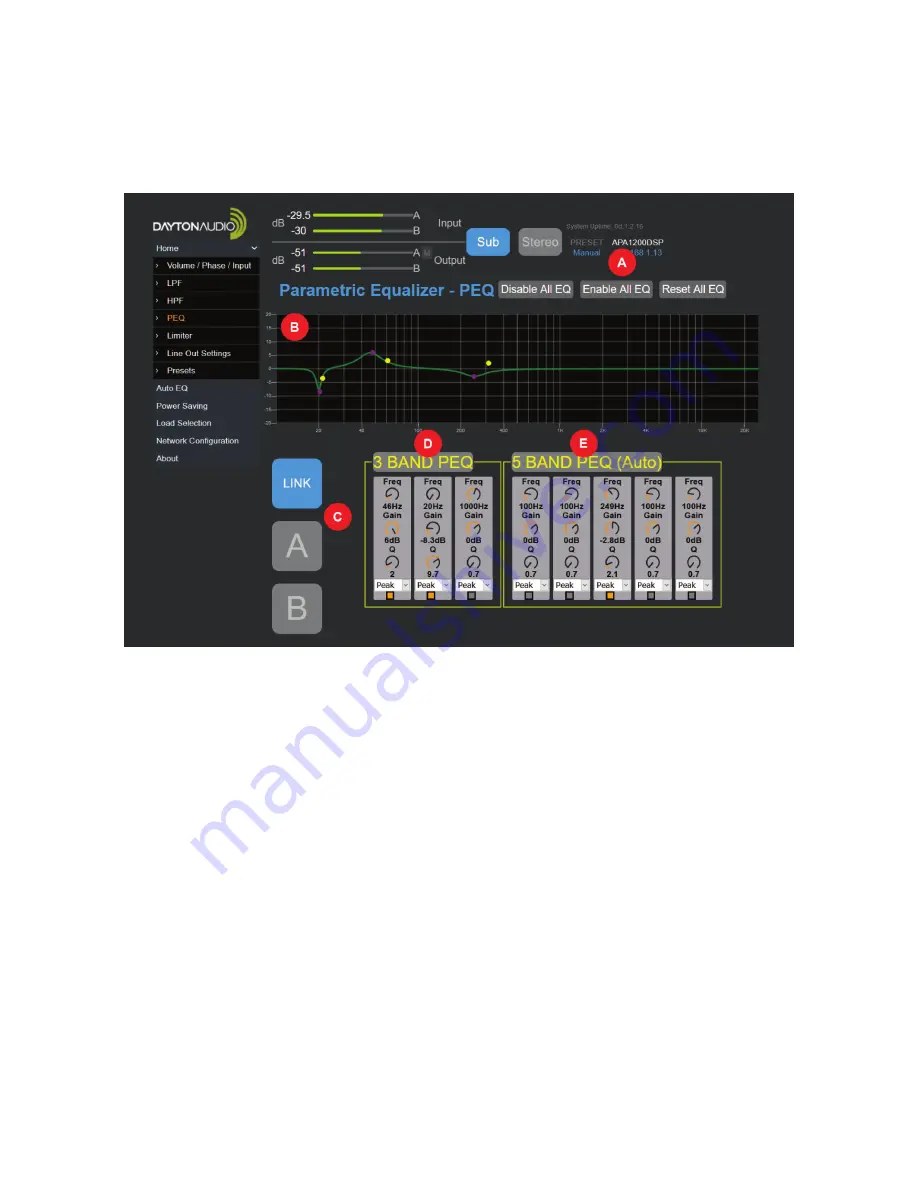
PEQ Menu (Parametric Equalizer) 

The parametric EQ (PEQ) menu allows for up to 8 bands of custom equalization, and also allows customization of the EQ 

generated from the “AUTO EQ” function of the APA1200DSP. All filters are implemented as infinite impulse response or 

IIR filters, which is standard for most PEQ interfaces.

A.  EQ Control Buttons

1.  Disable All EQ – Turns OFF all EQ bands. Does not reset values. Useful for doing before and after 

comparisons with EQ.

2.  Enable All EQ – Turns ON all EQ bands. Does not change values. Useful for doing before and after 

comparisons with EQ.

3.  Reset All EQ – Resets all EQ values to default (flat). Does not change enabled/disabled status. There 

will be a slight delay.

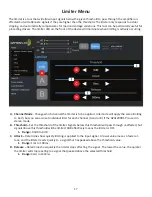
B.  Graph - The graph will show the effects of all enabled EQ bands. Each enabled EQ band will have its own 

corresponding purple and yellow dots on the graph for easy control.

1.  Purple Dot – Drag the dot to change the frequency and gain values of each enabled EQ band

2.  Yellow Dot – Drag the yellow dot to change the Q value of each enabled EQ band. Moving the 

yellow dot away from the corresponding purple dot will reduce the Q value, and moving the yellow 

dot towards the purple dot will increase the Q value. (Larger Q values will affect a smaller range of 

frequencies, smaller Q values will affect a larger range of frequencies)

C.  Channel Mode - Change which channel the filter is to be applied to. Link mode will apply the same filter 

to both, but you can also set individual filters for each channel (A and or B) if the APA1200DSP is used in 

stereo mode.

D.  See next page

E.  See next page

Summary of Contents for APA1200DSP

Page 1: ...1200WPOWER AMPLIFIERwith INTEGRATEDDSP Model APA1200DSPUserManual ...

Page 2: ...t from the unit Only use attachments accessories specified by themanufacturer Unplug this unit during lightning storms or when unused for long periods of time Refer all servicing to qualified service personnel Servicing is required when the unit has been damaged in any way such as when the power supply cord or plug is damaged liquid has been spilled or objects have fallen into the unit the unit ha...

Page 3: ... fabricant Débranchez cet appareil pendant les orages ou lorsqu il n est pas utilisé pendant de longues périodes Confiez toutes les opérations d entretien à un personnel qualifié L entretien est nécessaire lorsque l appareil a été endommagé de quelque manière que ce soit par exemple lorsque le cordon d alimenta tion ou la fiche est en dommagé qu un liquide a été renversé ou que des objets sont tom...

Page 4: ...ins integration with a connected subwoofer Limiter Efficient Class D output topology Balanced and unbalanced line level inputs and outputs Digital COAX input Line Output with high pass filter and delay for connecting external amplifiers Table of Contents Front Panel Diagram 5 Rear Panel Diagram 6 Navigating and Adjusting Parameters with the Onboard GUI 7 Onboard GUI Menu Screens 8 Network Connecti...

Page 5: ...ntrol of the device with the control knob All parameters found in these menus can also be adjusted with the web GUI after making a network connection C Adjustment Set Control Knob Rotating the knob moves through the device s menu or adjusts the currently selected parameter up or down 1 Pressing the dial once selects a given parameter or advances further into the menu go forward 2 Quickly pressing ...

Page 6: ... in the power saving menu it will automatically enter standby If you want to wake up in Auto mode you can input a music signal over the selected threshold or select the ON mode NOTE This mode should not be used if the digital coax connection is used as the digital coax connection cannot trigger the device out of standby 3 12V Trigger Will confirm that there is no audio signal and DC 12V before ent...

Page 7: ...hted 2 Pressing the dial once selects a given parameter or advances further into the menu go forward 3 Quickly pressing the dial twice returns to the previouspage or previous level of the menu go backward For example if you are in the PEQ menu you will click the knob once to select a parameter such as frequen cy You can then rotate the dial to change this frequency When you are done press the dial...

Page 8: ...h possible menu screen using the APA1200DSP s onboard menu system The leftmost column are main menu options and the following columns are found by pressing the dial while the main menu item is selected Quickly press the dial twice to go back ...

Page 9: ...9 Onboard GUI Menu Screens ...

Page 10: ...isplay as highlighted below Enter the IP address into the address bar of your web browser Network Troubleshooting A If using the link http APA1200DSP and you cannot make a connection try following step 3 above to find the IP address of your device and connect to your device by entering the IP address into your web browser B Make sure that you are using a device that is on the same network as your ...

Page 11: ... but you see that there is output from the level meter check the connection from the amp to your speaker 1 The M buttons next to the output label can be used to mute the output of your APA1200DSP C Output Mode Set your device to either Sub or Stereo mode 1 Sub This mode should be used when a subwoofer is attached to the APA1200DSP in bridged mode This mode allows the Auto EQ function to be used 2 ...

Page 12: ...ndividual settings for each channel if the APA1200DSP is used in stereo mode C Volume Drag the slider to increase or decrease the amplifier s output volume The arrow buttons can also be pressed for granular volume control The range is 99dB to 0dB D Phase Drag the slider to increase or decrease the amplifier s phase The arrow buttons can also be pressed for granular control increment or decrement b...

Page 13: ... specified slope LPFs are essential for subwoofers because it allows the subwoofer to only play the low frequencies of your audio source A Graph Shows a graphical representation of the applied low pass filter B Channel Mode Change which channel the filter is to be applied to Link mode will apply the same filter to both but you can also set individual filters for each channel A and or B if the APA1...

Page 14: ...tting out frequencies from the signal that the system cannot play cannot play well This can have numerous advantages in power handling and even clarity of audio depending on the system A Graph Shows a graphical representation of the applied high pass filter B Channel Mode Change which channel the filter is to be applied to Link mode will apply the same filter to both but you can also set individua...

Page 15: ...ight delay B Graph The graph will show the effects of all enabled EQ bands Each enabled EQ band will have its own corresponding purple and yellow dots on the graph for easy control 1 Purple Dot Drag the dot to change the frequency and gain values of each enabled EQ band 2 Yellow Dot Drag the yellow dot to change the Q value of each enabled EQ band Moving the yellow dot away from the corresponding ...

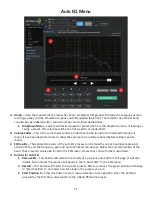
Page 16: ...y dragging the purple dot of each EQ band vertically 3 Q Sets the Q value of each EQ band This will affect the range of frequencies the EQ band will affect i Range 0 4 to 14 ii Lower values will affect a larger range of frequencies Higher values will affect a narrow er range of frequencies iii Controllable by dragging the yellow dot horizontally for each corresponding EQ band 4 Type Type is locked...

Page 17: ...imiting to both but you can also set individual limit for each channel A and or B if the APA1200DSP is used in stereo mode B Threshold Set the threshold of the limiter Signals below this threshold will pass through unaffected but signals above this threshold will be limited 0dB effectively means the limiter is OFF 1 Range 99dB to 0dB C Attack Determines how quickly limiting is applied to the input...

Page 18: ...ing this will also ensure a more accurate simulated result when using the AUTO EQ function of this device A Graph Shows a graphical representation of the line output If you have enabled the high pass filter HPF you will see it represented in this graph B HPF Enable Turns the high pass filter for the line out on or off C HPF Slope Changes the slope of the high pass filter 1 Options 6dB 12dB 24dB 36...

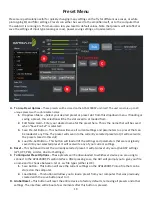
Page 19: ...hat can be loaded at any time The preset will save into the currently selected preset slot it will overwrite the preset stored in this slot 4 Load Pre Set Button This button will load all of the settings and parameters that were originally saved into your selected preset It will overwrite any of your current settings B Reset This button will reset the currently selected preset It will also reset a...

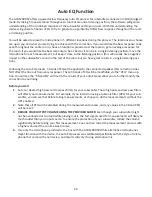
Page 20: ... this correction does NOT affect the line out frequency response These 5 bands of EQ will be modifiable via the PEQ menu op tion You will see the 5 Band EQ will match the results of your auto EQ and allow you to further modify the correction to your liking Before you start 1 Set your desired high pass and low pass filters for your subwoofer These high pass and low pass filters will affect your mea...

Page 21: ...ing measure ments C EQ Results The calculated results of the auto EQ process can be found here Each number represents a band of EQ and the frequency gain and Q of each band can be seen below the colored number of the band These results can also be found in the PEQ menu where they can be further customized D Buttons for auto EQ 1 Remove EQ This button will remove the results of a previous auto EQ f...

Page 22: ... EQ algorithm cannot account for the bass that is coming from your mains 3 Try taking measurements at a higher volume or lower volume You might be overdriving your sub woofer if the volume is too loud or under driving the subwoofer which could result in misrepresen tative measurements especially in a larger room 4 Take your measurements at different positions If you took your measurements clustere...

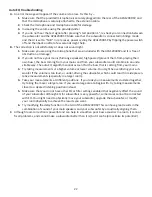
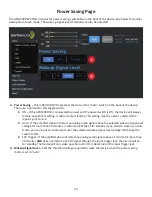
Page 23: ...AX input is your source 2 Auto If the amplifier does not detect an analog audio signal above the selected wakeup signal level voltage for more than 20 minutes it will automatically enter standby If you want to wake up in Auto mode you can input an audio signal over the selected wakeup signal level voltage OR change the switch to ON 3 12V Trigger If the amplifier does not detect an analog audio sig...

Page 24: ...he APA1200DSP if you are using 2 Ohm or 4 Ohm speakers This helps to properly maximize the power output If using speakers that are greater than 4 Ohm select 4 Ohm Both options will be greyed out when in SUB mode as bridged configurations only allow 4 Ohm minimum ...

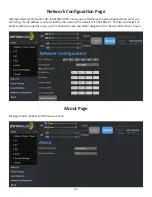
Page 25: ...h networking and know what you are doing If an IP address is not provided by the network the default IP is 192 168 14 1 To find your device s IP address without using this menu use the onboard screen and dial to navigate to the device information screen About Page Displays model number and firmware version ...

Page 26: ...e 1 8 VRMS Frequency Response 20Hz to 20kHz Frequency Deviation 20 20kHz 3 dB RMS Output Power Stereo 560 W x 2 RMS Output Power Bridged 1150 W SNR A weighted 96 dB THD N Rated Power 0 74 Auto on Sensitivity 10 mVRMS Power Consumption Standby 2 W Idle 17 5 W Max 1600 W Weight 16 2 lbs Dimensions 17 W x 15 D x 3 75 H ...

Page 27: ...your high pass and low pass filters are set appropriately For example if you are using the APA1200DSP as a subwoofer amplifier a low pass filter set at a low frequency like 25Hz could cut out most of the desired output If unsure try pressing the reset button in the presets menu to remove all DSP Q The line output is not playing full range audio I don t have any bass from my main speakers A The APA...

Page 28: ...Dayton Audio Last Revised 4 6 2021 daytonaudio com tel 937 743 8248 info daytonaudio com 705 Pleasant Valley Dr Springboro OH 45066 USA 5 Year Limited Warranty See daytonaudio com for details ...

Reviews: