EtherSeries DNP- 3 Gateway User’s Guide
Installation
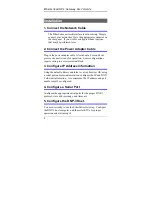
1. Connect the Network Cable
The EtherSeries network interface is auto-sensing. Simply
connect your network cable to the appropriate connector on
the rear panel. If you wish to configure ethenet options,
that may be performed later.
2. Connect the Power Adapter Cable
Plug in the power adapter cable. After about a 4 second boot
process the unit is ready for operation. Some configurations
require wiring to a screw-terminal block.
3. Configure IP Address Information
Using the default address and telnet or a web browser OR using
a serial port and terminal emulation, configure the IP and DNP-
3 ethernet information. At a minimum, the IP address and port
number must be configured.
4. Configure a Serial Port
Configure the appropriate serial ports for the proper DNP-3
protocol, slave address range, and timeouts.
5. Configure the DNP-3 Host.
You are now ready to use the EtherSeries Gateway. Configure
the DNP-3 host computer and the serial RTUs for proper
operation and start using it!
8
Summary of Contents for EtherSeries EDNP-3
Page 1: ...EtherSeries DNP 3 Gateway EDNP 3 User s Guide Revised January 16 2008 Firmware Version 3 x...
Page 2: ......
Page 4: ...ii...
Page 9: ...Introduction v...
Page 10: ......
Page 16: ...EtherSeries DNP 3 Gateway User s Guide 6...
Page 38: ...EtherSeries DNP 3 Gateway User s Guide 28...
Page 48: ...Etherseries DNP 3 Gateway User s Guide 38...
Page 54: ...44...
Page 60: ...Etherseries DNP 3 Gateway User s Guide 50...
Page 64: ...Etherseries DNP 3 Gateway User s Guide Ring Indicator Not used 54...


