dCS P8i
Mk2 User Guide
Guide for Software Issue 2.0x
Data Conversion Systems Ltd.
March 2011
Manual filename: dCS P8i User Guide v2_0x.docx
Page 7
English version
www.dcsltd.co.uk
STEP 4 – Powering up
•
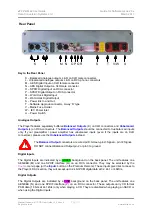
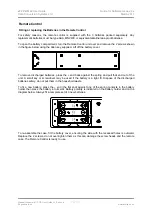
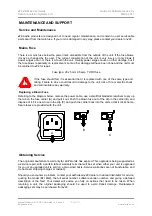
Connect the power cable supplied to the power inlet on the
P8i
rear panel. If you are using a power
cord other than the one supplied with the
P8i
, make sure that it is a good fit to the mains inlet and is
not too large or heavy as to cause damage (see “Power cables” on page 4). Plug the other end into
a convenient power outlet. Set the power switch beside the power inlet to the on position (
I
).
•
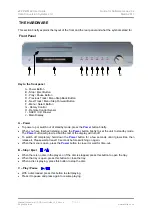
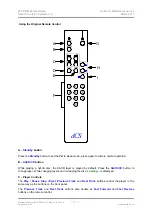
Press
the
Standby
button briefly. Wait several seconds while the
P8i
configures itself. The buttons
light up in blue showing that the unit is booting up. After a few seconds the blue lights turn off. The
unit displays
dCS P8i
,
Welcome
and then
Loading
. Once booted up, the colour of the buttons
changes to green, signifying that there is no disc in the player, and the unit should display
No Disc
.
•
Make sure the volume on your
P8i
and/or amplifier is set to a low level before first operation.
STEP 5 – Inserting and playing a Disc
•
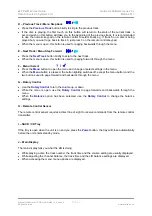
Press
the
Stop/Eject
button. The display will show
Opening
, the drawer will open and then the
display will show
Open
.
•
Place the disc onto the tray and press the
Stop/Eject
button again. The display will show
Closing,
Loading
,
Read TOC, Checking
and will then build a table of contents displaying
1-5, 6-10,
etc.
The disc will be identified as CD or SACD. Either the
CD
or the
SACD
indicator will light. In this
release, the unit will play the SACD layer of a hybrid disc by default. The colour of the buttons
changes depending on the type of disc you choose to play, red for a CD layer or lilac for an SACD
layer.
•
Press
the
Play/Pause
button. Turn the volume to a comfortable level. You should have audio.
•
Press
the
Play/Pause
button to pause playing, press again to resume playing.
•
Press
the
Next Track
or
Previous Track
buttons to skip to another track.
•
Press
the
Stop/Eject
button to stop the disc. Press it again to open the tray.
•
Enjoy the music!
STEP 6 – Adding a System Clock
Disc playback can be enhanced by adding a
Puccini U-Clock
or
Paganini Clock
to your system.
•
Set the Clock to
44.1kHz
.
•
Connect one of the Clock’s word clock outputs to the P8i’s
W/CLOCK IN
socket using a 75 ohm
BNC cable.
The Player will automatically slave to the Clock, which then controls the timing and reduces jitter.
STEP 7 – Using an external source
If you connected an external source to the
P8i
in STEP 3, turn it on and select it as follows:
•
Press
the
MENU
button and use the arrow buttons to scroll to the
Source
menu page. Press the
MENU
button again to select either the
AES
or
RCA
input.
Either the
AES
or
RCA
indicator will illuminate. The unit will detect the sample rate of the source (32,
44.1 or 48kS/s only), then display the source word length and sample rate on the left side of the
display (e.g.
16/44.1k
).
•
Turn the volume to a comfortable level. You should have audio.
•
Enjoy the music!
!
When using the digital inputs, the CD controls are disabled. If you need to eject a disc,
return the Player to
Disc
mode.


