OVEN SELF CLEANING MODES
24
OVEN DOOR LOCK DURING
SELF-CLEAN
When the clean cycle starts, the lock light turns
on, and the automatic door lock cycle begins.
Do Not attempt to open the door when the lock
light is on. You can stop the cycle by pushing
the off button. The lock light will turn off only
after the oven has cooled below 550ºF, and the
automatic door lock has completed its cycle to
the open position.
BEFORE SELF-CLEANING THE OVEN:
Remove all utensils and racks
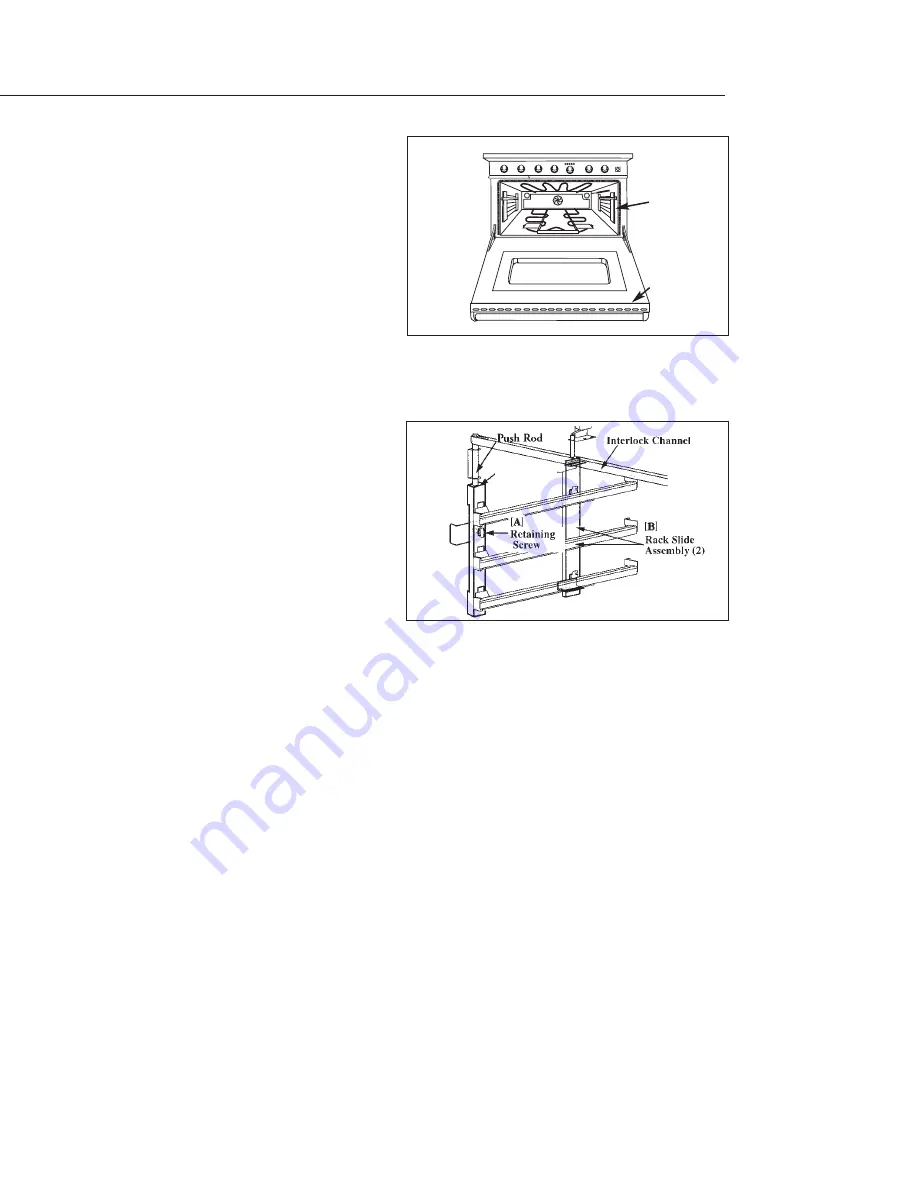
Clean the oven front frame and outer
door edges. Wipe up large spillovers
and grease. (see fig. 11)
Be sure the light bulbs and glass covers
are in place.
Turn on the ventilator hood above the
range and leave it on until after the
oven has completed the self-clean
cycle.
Remove Oven Racks and Rack Slide
Assemblies.
NOTE:
An Interlock System has been
designed so that the Self-Clean
Cycle will not engage until the Rack Slide Assemblies have been removed. The roller
assisted rack supports are designed to withstand the temperature range of the
standard baking thermostat. They will not withstand the extreme temperatures of
pyrolytic self cleaning. To remove the Assemblies:
A) For each side, Remove the retaining screw,
B) Lift up slightly and pull the entire Assembly out. Set aside.
Replace the assemblies and retaining screws after the Self-Clean
cycle has finished.
27” OVEN RACK SLIDE ASSEMBLY
Wipe out puddles of grease and any loose soil that can be easily removed. Remove any soil that is
outside the door seal area. This appliance is designed to clean the oven interior and that portion of the
door that is inside the oven. The outer edges of the door and the oven cavity are not in the cleaning
zone. Wipe this area clean before setting the oven to self-clean.
Oven front
frame
Outer door
edge
Fig. 11
Fig. 12
Summary of Contents for RDS-305
Page 36: ...NOTES 35 ...
Page 37: ...NOTES 36 ...


