17
4.3 condenSer
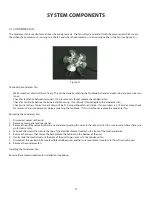
The condenser is a steel tube serpentine with copper alloy fins that removes heat from hot, high pressure vapor from the com-
pressor (see Figure 4.8). The most common trouble is lack of airflow from either a restricted intake or exhaust opening in the front
of the unit. Lint, dust, hair, and dirt build-up needs to be removed from the condenser periodically to allow the unit to perform
properly.
Figure 4.8
It is possible that the condenser might need replaced because of an unrepairable leak or a restriction that cannot be flushed out.
System high side pressures and temperatures will verify if this is the case.
Removing the Condenser:
Disconnect power to the unit.
1.
Remove back panel and lower shroud (see Figure 4.1).
2.
Remove the screws that hold the baseplate to the chair frame of the unit and slide out the mechanical baseplate (see Figures
3.
4.2 and 4.3).
Install sealed system access valve(s) and recover refrigerant. After recovering, be sure to cap off the access valve(s) to prevent
4.
contamination of the system.
Remove the condenser fan by removing the four screws on the fan mounting bracket at the baseplate. The fan wire leads can
5.
be left connected. Set the fan assembly to the side out of the mechanical.
Remove the condenser fan shroud.
6.
Un-braze capillary tube from drier assembly.
7.
Un-braze high side tubing from the compressor.
8.
Remove the condenser and drier assembly.
9.
Installing the Condenser:
Reverse the removal procedure for installation (see above). Always install a new drier after opening the sealed system. Be sure to
flush the system and evacuate to 50 microns before weight charging. If contamination was found or determined, the evaporator
should also be replaced at this time.
SEALEd SYSTEM
Summary of Contents for RF24-D
Page 1: ...1 DCS REFRIGERATED DRAWERS Service manual Model RF24D ...
Page 2: ......
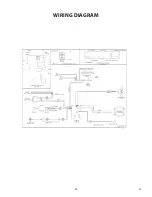
Page 30: ...28 23 WIRING DIAGRAM ...
Page 36: ...34 NOTES ...
Page 37: ...35 NOTES ...
Page 38: ...36 NOTES ...
Page 39: ......

