9
INSTALLATION INSTRUCTIONS
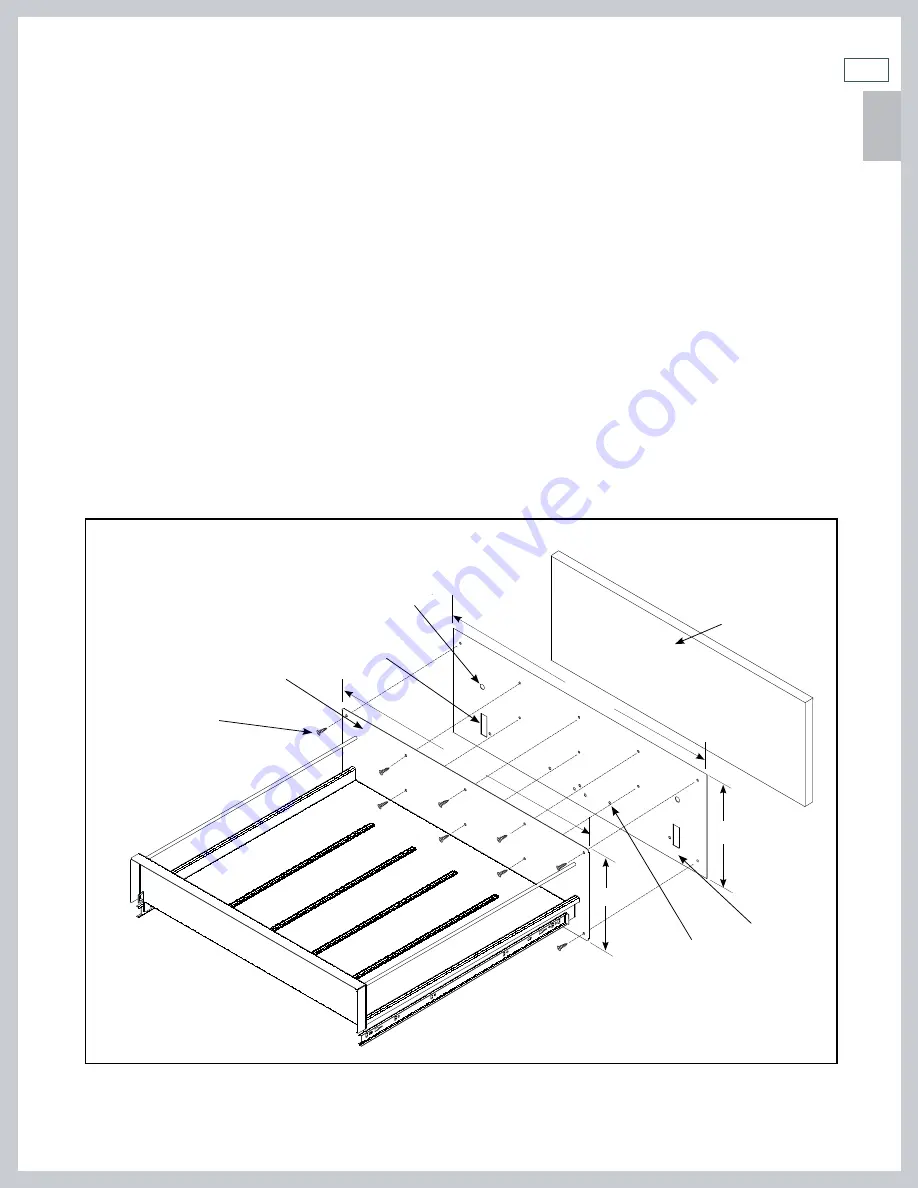
CUSTOM PANEL INSTALLATION OF THE INTEGRATED WARMING DRAWER (WDUI)
STEP 1
Remove drawer as per instructions (see section ‘Care and maintenance’).
STEP 2
Check the dimensions of the front face (see Fig. 8).
STEP 3
Cut the custom panel to the desired dimensions, knowing that the panel must cover the paper front template
plus 1/8” on all four sides for a good presentation. The thickness of the custom panel must be greater than
9/16” to allow for clearance for the tips of the screws holding the drawer when the custom panel is mounted.
STEP 4
Center the provided paper front template on the back of the custom panel to drill or cut the clearance areas for
the hardware holding the drawer. (Note: the drill sizes and callouts are on the template.)
STEP 5
Fasten the custom panel to the front face with the supplied screws as shown in Fig. 8.
Fig. 8
25-3/4”
Front face
( WDUI only)
Screws to hold
custom panel to
warming drawer
8-5/16”
10-1/2”
29-11/16”
Paper front
template
ø 1/4” clearance
5/16” deep
ø 1/2” clearance
1/2” deep
11/16” x 2-1/8” clearance
1/8“deep
Custom panel
US
CA
Summary of Contents for WDU models
Page 2: ......
Page 7: ...5 US CA...
Page 13: ...11 US CA...
Page 21: ...19...
Page 38: ......
Page 39: ......


