Red Bull Racing RB7: Step by Step
™
6
04
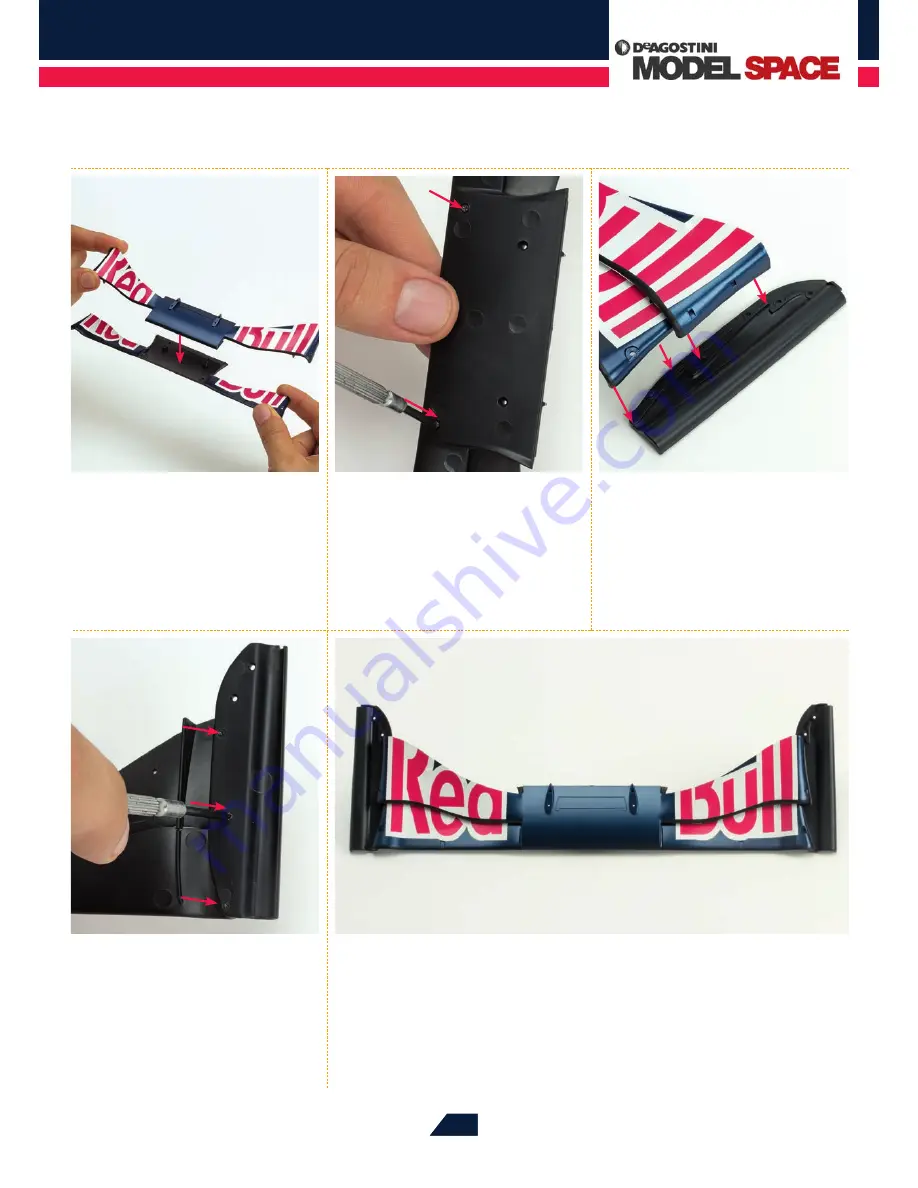
Fix the baseplate to the wing
by screwing three 1.4 x 4mm
countersunk screws into the three holes
(arrowed) on the underside. Repeat Steps 3
and 4 for the right side.
05
At the end of this first stage of the assembly, the characteristic shape of the front
wing is already clearly visible. Store the wing in a safe place, along with any unused
parts, as these will be needed for future assemblies. It is recommended that you keep the
parts in a box with several compartments, so that even very small components are unlikely
to be lost.
01
Place the centre front wing on
the lower front wing, as shown.
The middle part of the centre front wing
should be flush with the front edge of
the lower wing.
02
Turn the assembly over. Take the
two 1.4 x 2.5mm screws and
fix them into the two holes on the
underside of the lower front wing (as
arrowed), using a Phillips screwdriver.
03
Lay the left front wing baseplate
on your work surface, as shown.
Position the left side of the front wing
above it, so that its two ends are located
exactly above the two raised areas on the
baseplate (see arrows).


