G
enesis II S
elec
t
™
U
ser
’s
& Installa
tion Ma
nual
16/September/2015
19
After you have mounted the antenna, plug the cable into the
antenna and the antenna receptacle on the computer/display unit.
If you are using only one antenna, you must connect it to the FRONT
antenna receptacle. Either the FRONT or REAR button on the remote
can activate a single antenna system.
2.4 Installation Check
After you install the components, for safety, double-check to ensure
all components are secure.
2.5 VIP Installation (Optional)
If your Genesis II Select has come with the optional Motor vehicle
Interface Portal™ (VIP™) then use the following installation
instructions.
WARNING
t #FGPSFDPOOFDUJOHUIF7*1FOTVSFBMMEFWJDFT
including the motor vehicle and radar are powered off.
2.5.1 Connecting to the Radar
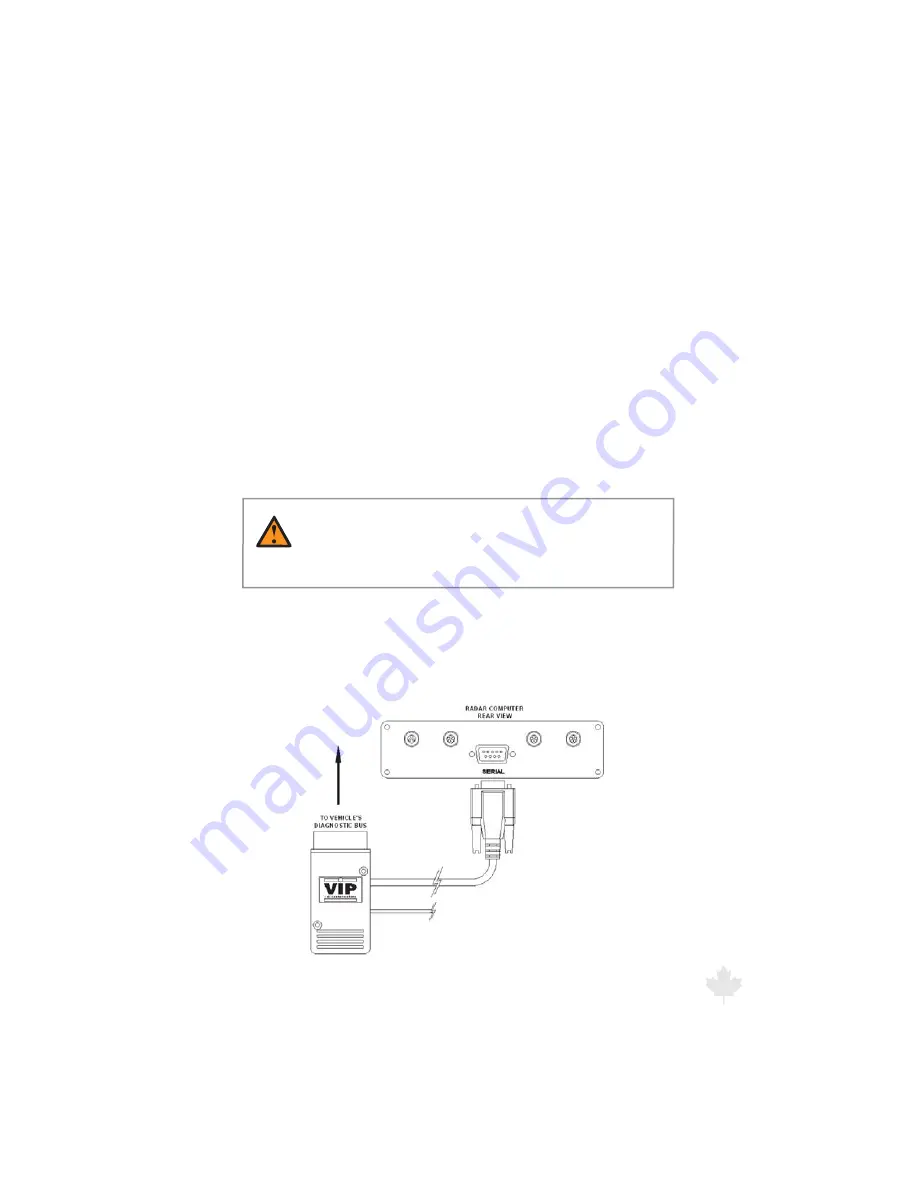
Connect the VIP's™ communications cable to the Genesis II
Select's™ communication port located on the back panel of the
radar unit. This port is a DB-9 female connector labeled “SERIAL”.
Refer to the picture in Figure 2.5.1.
Figure 2.5.1
VIP connection to Radar
Summary of Contents for Genesis II Select
Page 2: ......
Page 3: ...GenesisII Select User s Manual Installation Guide CanadaVariant Revision 16 September 2015 ...
Page 60: ...Genesis II Select User s Installation Manual 16 September 2015 60 ...
Page 61: ...Genesis II Select User s Installation Manual 16 September 2015 61 ...
Page 68: ...Genesis II Select User s Installation Manual 16 September 2015 68 USER NOTES ...
Page 69: ...Genesis II Select User s Installation Manual 16 September 2015 69 USER NOTES ...
Page 70: ......
Page 71: ......


