SLEEPER SYSTEM INSTALLATION INSTRUCTIONS 23
SLEEPER SYSTEM
INSTALLATION INSTRUCTIONS
1/4
"
minimum gap between the sleeper and any solid object.
Space sleepers according to deck board and application
requirements.
Note: The Deckorators
®
Sleeper System should only be used
with Deckorators decking or porch flooring featuring Eovations
™
technology. For best results, we recommend laying strips of
EPDM underneath the sleeper system.
Step 1:
Determine the layout and spacing of the sleepers.
Arrange sleepers so they do not block drainage flow. Sleeper ends
may be arranged to create “panels” or staggered to tie the surface
together. A “panel” type installation allows for easier access to the
roof surface for maintenance or cleaning later on. Shims can be
cut from scrap sleepers as needed.
Step 2:
Ensure fasteners are sized correctly and will not extend
past the sleeper causing damage to the roof surface. Typically,
maximum 2” long face screws. Fasten deck boards according to
deck board instructions. Do not overdrive screws.
Sleeper gapping and spacing
Prior to construction, check with your local regulatory agency for code requirements in your area. For best results,
follow all installation instructions, paying close attention to gapping, spacing and fastener requirements.
The Sleepers are not structural and must be fully supported along the underside. They are intended to create a floating
deck surface on top of an appropriate structure, such as a flat membrane roof or concrete slab. Care must be taken
during construction to avoid damaging the roof’s surface.
A roof top deck is a unique application. Consult with a licensed contractor to ensure your roof is a good candidate
for a roof top deck. The roof must have sufficient load bearing capacity for a roof deck and be in good condition prior
to installation. It must have an appropriate guard, typically a kneewall that meets minimum height and strength
requirements in your area (minimum height is measured from the finished walking surface.)
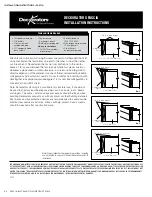
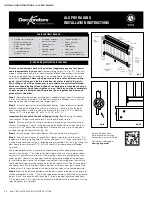
Sleeper System
Deck Boards
Concrete Slab
THE DIAGRAMS AND INSTRUCTIONS IN THIS BROCHURE ARE FOR ILLUSTRATION PURPOSES ONLY AND ARE NOT MEANT TO REPLACE A LICENSED
PROFESSIONAL. ANY CONSTRUCTION OR USE OF THE PRODUCT MUST BE IN ACCORDANCE WITH ALL LOCAL ZONING AND/OR BUILDING CODES. THE
CONSUMER ASSUMES ALL RISKS AND LIABILITY ASSOCIATED WITH THE CONSTRUCTION OR USE OF THIS PRODUCT. THE CONSUMER OR CONTRACTOR
SHOULD TAKE ALL NECESSARY STEPS TO ENSURE THE SAFETY OF EVERYONE INVOLVED IN THE PROJECT, INCLUDING, BUT NOT LIMITED TO, WEARING
THE APPROPRIATE SAFETY EQUIPMENT. EXCEPT AS CONTAINED IN THE WRITTEN LIMITED WARRANTY, THE WARRANTOR DOES NOT PROVIDE ANY
OTHER WARRANTY, EITHER EXPRESS OR IMPLIED, AND SHALL NOT BE LIABLE FOR ANY DAMAGES, INCLUDING CONSEQUENTIAL DAMAGES.
10457
INSTALLATION INSTRUCTIONS • SLEEPER SYSTEM


