CABLE RAILING INSTALLATION INSTRUCTIONS 43
©2019 Universal Forest Products, Inc. Deckorators is a registered trademark of Deckorators, Inc. in the U.S. All rights reserved.
933 US Route 202 Greene, ME 04236-3466 800.880.6278 8548_1/19
Deckorators.com
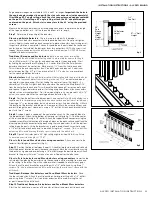
fig. 4
THIS BROCHURE IS FOR ILLUSTRATION PURPOSES ONLY. USE OF THIS PRODUCT MUST BE IN ACCORDANCE WITH ALL LOCAL ZONING AND/OR BUILDING CODES. CONSUMER ASSUMES ALL
RISKS AND LIABILITY ASSOCIATED WITH THE USE OF THIS PRODUCT. FOR DETAILS ON SAFE HANDLING, GO TO UFPI.COM/PTINFO. WARRANTOR DOES NOT PROVIDE ANY WARRANTY, EITHER
EXPRESS OR IMPLIED, AND SHALL NOT BE LIABLE FOR ANY DAMAGES, INCLUDING CONSEQUENTIAL DAMAGES.
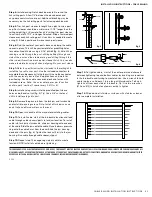
Step 4:
Install decking. Notch deck boards to fit around the
4x4 railing posts. Allow 1/4" between the deck boards and
any permanent structure or post. Additional blocking may be
necessary on the 4x4 railing posts for fastening deck boards.
Step 5:
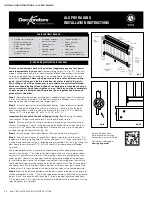
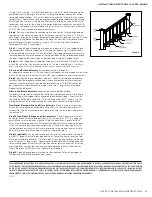
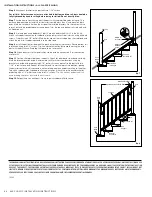
Trim 4x4 post sleeves to length if you plan to use a post
cap. Post sleeves should be a minimum of 1-1/2" longer than the
railing height (fig. 3). Example: For a 36" railing, trim post sleeves
to a minimum of 37-1/2", or longer if desired. Slide a trimmed post
sleeve over each 4x4 railing post. Use shims as needed to create
a snug fit. Slide a post base trim over each post sleeve.
Step 6:
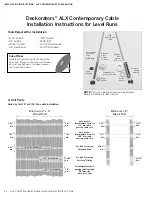
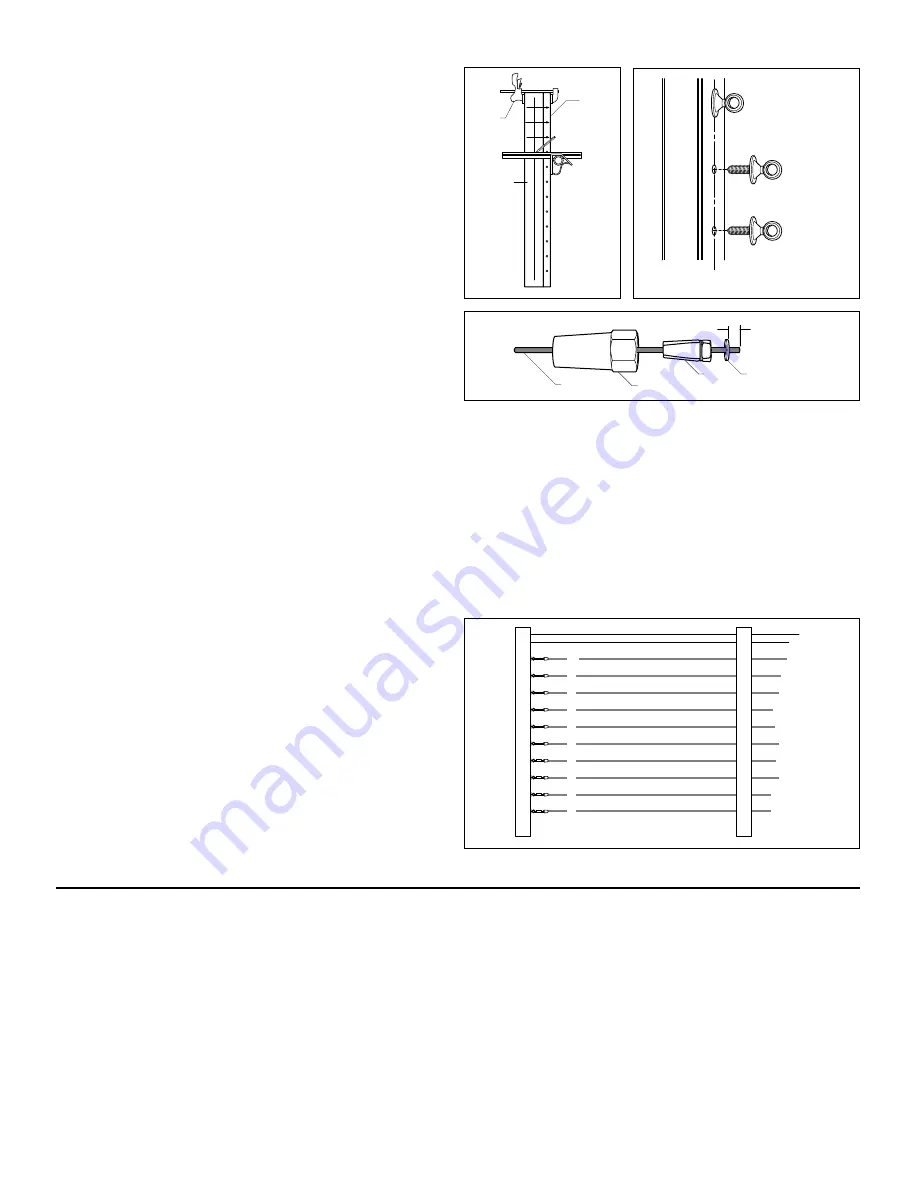
Find the center of your post sleeve and clamp the cable
spacer in place. This will be your template for predrilling holes
for cables. Predrill holes using a 3/16" drill bit (fig. 4).
Note: When
running a cable through the post, drilling halfway through one
side of the post and then remeasuring and drilling through the
other side will result in a much easier, cleaner finish. You can also
make a template by using a 2x4 and aligning it to your post sleeve.
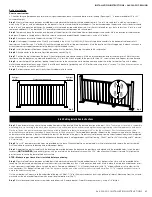
Step 7:
Refer to specific instructions included in the railing kit to
install the top rail to your post.
Use the included connectors to
assemble the cable spacer(s) to the top rail. Line up the connector
with the center of your rail for 6
'
applications and mark for
positioning. Position cable spacer on deck and fasten with
included screws.
Note: Use one cable spacer per 6' section
and two per 8' section (1 spacer every 2.5 ft for 8').
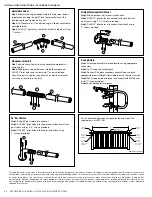
Step 8:
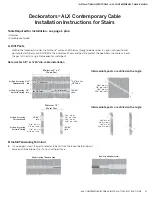
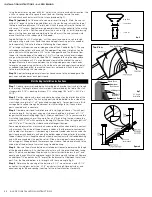
Install eye lag screws into the predrilled post sleeve
holes on both ends of rail (fig. 5).
Tip: Use a 5/8" socket and
drill to install eye lags into post.
Step 9:
Remove the pinch pin from the fork jaw and turnbuckle
and install into eye lag screws.
Note: Install all fork jaws on one
end of rail and all turnbuckles on other end.
Step 10:
Open turn buckle all the way before installing cables.
Step 11:
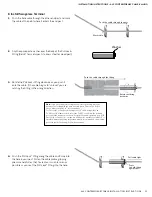
To install cable, start at the turnbuckle location and feed
cable through cable spacers/posts to fork jaw location. To install
cable into fork jaw or turnbuckle, slide jaw housing onto one end
of the cable. Slide the jaws onto the cable. Place the brass pressure
ring onto the cable 5 mm from the end. Slide the jaw housing
down over the jaws (fig. 6). Tighten the lock nut firmly to the jaw
housing. Run cable through cable spacer(s)/post.
Step 12:
Repeat step 10 on opposing side of cable to create
tension.
NOTE: Install all cable before tightening.
Step 13:
To tighten cable, start at the center point and alternate
between tightening top and bottom cables by inserting a screwdriver
in the turnbuckle and turning to create tension. Use a wrench to hold
cable in place so it doesn't turn along with turnbuckle. To finish,
tighten nut from each side of turnbuckle.
Tip: Use two wrenches
(#10 and #12) to hold nut and jaw assembly to tighten.
Step 14:
Wipe down all stainless surfaces with stainless cleaner
after complete installation.
CABLE RAILING INSTALLATION INSTRUCTIONS
CL
Step10.ai
Step11.ai
Jaw Housing
Jaw
5mm
Cable
Brass Ring
•
•
•
•
•
•
Spacer
Post
•
•
Clamp
Step6b.ai
•
fig. 5
fig. 6
1
2
3
5
7
10
CableAdj.ai
4
6
8
9
8548
INSTALLATION INSTRUCTIONS • CABLE RAILING


