Prior to construction, check with your local regulatory agency
for special code requirements in your area.
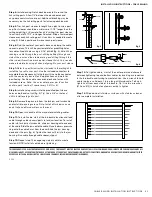
Start with an Inside Corner piece when applicable.
Guidelines:
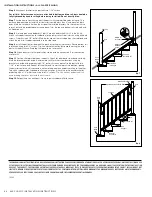
• The height of the secondary handrail must be installed between
34” and 38” above the surface, regardless of the height of the guard.
• We recommend that handrails be dry fit prior to final installation to
eliminate cutting and fastening errors.
• IMPORTANT: The secondary handrail must be attached to a structural
support. When installing mounting brackets on post sleeves, ensure
the hardware attaches to the structural support.
• For maximum strength, brackets should be used at every post and
every joint, or as closely as possible to the joint.
• An adhesive may be applied to further reinforce construction.
• Handrails must be supported every 6’ on-center
by a mounting bracket.
Handrail with Aluminum Insert
Step 1:
Dry fit handrails to determine proper lengths prior to
cutting rails.
Step 2:
Measure and cut rails to proper lengths for all runs.
Step 3:
Install to handrail component, following instructions for the
components.
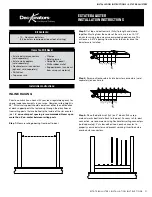
Items You Will Need
• Drill
• Chop/Miter Saw
• Quick Clamps
• PVC Cleaner
• Pencil
• Tape Measure
• Level
• #2 Square Drive Bit
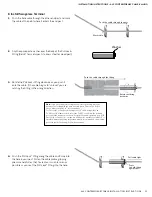
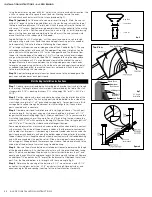
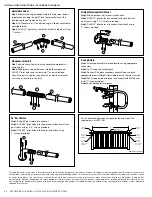
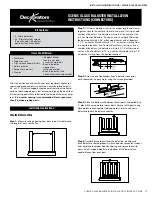
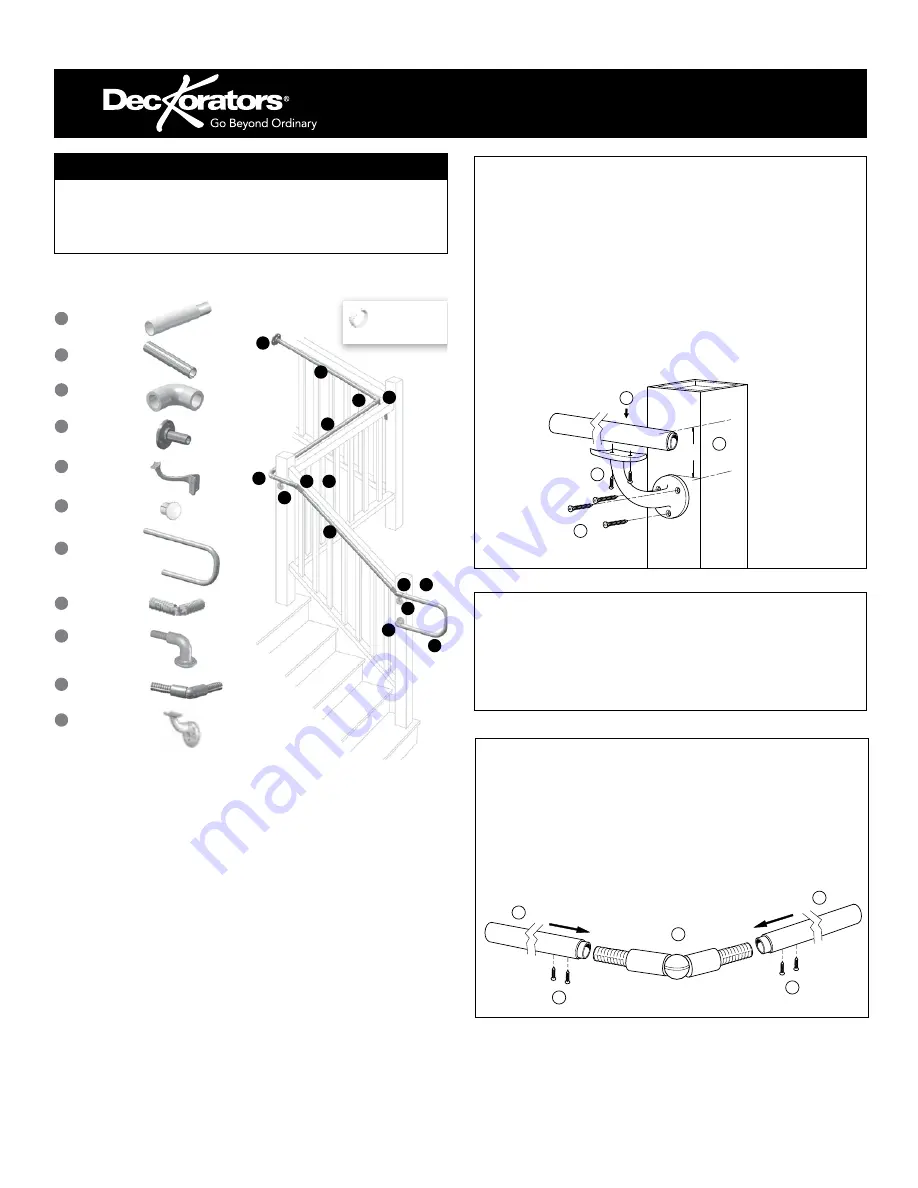
Aluminum Offset Bracket (Line Post Mounting Bracket)
Step 1:
Measure 2-1/2” less than the handrail height to determine
bracket position. Mark surface.
Step 2:
Align the top of the bracket mounting plate with the mark
made in Step 1. Drill 5/32” pilot holes and attach to the desired
surface using the 2-1/4” screws provided.
Step 3:
Clamp handrail to bracket at appropriate location to
secure in place.
Step 4:
Drill 5/32” pilot holes and attach handrail using the 1”
screws provided.
3
4
1
2
2-1/2"
AluminumBracket.ai
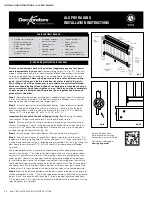
External Swivel
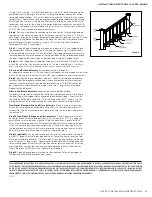
Step 1:
Adjust external swivel to desired angle and install set
screw.
Step 2
: Cut handrail with aluminum insert to desired length.
Step 3:
Insert external swivel bracket into the aluminum portion of
the handrail.
Step 4:
Pre-drill handrail and bracket with 5/32” drill bit and install
1” screw provided.
1
2
4
ExternalSwivel.ai
4
3
End Caps optional
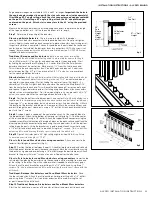
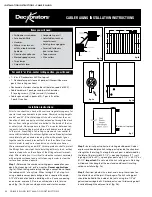
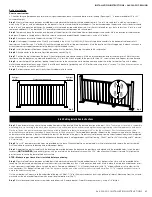
Typical ADA Railing Installation
Components
:
ADA Secondary
Handrail 104"
6" Straight Joiner
4" Inside/Outside
Corner
Straight End Wall
Bracket
Inside Corner Bracket
End Cap
P-Loop Return
6" Adjustable Joiner
90° Quick Return
Bracket
External Swivel
Offset Bracket
1
1
1
1
2
3
3
3
4
4
5
5
6
7
7
8
8
9
9
10
10
11
11
11
or
8
or
10
Optional Beauty Ring
Joint Cover
(Use As Necessary)
ADAinstall314_ADA 4/4/14 9:59 AM Page 2
ADA Compliant Handrail Guidelines and Installation
SECONDARY HANDRAIL INSTALLATION INSTRUCTIONS 47
INSTALLATION INSTRUCTIONS • SECONDARY HANDRAIL

