background image

EN

8

2 / USING YOUR APPLIANCE

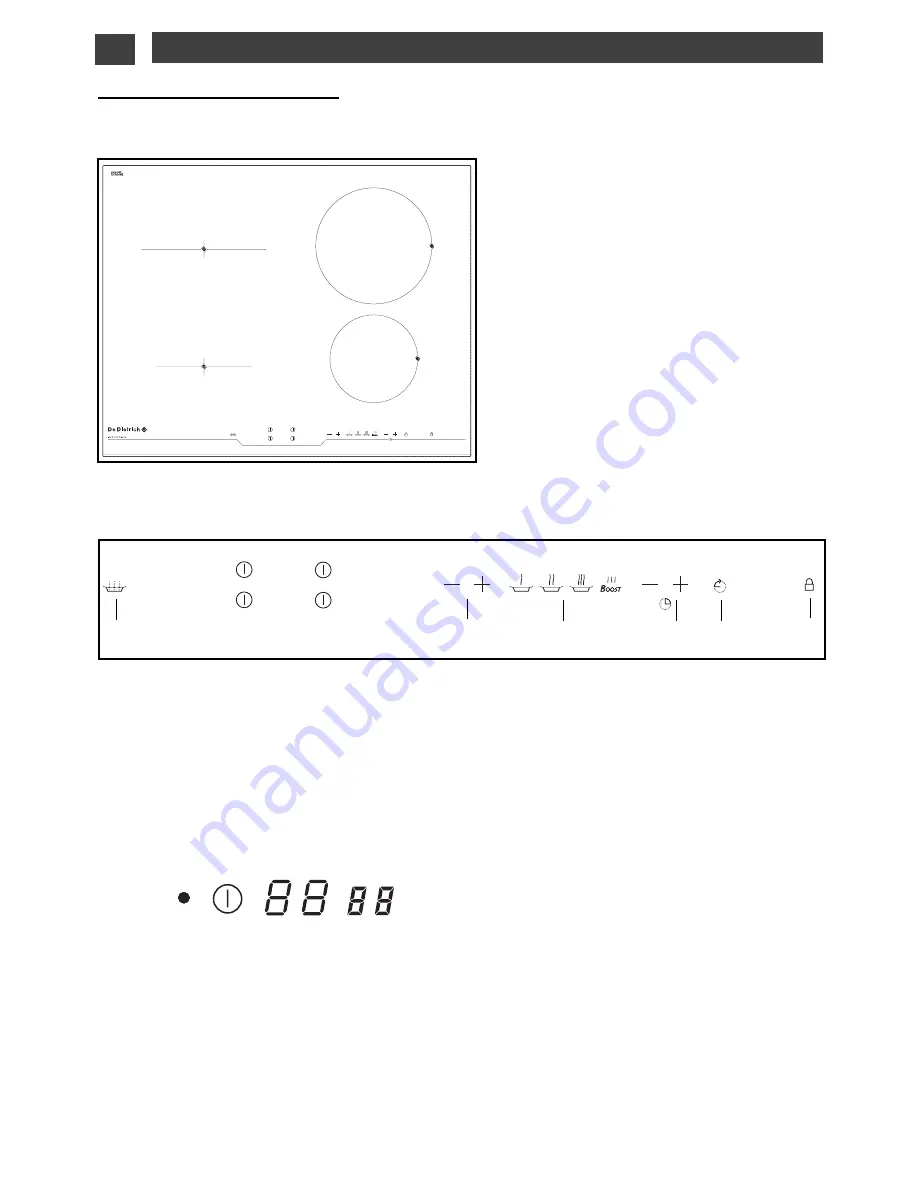
Description of your top

Adjustment touch controls

Use these touchpads A

A,,  B

B,,  C

C,,  o

orr  D

D  to select,

turn on and turn off the cooking zones. When
a zone is selected, you will see it light up, and
you can adjust its settings. 

Adjustment touch controls

These touchpads allow you to adjust power,
timer, programmer... for each of the selected
zones.

G

adjusting the power 

H

preselecting the power

I

adjusting the timer

J

E

LAPSED TIME

function

K

locking - unlocking - Clean lock

L

B

OIL

function

If there is no cookware on the induction selected induction zone, your adjustments will delete
automatically after a few moments.

Indicator for
selected zone

Power display

Timer display

F

Fo

orr  a

a  s

se

elle

ec

ctte

ed

d  z

zo

on

ne

e

D

DT

TII1

11

10

03

3X

X

00349

IIn

nd

du

uc

cttiio

on

n

2

23

3  c

cm

m  

3200 W

IIn

nd

du

uc

cttiio

on

n

1

16

6  c

cm

m    

2200 W

G

H

I

J

K

B

A

C

D

T

To

otta

all  d

diim

me

en

ns

siio

on

ns

s  ((L

L  x

x  

l

))  

DTI1103X : 65 x 52

R

Re

ec

ce

es

ss

s  c

cu

utt--o

ou

utt  ((L

L’’  x

x  

l

’’))

DTI1103X : 56 x 49

2

21

1,,5

5  c

cm

m  

2000 W

1

16

6,,5

5  c

cm

m    

1200 W

L

Summary of Contents for DTI1103X

Page 1: ...EN GUIDE TO INSTALLATION AND USE Cooking Hob ...

Page 2: ...e art technology with top quality materials De Dietrich produces beautifully crafted products to help you get the most from the culinary arts a passion shared by all lovers of cooking and fine food We hope that you enjoy using this new appliance and we would love to receive your suggestions and to answer any questions you may have Please feel free to contact our customer service department via our...

Page 3: ...OIL Independent timer Preselected power settings Child safety Clean lock Safety features when operating ________________________________________ 11 3 MAINTAINING YOUR APPLIANCE ______________________________________ 12 4 SPECIAL MESSAGES DIFFICULTIES __________________________________ 13 5 AFTER SALES SERVICE __________________________________________ 14 We are constantly improving our products fo...

Page 4: ... activated for example when the hob is installed over an oven that is not sufficiently insulated If this occurs a series of small lines appear in the control panel In this case we recommend that you increase the ventilation of your hob by creating an opening in the side of your cabinet 8 cm x 5 cm and or that you install the oven insulation kit reference 75X1652 that is available from the After Sa...

Page 5: ...qualification to prevent danger With hook up of 400 V 2N three phase verify that the neutral wire is properly connected These hobs must be connected to the mains using a socket in compliance with publication CEI 60083 or an all pole circuit breaker device in compliance with the installation rules in force When power is first supplied to your hob or after an extended power cut an indicator light wi...

Page 6: ... To verify that your cookware is suitable place it on a heating area on power 4 If the display remains on your cookware is compatible If the display flashes your cookware cannot be used with induction cooking You can also use a magnet to test the cook ware If a magnet sticks to the bottom of the cook ware it is compatible with induction Only glass terra cotta aluminium without a special finish on ...

Page 7: ...ooking to 0 0 and leave the pan in place to use up all the accumulated heat which saves energy Use a lid whenever possible to reduce any loss of heat through evaporation A Au ut to om ma at ti ic c c co oo ok ki in ng g z zo on ne e t te em mp pe er ra at tu ur re e a ad dj ju us st tm me en nt t T Th he e c co oo ok ki in ng g z zo on ne es s a ar re e s se el lf f r re eg gu ul la at ti in ng g ...

Page 8: ...APSED TIME function K locking unlocking Clean lock L BOIL function If there is no cookware on the induction selected induction zone your adjustments will delete automatically after a few moments Indicator for selected zone Power display Timer display F Fo or r a a s se el le ec ct te ed d z zo on ne e D DT TI I1 11 10 03 3X X 00349 I In nd du uc ct ti io on n 2 23 3 c cm m 3200 W I In nd du uc ct ...

Page 9: ... ff fe ec ct t t th he e f fi in na al l r re es su ul lt t T Th hi is s f fu un nc ct ti io on n m ma ay y b be e u us se ed d o on n a al ll l c co oo ok ki in ng g z zo on ne es s a at t t th he e s sa am me e t ti im me e D Do o n no ot t u us se e c ca as st t i ir ro on n c co oo ok kw wa ar re e D Do o n no ot t u us se e a a l li id d D Do o n no ot t u us se e s sa al lt t Using a cooking...

Page 10: ...period press button J J then in 5 seconds press on the timer to increase the cooking time that you wish to set The time display becomes steady for 3 seconds then the remaining time is displayed There is a beep to confirm your choice This function exists with or without the timer function Note If a time is displayed on the timer this time cannot be changed during the 5 seconds after pressing the J ...

Page 11: ... and a beep sounds after about 2 min utes Press on the main selector to delete this information A beep will confirm your setting Small Items safety If you place a small object on the induction area a ring a fork etc the hob will detect it and not deliver any power The power display flashes Note However several small objects at the same time on a zone could be identified as cook ware In that case p...

Page 12: ...ot covered by our guarantee And for the safety of your kitchen do not place cleaning items or inflammable objects or products in the kitchen furniture under neath your cooking hob TYPES OF STAINS SPOTS Light Accumulation of baked on stains dirt Sugar spills melted plas tics Rings and hard water residue Shiny metal colourings Weekly maintenance WHAT TO DO Thoroughly moisten the zone to be cleaned w...

Page 13: ...during cooking The fan continues to function a few minutes after your hob is turned off There was an overflow or an object is in contact with the control panel The electronic circuits have overheated The cookware used is not suit able for induction or is less than 12 cm in diameter 10 cm on a 16 cm area This is normal with some types of cookware This is caused by the transfer of energy from the ho...

Page 14: ...y either your dealer or another qualified mechanic who is an authorized agent for the brand appliances When making an appointment state the full reference of your equipment model type and serial number This information appears on the manufacturer s nameplate attached to your equipment ...

Page 15: ...n will have insu rance protecting their workmanship for 6 years Make sure you use a licensed person to install this product and ask for your Compliance Certificate 1 1 The Warranty only applies provided that the appliance has been used in accordance with the manufacturer s instructions and pro vided that the appliance has not been dama ged by an accident misuse neglect or abuse of any person other...

Reviews: