background image


  3 


7

(12’ screen pictured, not all screens are same proportions. For illustration purposes only )

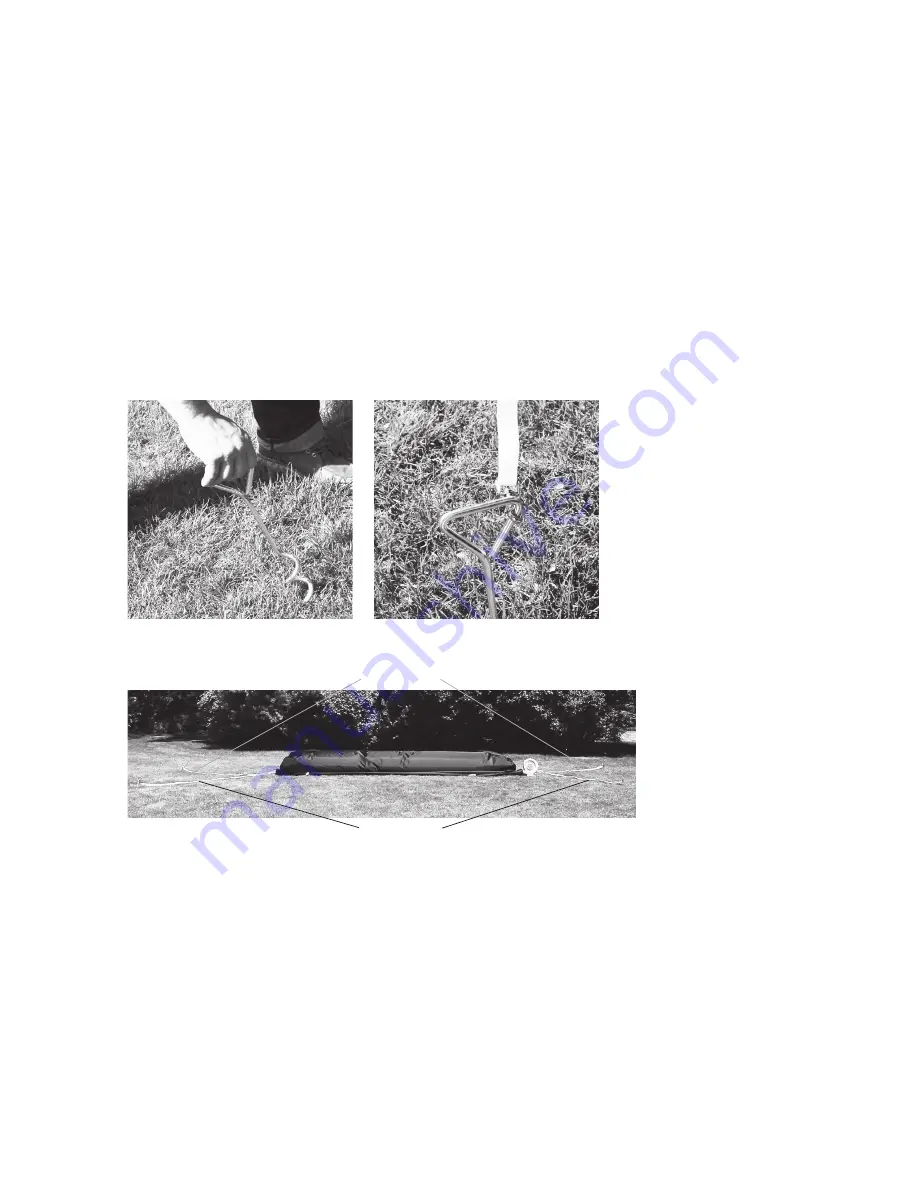
STEP 2: SECURE STAKES AND TETHERS

Place stakes in ground roughly 10 feet from the corners of screen at 

135 degree angles. 

For 9’, 12’, and 16’ screens, clip the tethers from the corners of the 
screen to the stakes. For the 20’ screen, tie ends of tethers to stake, 
preferrably using a clove hitch knot.

There are eight tethers total, four attached to the top of the screen, 

four to the bottom. Make sure bottom tethers are taut when 

connected to stakes, but leave about 3 feet of slack in the top 

tethers. Tether length can be adjusted using the black sliders on each 
tether. 

ATTENTION: Be aware of any underground pipes or utilities before 

driving stakes into the ground.

Place stakes in ground

Attach tethers to stakes with clips

INFLATABLE SCREEN SETUP

Properly attached
stakes and tethers

Front tethers

Rear tethers

Summary of Contents for INFLATABLE SCREEN

Page 1: ...1 INFLATABLE SCREEN Instructions as of 3 22 17 SYSTEM COMPONENTS 1 Inflatable Movie Screen with storage bag 8 Tie down straps attached to screen 1 Air blower 4 Steel twist in stakes 1 Tarp ...

Page 2: ...her debris Uncoil white tethers from four corners of screen top and bottom Screen should be at least 10 away from structures and objects such as fences buildings trees overhead branches power lines electrical wires walls etc Choose a location where no direct light will hit the screen ATTENTION Do not drag screen across concrete pavement or other rough surfaces Properly unfolded screen Uncoiled whi...

Page 3: ...preferrably using a clove hitch knot There are eight tethers total four attached to the top of the screen four to the bottom Make sure bottom tethers are taut when connected to stakes but leave about 3 feet of slack in the top tethers Tether length can be adjusted using the black sliders on each tether ATTENTION Be aware of any underground pipes or utilities before driving stakes into the ground P...

Page 4: ...nch cord is secured tightly around the coupling of the air blower Place the air blower in an area where it will not suck in dirt or leaves Do not use near water Do not block vents on blower Intake vent left and air blower right Pull intake vent over blower pipe INFLATABLE SCREEN SETUP Tighten cinch cord around blower pipe Properly attached intake vent Air blower model will vary with each screen si...

Page 5: ...er should remain on to continuously maintain air pres sure during use Airflow through seams is normal Do not try to seal seams Zip air vent closed Turn on the air blower s power switch HOME INFLATABLE SCREEN SETUP The Open Air Screen should inflate in less than a minute Air blower model will vary with each screen size for illustration purposes only 12 screen pictured ...

Page 6: ...4 feet 30 feet Center console to screen at the distance specified above CineBox Console Stakes and tethers Speakers Front of screen Air blower illustration not to exact scale Video projector Overhead View of system and console setup Center console to screen at the distance specified above CineBox Console Stakes and tethers Speakers Front of screen Air blower illustration not to exact scale Video p...

Page 7: ...r SPEAKER Connect Primary SPEAKER to DVD PLAYER or LAPTOP via IPOD CABLE Plug Power Cord in Power on PROJECTOR Power on DVD PLAYER or LAPTOP Power on SPEAKERS adjust volume for sound check by playing DVD or video on LAPTOP IMAGE ALIGNMENT Turn on DVD and or video on LAPTOP to make any image adjustments using the adjustable feet on PROJECTOR as well as ZOOM FOCUS and KEYSTONE features of projector ...

Page 8: ...urn off air blower and guide screen down so that it unfolds in half top to bottom as shown in screen setup Unzip air vent and disconnect the intake sleeve from air blower Unclip or untie tethers from stakes Remove stakes from ground and clean off debris dirt with a rag Fold screen from back to front a few times until it is in a long strip about 2 feet wide Roll tightly and place in travel bag NOTE...

Reviews: