12
13
Turn on the MONITOR
Press and hold the POWER
button on the front of the monitor.
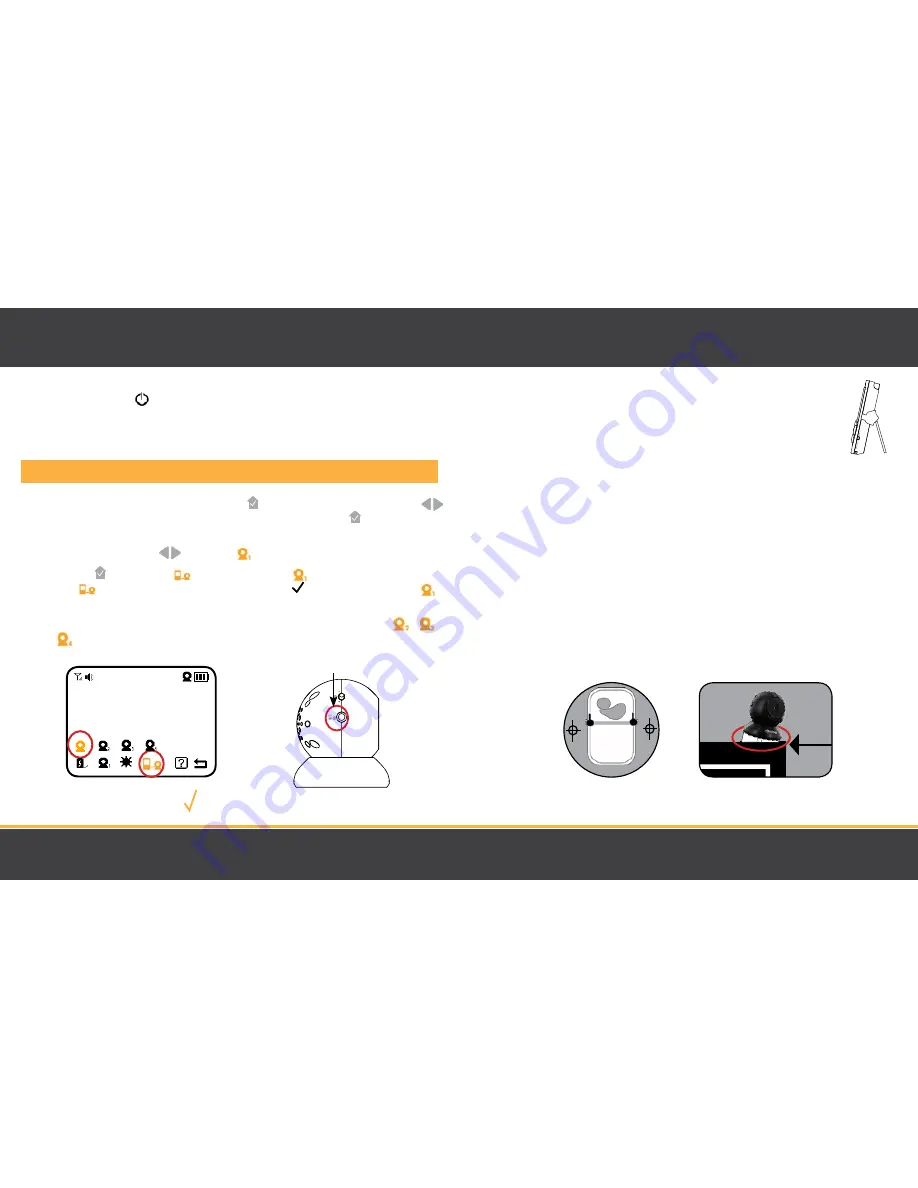
Pairing the Camera(s) and Monitor
The camera and monitor come paired (connected) to each other automatically. However, if upon opening
this package the devices do not automatically connect and transmit, you may do so manually.
1.
To pair your camera and monitor, press the MENU button. Using the navigational arrows
+
–
on the front of the monitor, highlight the PAIRING icon and press the MENU button once
to select.
2.
Use the navigational arrows
+
–
to select the
icon.
3.
Press MENU . When you see
flashing next to camera
icon, quickly press and hold the
PAIRING
button on the side of the camera. A checkmark will appear next to camera
confirming pairing is successful. Video/audio will be transmitted automatically.
4.
To pair additional cameras, repeat steps 1 to 3 and be sure to select camera number
,
or
in the Pairing menu when pairing each additional camera.
Note: Before you begin pairing, be sure to have the monitor and the camera(s) side by side.
ICONS ARE ORANGE
WHEN SELECTED
OPERATION
Placement of the Monitor
This monitor can be placed on a tabletop.
• You can place the monitor on a tabletop by using the retractable table stand on the
back of the monitor. When not in use, simply tuck the table stand away into the back
of the monitor until you hear a "click".
Placement of the Camera
This camera can be placed on a tabletop or hung on the wall above the
area being monitored.
• Place the camera within 15 feet of the area being monitored for best picture results.
• Do not place objects within 2 feet of the field of vision of the camera as the night vision will not
activate correctly if objects are too close.
Mounting the Camera on a Tabletop Safely
To increase the downward viewing angle of the camera, please insert the included camera wedge to the
bottom of the camera (see below).
1. Place the camera on a tabletop no less than 3 feet away from area being monitored.
2. Feed the power cord down the back of the table or use wall clips (not included) to secure the cord
away so children cannot reach it.
3. Plug in the power cord, check the monitor to ensure that you are getting a clear view of the
area you are monitoring and there are no obstructions.
OPERATION
CAMERA
BOTTOM
3 ft
WITH
WEDGE
PAIRING
BUTTON
Summary of Contents for Phoenix 2.4"
Page 12: ...22 23 NOTES NOTES ...


