background image

 20
 

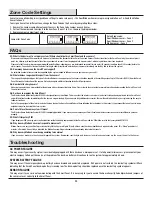
Zone Code Settings

Sensors are supplied with pre-assigned Zone settings to make setup easy – the Door/Window Sensors are pre-assigned to Zones 1 & 2 and the Motion 
Sensor to Zone 8.
To assign a Sensor to a different zone, change the Zone Code on the Sensor by completing these steps:
1.  Remove the Jumper compartment cover to access the Zone Code Jumper on each Sensor.
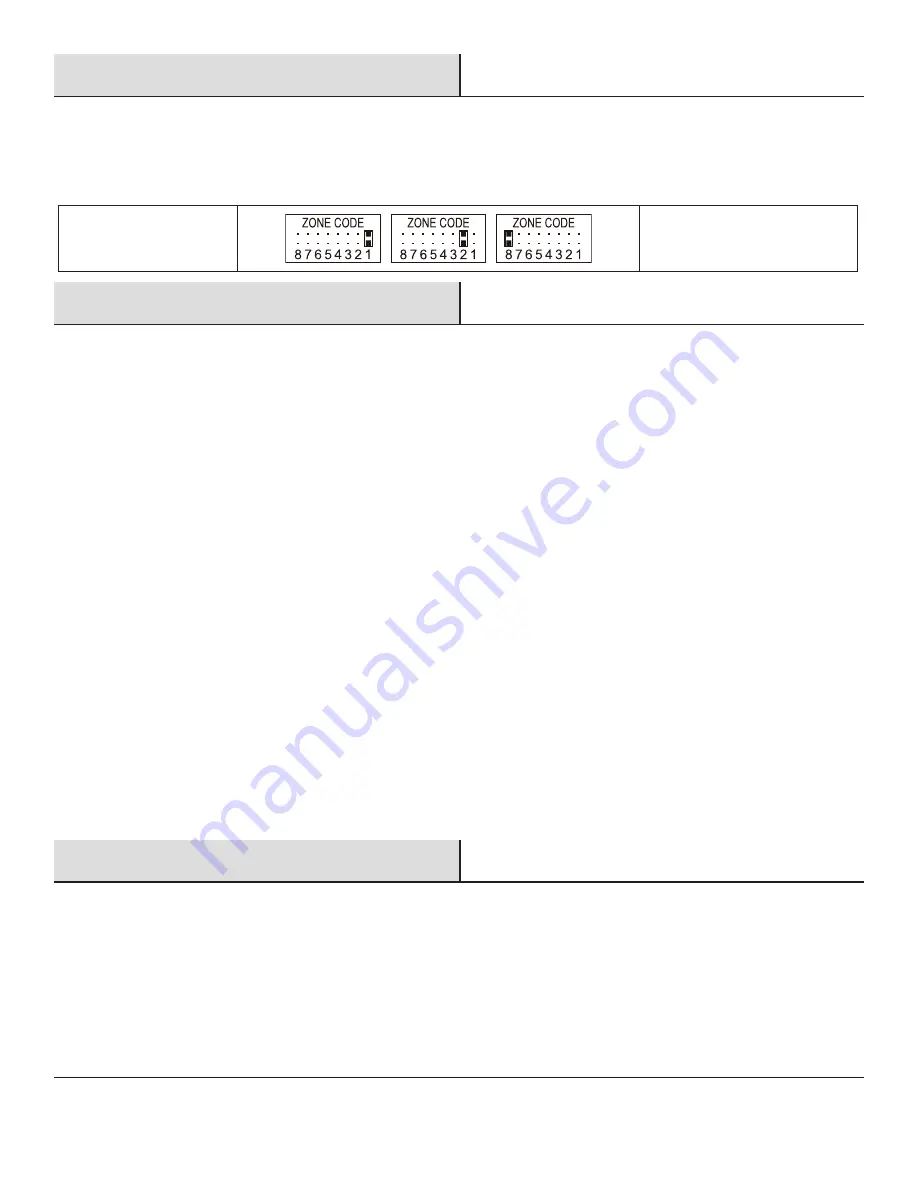
2.  Pull out the Jumper and reassign it to the new Zone (Zones 1 to 8) as shown in the diagram below.
3.  Replace Jumper compartment cover.

Jumper for Zone Code

Default zone code:

Door/Window sensor – Zone 1

Door/Window sensor – Zone 2

Motion sensor – Zone 8

FAQs

Q.1: What is the best way to set up my system? Where should I put my Smart Panel and the sensors?

We recommend that you take some time in advance to think about the placement of the Smart Panel and Sensors. The best location for the Smart Panel is by the main entry/exit 
point, in a hallway, or in another central location in your home. However, it must be plugged into a power socket, which may dictate where it can be placed.
Please note that the alarm is pre-programmed with default settings, allowing you a pre-determined amount of time to enter (30 seconds) and time to exit (20 seconds) before the 
alarm sounds. You can either change the default setting to allow more time to enter/exit your home or, alternatively use the Key Fob to disarm the system.

Q.2: How many Sensors can the Smart Panel support?

An unlimited number of sensors can be supported by the system, added to different zones in your house, as you see fit.

Q.3: What wireless range should I expect from the Sensors?

The range will vary depending on the type of structure. However, in an open space, the sensors should be capable of transmitting a signal up to 150 meters (500 ft.) from the Smart 
Panel. Determine the location of the sensors first and change to a different location for better RF performance.

Q.4: How do I attach my Sensors?

Adhesive tape and screws are provided for the purpose of securely mounting these items. Please refer to the user guide for more information about mounting the Smart Panel and 
the wireless sensors.

Q.5: Do I have to program the Smart Panel?

The Wireless Home Protection System WP-100 is designed for easy installation. This means that the wireless sensors are in a default setting already registered to the Smart Panel 
and will therefore function immediately after the sensors are powered up. If you choose to buy additional accessories, these will need to be added to your system using the easy to 
follow instructions.
Due to the strong signal of the alarm, we advise that you change the House Security Code settings following the instructions in this manual, if you suspect that one of your in-range 
neighbors may also be using this alarm system.

Q.6: Can I still use the same system if I move?

The Wireless Home Protection System WP-100 is completely portable. If you move, you can remove your Smart Panel and wireless accessories and re-install them in your new 
property.

Q.7: What if I forget my PIN?

If you forget your PIN, you may press the Reset button inside the battery compartment of the Smart Panel and the PIN will be reset to the factory default PIN 1234.

Q.8: Why does my Motion Sensor not respond to movement?

Motion Sensors are very sensitive. To preserve battery life the Sensor will go to “Sleep” after an event has been identified and reported to the panel. This “Sleep” period lasts 3 
minutes, after which, if no activity is detected, the Motion Sensor will again become active and ready to detect other events.

Q.9: Why does my Motion Sensor keep generating false alarms?

If you have a pet, make sure they have not triggered the system. Remember, sensitivity to pets increases in certain circumstances e.g. the nearer the pet to the Sensor.

Troubleshooting

AC POWER FAILURE

This may occur if your security system is accidentally unplugged or if there has been a main power cut. If a full power failure occurs, please contact your 
electric company to find out the source of the problem. The back-up battery will continue to run the system for approximately 6 hours.

SYSTEM BATTERY FAILURE

This may occur if the emergency back-up battery has been drained and needs to be replaced. If AC power is not restored, the low battery symbol will flash 
indicating that the Smart Panel back-up battery is running low. The back-up battery should be replaced once the low battery symbol appears.

SENSOR FAILURE

This may occur if a sensor is not communicating with the Smart Panel. It is necessary for you to ensure the House Security Code dipswitch and jumpers of 
the sensors are set correctly to the Smart Panel.

Summary of Contents for THD-1000

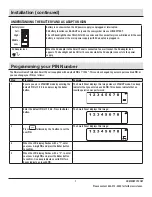
Page 1: ...ts designed to enhance your home Visit us online to see our full line of products available for your home improvement needs Thank you for choosing Defiant USE AND CARE GUIDE WIRELESS HOME PROTECTION S...

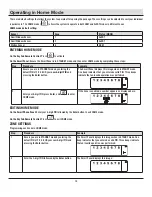
Page 2: ...Enter button The symbol in the display disappears b Press and to enter Remote Control Enroll Mode c Press any key on the remote control and press Enter to complete the enrollment STEP 5 OPERATING IN...

Page 3: ...When replacing batteries always replace the whole set Do not use rechargeable or reusable batteries Do not allow children to install batteries unsupervised Follow battery manufacturer s instructions a...

Page 4: ...uit different from that to which the receiver is connected Consult the dealer or an experienced radio TV technician for help Warranty 1 YEAR LIMITED WARRANTY This product is guaranteed to be free of d...

Page 5: ...open area Key Fob Remote Control Door Window Sensor Power Source 12V Alkaline Battery Power Source 2 AAA Alkaline Batteries 1 5 V RF Working Trans Freq 433 92MHz 0 5MHz RF Working Trans Freq 433 92MH...

Page 6: ...e Smart Panel is switched to HOME ALERT or ARM mode 2 Powering up the Smart Panel controller NOTE The Smart Panel is supplied with a demonstration switch to show the LCD display panel working while th...

Page 7: ...r The Wireless Home Protection Smart Panel is supplied with a default PIN of 1234 This can be changed to your own personalized PIN or you can change your PIN as follows Step Procedure Example 1 Ensure...

Page 8: ...e optional response devices Auto Dialer Outdoor Bell Box GSM Device to request emergency assistance Duress Password Enter the default 4 digit PIN 1 2 3 4 followed by 1 and Enter or Enter your personal...

Page 9: ...on the LCD display will flash until the setting is completed 4 Press the Enter button to confirm the setting and return the Smart Panel to STANDBY ADJUSTING ENTRY DELAY Step Procedure Example 1 Ensur...

Page 10: ...ton to confirm the setting and return the Smart Panel to STANDBY MUTING THE AUDIBLE COUNTDOWN When the Smart Panel is ARMED the audible countdown beeper can be silenced by pressing the MUTE button dur...

Page 11: ...Control Press to disarm the system ZONE SETTINGS Step Procedure Example 1 Ensure you are in STANDBY mode by entering the default PIN of 1 2 3 4 OR your new 4 digit PIN and pressing the Enter button Th...

Page 12: ...N every 1 5 seconds and indicates the triggered zone when the system detects a visitor in the protected area ALERT Mode Default Setting Sensor Zone Status MODE Door Window Sensor 1 ALERT Door Window S...

Page 13: ...PIN of 1 2 3 4 OR your new 4 digit PIN and pressing the Enter button The Smart Panel displays this image when in STANDY mode One beep indicates that you entered a valid PIN Three beeps indicate that a...

Page 14: ...er button The Smart Panel displays this image when in STANDY mode One beep indicates that you entered a valid PIN Three beeps indicate that an invalid operation was performed 2 Enter your 4 digit PIN...

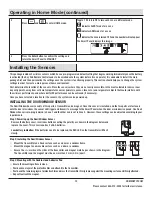
Page 15: ...selected a location for the sensors the system can be powered up INSTALLING THE DOOR WINDOW SENSOR The Door Window Sensor consists of two parts a transmitter and a magnet Once this sensor is installe...

Page 16: ...t is required to trigger the sensor It is recommended to set the sensitivity to Low and perform a Walk Test see step 4 If the walk test result is satisfactory the sensitivity does not require further...

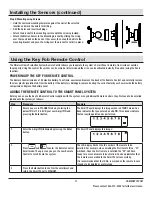
Page 17: ...the correct polarity as shown inside the battery compartment Replace the battery cover ADDING THE REMOTE CONTROL TO THE SMART PANEL SYSTEM Before you can use the Key Fob Remote Control supplied with t...

Page 18: ...system as follows Step Procedure Example 1 Ensure you are in STANDBY mode by entering the default PIN of 1 2 3 4 OR your new 4 digit PIN and pressing the Enter button The Smart Panel displays this im...

Page 19: ...n be checked by pressing any key on the remote For example if the LCD display flashes 02 then that is the ID of the remote 4 Press the Enter button to complete the query and return the Smart Panel to...

Page 20: ...for easy installation This means that the wireless sensors are in a default setting already registered to the Smart Panel and will therefore function immediately after the sensors are powered up If y...

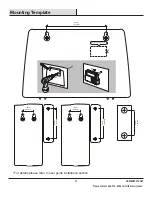
Page 21: ...44 212 0200 for further assistance Mounting Template For details please refer to user guide installation section Mount tamperproof magnet here 1 2 3 84mm 3 31inch 16mm 0 63inch 16mm 0 63inch 43mm 1 69...

Page 22: ...Questions problems missing parts Before returning to the store call Customer Service 8 a m 4 30 p m CST Monday Friday 844 212 0200 HOMEDEPOT COM Retain this manual for future use...

Reviews: