PAGE
4
OF18
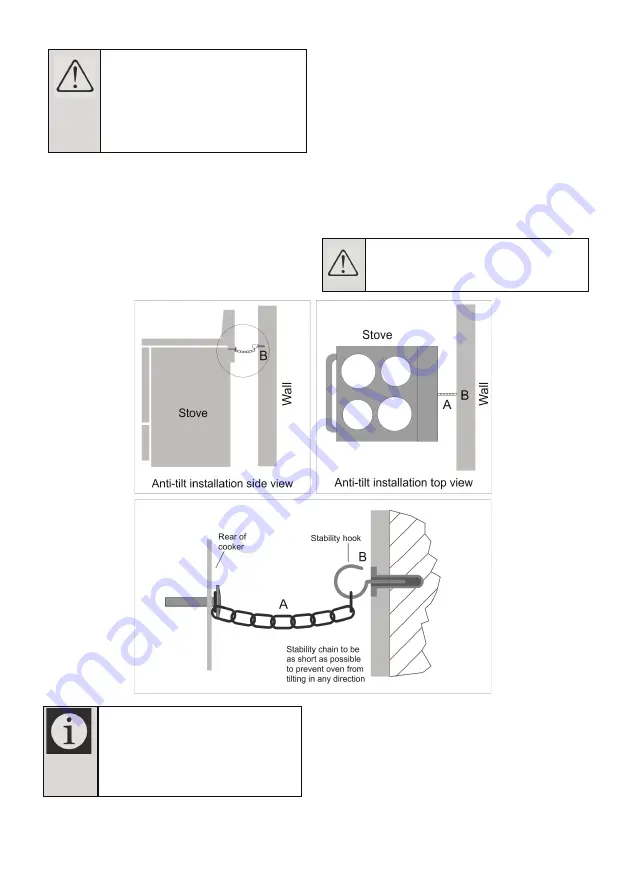
Safety regulations stipulate that the
ANTI-TILT mechanism supplied with
the stove, must be fitted as shown.
•
“A”
1 x Stability chain
•
“B”
1 x Stability hook with anchor sleeve
•
“A”
is factory fitted at the rear of the stove
in the centre. (See overleaf for instructions
if the removable splashback is to be fitted)
•
Position the stove and move
“A”
to touch
the wall behind the stove.
•
Mark the hole where
“A”
touches the wall
behind the stove.
Anti-tilt mechanism
All stoves can tilt if you or a child
sit or lean on an open oven door.
Safety regulations stipulate that
the ANTI-TILT mechanism
supplied with the stove, must be
fitted as shown below.
•
Move the stove away from the wall to al-
low for an area to work in.
•
Using a 8.0 mm concrete bit, drill a hole
at the marked position.
•
Using the Stability hook and anchor
sleeve
“B”
, firmly secure
“B”
to the wall.
•
Slide the stove back in position and en-
gage the stability chain
“A”
onto the Sta-
bility hook
“B”
.
•
The stove is then secured and will not
accidentally tilt if downward pressure is
applied to the open oven door.
Accessories supplied may vary
depending on the model. Not all
accessories in the user manual may
be included with your appliance.
Accessories may be purchased
from Defy spares.


