background image

PAGE 

19 

OF 20 

Warranty 

 
This  certificate  is  issued  by  DEFY  APPLIANCES  LIMITED  manufacturers  of  Defy  and 
Ocean  products,  hereinafter  the  Company,  to  the  original  purchaser  only,  of  the 
appliance  described  on  the  certificate  and  shall  constitute  the  only  warranty  given  in 
respect of this appliance. 
The Company warrants to the original purchaser that for a period of TWO YEARS from 
date  of  purchase  the  appliance  is  free  from  defect  under  normal  domestic  use,  both  in 
workmanship and material, subject to the following conditions. 
 

1.

  Repair  or  replacement  of  any  part  of  this  appliance,  found  by  the  Company  to  be 

defective, shall be at the election of the Company. The Company reserves the right to 
effect such service through any of its Service Divisions or Authorised Service Dealers. 
The  cost  of  such  service  shall  be  borne  by  the  Company  in  full,  provided  that  the  
appliance  is  located  no  further  than  50  km  from  a  Company  Service  Centre  or  an 
Authorised Service Dealer.   Where the appliance is located beyond the 50 km radius, 
the purchaser shall be liable for the standard travelling charges, as determined by the 
Company.  

      CARRY IN SERVICE  Microwave ovens, Compact cookers and small appliances are 

repaired in our service centres and are not collected from the customers home. Faulty 
units  should be delivered to the purchasing dealer or to the nearest Company Service 
Centre for warranty repairs. 

2.

  Rusted  or  corroded  solid  plates,  vitreous  enamelware,  fuses  and  lamps  are 

specifically  excluded  from  these  warranties.  It  is  an  express  condition  of  these 
warranties  that  the  purchaser  takes  due  care  and  attention  in  the  use  and 
maintenance  of  the  appliance.  Abuse,  misuse  in  conflict  with  operating  instructions, 
connection  to  incorrect  voltages  and  subjection  to  commercial  use  shall  release  the 
Company from its obligations. 

3.

 This warranty shall become void and cease to operate if the appliance is dismantled 

by, or any repairs to the appliance are effected by any persons not duly authorised by 
the  Company,  or  if  substitute  parts  not  approved  by  the  Company  are  used  in  the 
appliance, or if the serial number of the appliance is removed. 

4.

  The  Company  shall  not  be  responsible  for  damages  resulting  from  fire,  flood,  civil 

disturbances or any Act of God. The Company shall not, in terms of these warranties 
be  responsible  nor  held  liable  for  any  consequential  loss  or  damage  of  any  kind 
caused by or due to the failure or malfunction of the appliance. 

5.

  The  Company  shall  not  be  responsible  for  transportation  or  other  costs  other  than 

those incurred within the provisions of Point 1 of this Certificate. 

6.

 These warranties shall not apply to the appliance if it is purchased or used beyond the 

borders of the Republic of South Africa, Namibia, Botswana, Swaziland and Lesotho. 

7

. Where service is requested under warranty and no fault or defect can be found by the 

Company, all costs incurred will be for the purchaser's account. 

8.

  This  Certificate  as  well  as  your  invoice  will  serve  as  proof  of  purchase.  For  the 

purpose of warranty, it will be essential to produce this Certificate and invoice. Failure 
to do so, will render the purchaser liable for service costs. 


KEEP THIS CERTIFICATE AND SALES INVOICE AS PROOF OF PURCHASE  

FOR WARRANTY PURPOSES.          


Summary of Contents for Thermofan 731 MF

Page 1: ...on 2 Electrical installation 2 Anti tilt mechanism 3 Anti tilt mechanism assembly 4 Safety advice 5 Control panel and symbols 5 Automatic oven timer clock 7 Warming drawer 8 Multifunction oven 9 Defrost fan only 9 Static oven 10 Fan assisted oven 10 Thermofan oven 11 Turbo grilling 12 Grilling 12 Solid plate care guide 13 Solid plates 14 Ceran smooth top 15 Maintenance 15 Cleaning 15 Oven light 15...

Page 2: ...mediately adjacent to the stove should be able to withstand temperatures of up to 100 C without delaminating or discolouring Electrical installation This appliance must be earthed and the manufacturer and the seller do not accept re sponsibility for any damage due to incorrect installation or electrical connection This appliance should not be connected through an earth leakage system Refer to S A ...

Page 3: ...ll behind the stove Move the stove away from the wall to allow for an area to work in Using a 8 0 mm concrete bit drill a hole at the marked position Using the Stability hook and anchor sleeve B firmly secure B to the wall Slide the stove back in position and engage the stability chain A onto the Stability hook B The stove is then secured and will not accidentally tilt if downward pressure is appl...

Page 4: ... into contact with hot surfaces Do not heat closed tins and glass jars in the oven The pressure that would build up in the tin jar may cause it to burst Do not place baking trays dishes or aluminium foil directly onto the bottom of the oven The heat accumulation might damage the bottom of the oven Keep all ventilation slots clear of obstructions The appliance may be hot when it is in use Never tou...

Page 5: ...ng the time of day When power is first connected or after a power failure the clock display will flash 00 00 To set the clock press buttons 1 and 2 and hold them down Press button 5 or 6 until the correct time of day is displayed Release the buttons The clock is now set Please note that the clock has a 24 hour display For example 3 00 PM will be displayed as 15 00 6 5 4 3 2 1 ...

Page 6: ...epare your meal and place it in the oven Press and hold button 2 Set the cooking period required by pressing button 6 until the desired period is displayed Release the buttons Press and hold button 3 Press button 6 until the desired stop time is displayed Release the buttons and the clock will again display the time of day The word AUTO will light up on the clock display Set the multi function sel...

Page 7: ...e buttons and the clock will again display the time of day The word AUTO will light up in the display After 40 minutes the oven will switch off automatically and emit an electronic tone for about one minute 4 beeps every 3 seconds The word AUTO will flash until button 4 is pressed and manual control is restored The oven thermostat must be turned to the OFF position in an anticlockwise direction Im...

Page 8: ...heat elements are used Use the fan assisted oven mode for traditional baking and roasting where a more even heat distribution is required 4 Thermofan Oven The fan plus the element surrounding the fan is used Registered by Defy in 1978 Thermofan cooking differs from conventional cooking in that it uses the principle of forced convection within the oven The advantages are Both baking trays may be us...

Page 9: ... the wire shelf only Remove the baking trays during baking in static mode as they are to be used for Thermofan baking only Set the multifunction selector to static oven and the oven thermostat to the required temperature The indicator light will glow and remain on until the oven has reached the selected temperature When the indicator light switches off the food should be placed in the oven During ...

Page 10: ...orced convection within the oven The advantages are 1 All the trays may be used at the same time 2 Different dishes can be cooked simultaneously without flavour or aroma transfer Hence fish meat and cakes can be baked at the same time 3 The oven door may be opened any time for inspection purposes without risking a flop 4 By circulating hot air around the food spit roast chickens may be done withou...

Page 11: ...ly a wire shelf when grilling as the intense heat could warp the baking trays Turbo grilling is most suitable for meat as drying out and shrinkage will be reduced Set the multifunction knob to turbo grill Set the oven thermostat to the grill position Pre heat the grill element for about 5 minutes Place the food on the grid roast pan and place this on the wire shelf near to the grill element Monito...

Page 12: ...LY BIGGER THAN THE PLATE AND THAT HAVE A SMOOTH FLAT BASE BEFORE USING THE PLATES FOR THE FIRST TIME SWITCH THEM ON FOR FOUR MINUTES AT THE HIGHEST SETTING THIS ALLOWS THE PROTECTIVE COATING TO BURN IN TO INHIBIT CORROSION PERIODICALLY APPLY SALT FREE VEGETABLE OIL SEWING MACHINE OIL OR ELECTRICAL HOT PLATE POLISH AVAILABLE FROM DEFY SERVICE CENTRES DO NOT USE ONE POT ON TWO PLATES DO NOTUSE A POT...

Page 13: ...rom spatters and spills should be cleaned off immediately To clean the plates wipe them with a damp cloth or nylon pad A little liquid detergent may be used Do not use metal scourers or sharp metal objects to clean the plates After cleaning dry the plates by switching them on for a short while To prevent rust periodically apply some sewing machine oil or electrical hotplate polish available from D...

Page 14: ...shock and have the panel replaced before further use Plate controls variable Select the heat level by turning the plate control knob to the required setting 1 low 3 medium and 6 high The relevant pilot light will glow and shortly thereafter the hot surface indicator light on the hob will glow It will remain on for 20 to 30 minutes after switch off This is a reminder that the hob surface is still t...

Page 15: ...ge the oven enamel General cleaning Switch off the electrical power supply before cleaning any part of the appliance Wipe down glass panels cabinet door control knobs trims and handles with a hot soapy cloth Do Not use steam cleaners Use only mild liquid household cleaners and avoid abrasive powders scouring pads and caustic or ammonia based cleaners Rinse and wipe down with a clean cloth Oven lig...

Page 16: ...oblem please check The mains distribution board for tripped circuit breakers That the wall switch is on Remember that you may be charged for a service call even during the warranty period if the fault is due to or caused by any of the above Problem check WARNING Under no circumstances should the bake element be covered with aluminium foil Nor should a pan or tray be positioned directly above the b...

Page 17: ...ven sides Do Don t Use pots which are smaller than the hotplate diameter This wastes electricity and allows the pot handles to overheat Leave the appliance unattended especially when grilling This is good practice and avoids accidents Place anything on the open oven door The glass is not a work surface and could get scratched Use abrasive cleaning materials They will scratch surfaces and fascia gr...

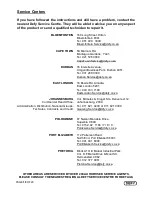
Page 18: ...eet Hilton Bloemfontein 9301 Tel 051 400 3900 Bloemfontein Service defy co za 5A Marconi Rd Montague Gardens 7441 Tel 021 526 3000 CapeTown Service defy co za 35 Intersite Avenue Umgeni Business Park Durban 4051 Tel 031 268 3300 Durban Service defy co za 16 Bowls Rd Arcadia East London 5201 Tel 043 743 7100 EastLondon Service defy co za Cnr Mimetes Kruger Sts Denver ext 12 Johannesburg 2094 Tel 01...

Page 19: ... an express condition of these warranties that the purchaser takes due care and attention in the use and maintenance of the appliance Abuse misuse in conflict with operating instructions connection to incorrect voltages and subjection to commercial use shall release the Company from its obligations 3 This warranty shall become void and cease to operate if the appliance is dismantled by or any repa...

Page 20: ...OR LIGHT 1 1 1 1 PLATE CONTROL WITH INDICATOR LIGHT 4 4 4 4 OVEN MULTIFUNCTION No of functions 6 6 6 6 PLATES SOLID 4 4 CERAN 4 4 GENERAL LIFT OFF OVEN DOOR FULL GLASS AIR COOLED 1 1 1 1 OVEN LAMP 1 1 1 1 ROAST PAN AND RACK 1 1 1 1 OVEN SHELVES 2 2 2 2 BAKE TRAYS 2 2 2 2 EASY CLEAN ENAMEL OVEN INTERIOR YES YES YES YES LEVELLING FEET 2 2 2 2 For future reference record the listed information in the...

Reviews: