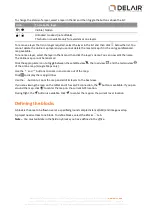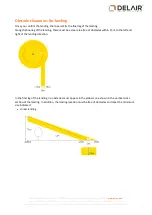
To set the geofence boundary:
1. Enter a value in the geofence radius field
between 500 m (1640 ft) and 5000 m (16400 ft). The default
value is 2000 m (6560 ft).
2. Enter a value in the geofence height field
between 75 m (246 ft) and 1000 m (3280 ft). The default
value is 1000 m (3280 ft).
Setting the takeoff properties
To set the takeoff properties, in the flight menu tap
.
A toolbar appears on the map.
1. To add a takeoff location, do one of the following:
l
To add a new location without GPS:
In the Aerial Imaging Desktop or Tablet software, tap
and
then tap on the map to set the location. The takeoff pin appears on the map with an arrow
indicating the takeoff heading and shows the "Planned and not active" status icon
. The takeoff
pin includes an arrow to indicate the takeoff heading. A new entry appears in the list to the right.
You can add as many takeoff locations as you want. Click
to confirm the added locations.
l
To add a new location using GPS:
In the Aerial Imaging Tablet software, physically go to the
takeoff location and then tap
. If the location you want to fix lies within 10 m of a planned pin,
the planned pin is fixed. Otherwise, a new pin with the fixed status is added to the map. The
takeoff pin appears on the map with an arrow indicating the takeoff heading and shows the "Fixed
and not active" status icon
. The takeoff pin includes an arrow to indicate the takeoff heading. A
new entry appears in the list to the right with the
icon.
You can fix as many takeoff locations as you want.
Note –
Each takeoff location comes with default parameters (for example, the heading is set into the
wind direction). If you change the heading, the takeoff location is updated accordingly. If you use this
location in another flight, the heading is set to the value of the latest change in all flights where the
location is used.
2. To select any defined location for the flight, tap the takeoff pin on the map or select the radio button
beside the takeoff location in the list. The takeoff pin status changes to "Planned and active"
or
"Fixed and active"
.
The selected takeoff location is added to the flight summary. To view the summary, tap
.
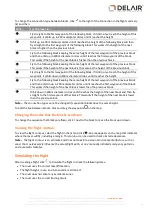
3. To set the takeoff heading, click the arrow next to the takeoff pin and rotate to change the takeoff
direction and avoid any obstacles. For more information, see
. By default,
the takeoff heading is set into the wind direction set in the
Blocks
tab. Alternatively, enter the heading
for the selected pin in the
field.
The takeoff heading icon turns red when the takeoff direction deviates by more than 45 degrees from
the default direction. (The default direction is into the wind direction, which is set in the
Blocks
tab).
Note –
Always try to takeoff into the wind. This prevents a higher launch speed and a higher risk of
launch failures.
4. When the flight has a block linked to it, the takeoff route is displayed. To edit the takeoff route, click
and drag the waypoints
on the map.
39
Delair-Tech
|
676, Rue Max Planck – 31670 Toulouse-Labège, France
|
Tel: +33 (0) 5 82 95 44 06
|
Capital: 238 110,30 € - APE: 3030Z – Intra-Community VAT number: FR90 53 09 69 781 – 530 969 781 R.C.S. Toulouse
This document is the sole property of Delair-Tech and cannot be used or reproduced without the written authorization of Delair-Tech
.


