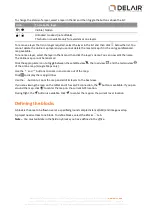
By default, the landing heading is set into the wind direction set in the
Blocks
tab. To help you define
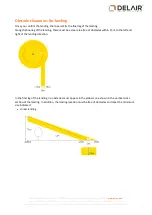
the landing heading in the field, zoom in on the map to the most detailed zoom level and then walk
into the heading with the GCS for about 20 to 30 meters (65 to 100 ft). You will see the GCS location
move on the screen. Now rotate the arrow and position the final leg of the landing circuit over the
center of the GCS icon
on the map.
The landing heading icon turns red when the landing direction deviates by more than 45 degrees from
the default direction. (The default direction is into the wind direction, which is set in the
Blocks
tab).
Note –
Always try to land into the wind. This reduces the landing speed and reduces the risk of
damage to the rover.
4. Set the landing zone offset
.
Valid values are from -25 m to +25 m (-82 ft to +82 ft). A negative value means that the landing location
is lower than the takeoff location. The default value is 0 m, which means that the takeoff and landing
locations are at the same height.
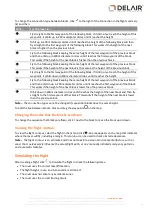
5. Set the landing type to a linear
or curved
landing, depending on the landing surface and
available clearances.
l
The
linear landing
type requires less clearance and lands the rover on the ground more quickly,
but has a larger impact on the aircraft.
l
The
curved landing
type requires larger clearances but reduces the impact on the aircraft when it
lands, and is especially suited for hard landing surfaces.
For more information, see
.
6. When the flight has a block linked to it, the landing route is displayed:
a. Set the landing entry to use a left
or right
turn, depending on which turning direction
provides better visibility and is furthest away from any obstacles (see
).
b. To edit the landing route, click and drag the waypoints
on the map.
7. To delete a landing location, click
in the toolbar on top of the map and then select the landing pin
that you want to remove. Click
to confirm the deleted location.
Repeat this step to delete as many landing locations as required.
Adding blocks to the flight
To add a block to the flight, in the flight menu tap
.
All blocks defined with a rover and sensor type that corresponds with the rover and sensor type selected
for the flight are listed and shown on the map. Only blocks that if added will keep the flight time less than
the maximum can be selected.
For each block the status is indicated on the map:
l
No icon: Not scheduled
l
Scheduled
l
Successfully mapped, log files downloaded and settings frozen
l
Flown and waiting for post-flight checklist to be completed to determine if the block was
successfully mapped. Settings are frozen.
From the map or the list, select one or more blocks to link to the flight.
41
Delair-Tech
|
676, Rue Max Planck – 31670 Toulouse-Labège, France
|
Tel: +33 (0) 5 82 95 44 06
|
Capital: 238 110,30 € - APE: 3030Z – Intra-Community VAT number: FR90 53 09 69 781 – 530 969 781 R.C.S. Toulouse
This document is the sole property of Delair-Tech and cannot be used or reproduced without the written authorization of Delair-Tech
.

