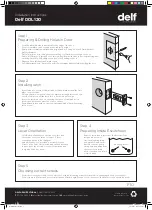
Step 1
Preparing & Drilling Holes in Door
•
Fold the template where indicated for the edge of the door
•
Position template on door edge at desired latch height
•
Firmly hold template and mark latch height and lock fixing holes at 60mm backset
(refer template)
•
Drill a 3mm pilot hole through centre marking for 50mm hole through the door.
•
Now drill 50mm hole through door face, drilling from both sides to avoid splintering and
ensuring the drill is held straight and level whilst drilling the hole
•
Measure Door thickness and mark centre
•
Drill 28mm latch hole - Ensure the drill is held straight and level whilst drilling the hole
Step 2
Installing latch
•
Insert latch into centre of 28mm latch hole and mark around the face
plate – remove latch
•
Using a sharp chisel, gently chisel the marked rectangular section to a
recess of 2mm or until the latch face is flush with door edge
•
Insert the latch into the hole, ensuring the curve of the latch bolt is
positioned toward the direction of door closure.
•
Pre-drill and fasten with wood screws provided (#6 x 19mm) ensuring
latch is level
Step 5
Choosing correct screws
•
From the two sets provided, choose which set of three mounting screws will be used – depending on the door thickness.
For doors up to 45mm thick, we recommend the 20mm length screws. For thicker doors, the 45mm screws should be used.
Installation Instructions
Delf DDL120
DELF ARCHITECTURAL
|
ABN 71 621 592 907
T
1300 362 625
| E
sales@delfarchitectural.com.au
|
W
www.delfarchitectural.com.au
PLEASE RECYCLE
THESE INSTRUCTIONS
PTO
Step 4
Preparing Inside Escutcheon
•
Remove two black screws from the bottom of the
inside escutcheon, to
free the mounting plate
and gasket. Remove the
battery cover by gently
siding it up and away from
the escutcheon body.
Keep cover and two black
screws handy.
Step 3
Lever Orientation
•
Hold Exterior Furniture on outside door face and
check that lever orientation is correct. If lever
orientation needs to be changed:
•
Using Allen Key tool provided, unscrew Allen key
screw on the hub of both inside and outside lever and
remove lever, then rotate to correct orientation, and
re-tighten Allen Key screw.
mounting screws
TEMPLAT
E
Delf DDL120 v04.indd 1
9/07/2020 10:17:28 AM


