Identifier
GUID-38D6E0EF-5843-4002-91BE-CCB9D07D9906
Status
Released
Installing the air shroud
Prerequisites
1
Follow the safety guidelines listed in
2
Follow the procedure listed in
Before working inside your system
.
3
If applicable, route the cables inside the system along the system wall and secure the cables by using the cable latch.
Steps
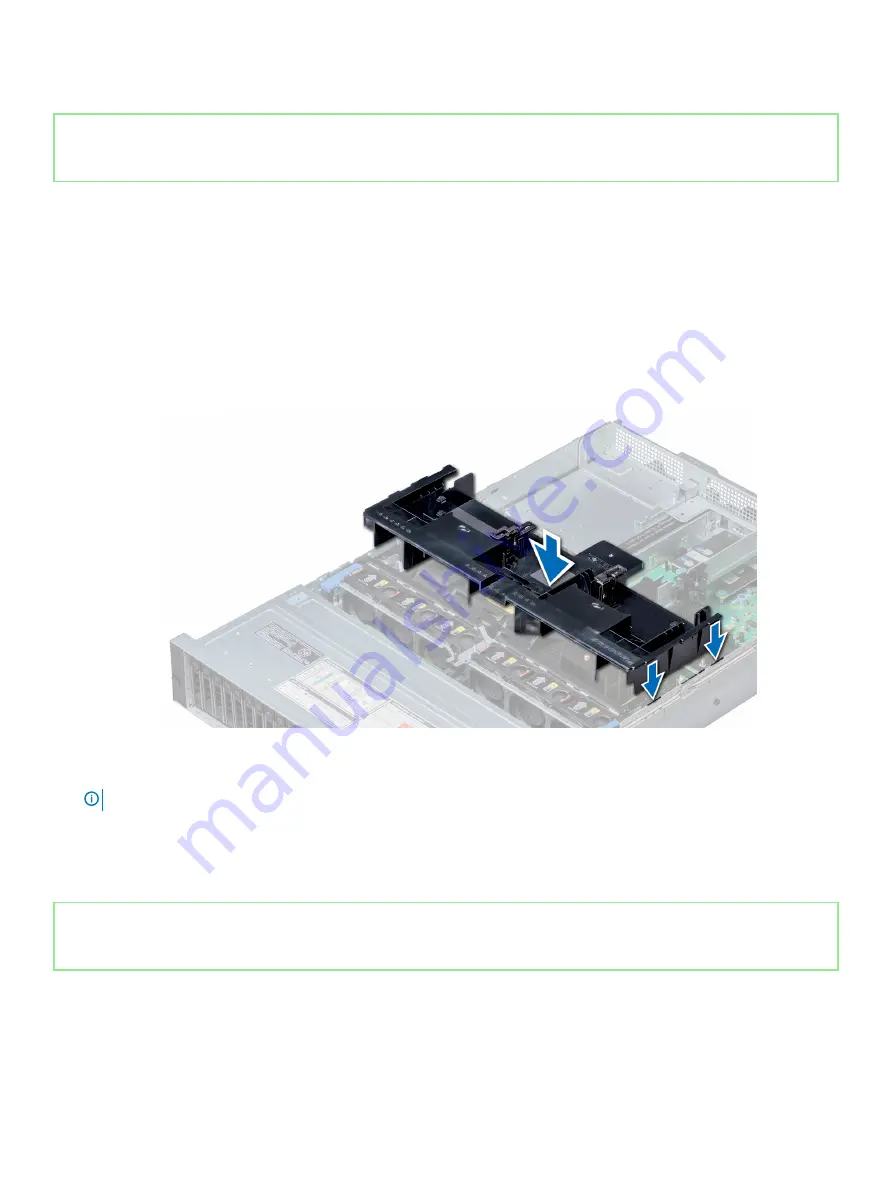
1
Align the tabs on the air shroud with the slots on the system.
2
Lower the air shroud into the system until it is firmly seated.
When firmly seated, the memory socket numbers marked on the air shroud align with the respective memory sockets.
Figure 22. Installing the air shroud
NOTE:
The images shown here are for representation only and the actual configuration of your system may vary.
Next steps
1
If removed, install the full length PCIe cards.
2
Follow the procedure listed in
After working inside your system
.
Identifier
GUID-80F72754-6D37-43F3-83E6-BCCB8B17CB54
Status
Released
Cooling fan assembly
The cooling fan assembly ensures that the key components of the system such as the processors, drives, and memory get adequate air
circulation to keep them cool. A failure in the NAS system’s cooling system can result in the system overheating and may lead to damage.
This section contains information about the removal and installation of the cooling fan assembly.
Installing and removing system components
73


