3
Remove the SSD backplane.
4
Keep the Phillips #2 screwdriver ready.
Steps
1
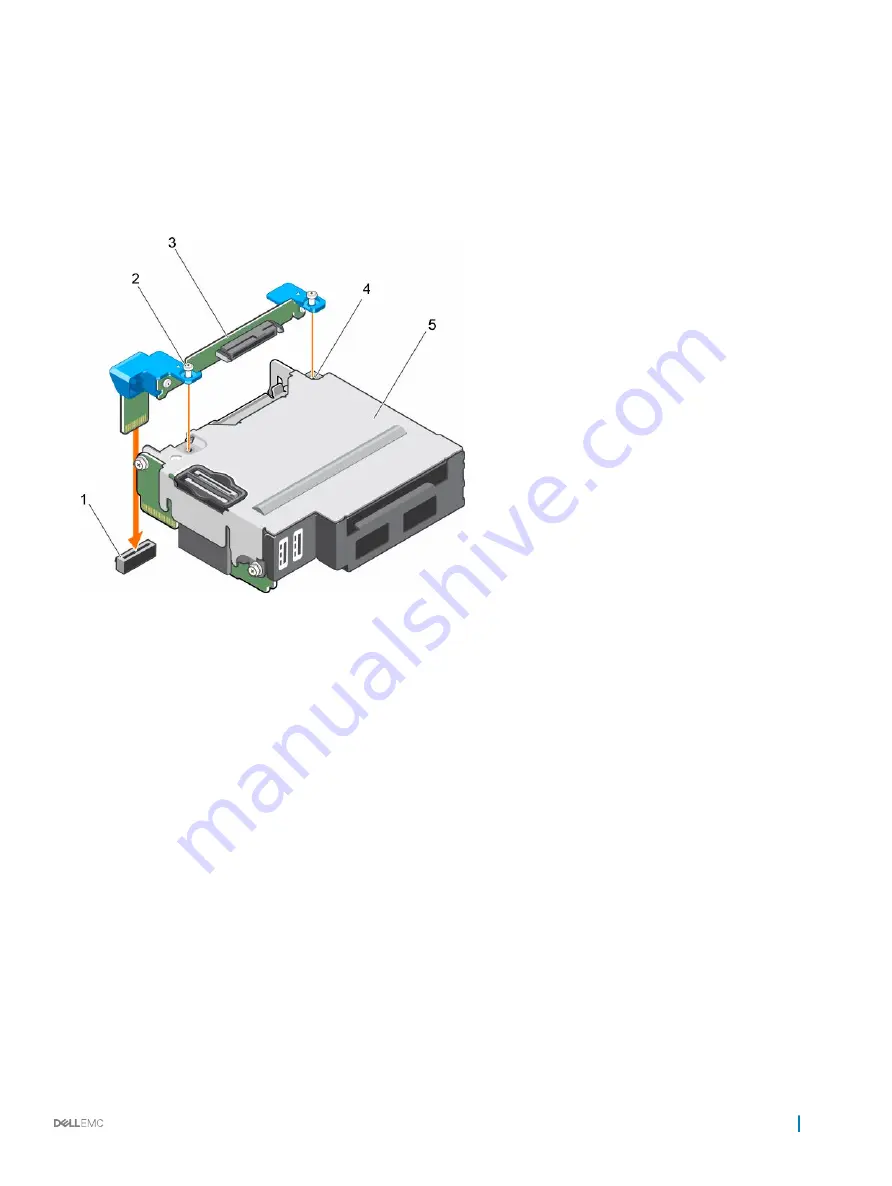
Align the screws on the SSD backplane with the screw holes on the SSD cage.
2
Press the SSD backplane into place until the retention screws on the SSD backplane engage with the screw holes on the SSD cage.
3
Ensure that the backplane connector is seated firmly in the socket on the system board and tighten the two captive screws to secure
the backplane to the SSD cage.
Figure 41. Installing the SSD backplane
1
SSD backplane connector on system board
2
captive screw (2)
3
SSD backplane
4
screw hole on the SSD cage (2)
5
SSD cage
Next steps
1
Install the SSD carriers into their original bays.
2
Follow the procedure listed in the After working inside your system section.
Related links
Safety instructions
Before working inside your system
Removing the SSD backplane
Installing an SSD carrier
After working inside your system
Installing and removing sled components
97


