background image

Installing and removing sled components

Safety instructions

WARNING: 

Whenever you need to lift the system, get others to assist you. To avoid injury, do not attempt to lift the system by 

yourself.

CAUTION: 

Many repairs may only be done by a certified service technician. You should only perform troubleshooting and simple 

repairs as authorized in your product documentation, or as directed by the online or telephone service and support team. 
Damage due to servicing that is not authorized by Dell is not covered by your warranty. Read and follow the safety instructions 
that are shipped with your product.

NOTE: 

It is recommended that you always use an antistatic mat and antistatic strap while working on components inside the 

system.

CAUTION: 

To ensure proper operation and cooling, all bays in the system and system fans must be always populated with a 

component or a blank.

Before working inside your sled

Prerequisite

Follow the safety guidelines listed in the 

Safety instructions

 section.

Steps

Power off the sled.

Remove the sled from the enclosure.

If applicable, install the I/O connector cover.

CAUTION: 

To prevent damage to the I/O connectors on the sled, ensure that you cover the connectors when you 

remove the sled from the enclosure.

Remove the sled cover.

After working inside your sled

Prerequisite

Follow the safety guidelines listed in the 

Safety instructions

 section.

Steps

Install the sled cover.

If installed, remove the I/O connector cover on the sled.

CAUTION: 

To prevent damage to the I/O connectors, do not touch the connectors or the connector pins.

Install the sled into the enclosure.

Power on the sled.

NOTE: 

The sled iDRAC has to completely initialize first for the sled to power 

on.

5

42

Installing and removing sled components

Summary of Contents for PowerEdge MX840c

Page 1: ...Dell EMC PowerEdge MX840c Installation and Service Manual Regulatory Model E05B Series Regulatory Type E05B001 ...

Page 2: ...amage to hardware or loss of data and tells you how to avoid the problem WARNING A WARNING indicates a potential for property damage personal injury or death 2018 Dell Inc or its subsidiaries All rights reserved Dell EMC and other trademarks are trademarks of Dell Inc or its subsidiaries Other trademarks may be trademarks of their respective owners 2018 12 Rev A01 ...

Page 3: ...stem management applications 18 Options to manage the pre operating system applications 18 System Setup 18 Viewing System Setup 18 System Setup details 19 System BIOS 19 iDRAC Settings utility 39 Device Settings 39 Dell Lifecycle Controller 39 Embedded System Management 39 Boot Manager 40 Viewing Boot Manager 40 Boot Manager main menu 40 One shot UEFI Boot menu 40 System Utilities 40 PXE boot 41 5...

Page 4: ... Drive backplane 60 Drive backplane connectors 60 Removing the drive backplane 61 Installing the drive backplane 62 Cable routing 64 Drive cage 67 Removing the drive cage 67 Installing the drive cage 69 Battery backup unit 70 Removing the battery backup unit module 70 Installing the BBU module 71 Removing the BBU from the BBU cage 72 Installing the BBU into the BBU cage 72 Control panel 73 Removin...

Page 5: ...le 106 Removing the M 2 SATA card 107 Installing the M 2 SATA card 108 Mezzanine card 109 Mezzanine card installation guidelines 109 Removing the mini Mezzanine card blank 109 Installing the mini Mezzanine card blank 110 Removing a mini Mezzanine card 111 Installing a mini Mezzanine card 111 Removing the Mezzanine card 112 Installing the Mezzanine card 114 Optional internal USB memory key 115 Repl...

Page 6: ... 133 Standard operating temperature 134 Expanded operating temperature 135 Thermal 135 8 System diagnostics and indicator codes 137 System ID and status LED indicator codes 137 Power button LED 138 Drive indicator codes 138 Using system diagnostics 139 Dell Embedded System Diagnostics 139 9 Getting help 141 Contacting Dell 141 Documentation feedback 141 Receiving automated support with SupportAssi...

Page 7: ...technical specifications diagnostic tools and guidelines to be followed while installing certain components The PowerEdge MX840c is compatible with the PowerEdge MX7000 enclosure For more information on the enclosure refer to the Installation and Service Manual for the PowerEdge MX7000 at Dell com poweredgemanuals 1 About this document 7 ...

Page 8: ...p to 48 DIMM slots Up to eight 2 5 inch SAS SATA HDD SSD or NVMe drives NOTE All instances of SAS SATA NVMe hard drives and SSDs are referred to as drives in this document unless specified otherwise Topics Front view of the sled Inside the sled Locating the Service Tag of the sled System information label 2 8 Dell EMC PowerEdge MX840c overview ...

Page 9: ...Drives 4 Release lever 5 Lever button 6 Information tag 7 System ID and status LED indicator 8 Power button For more information on the drives and ports see the Technical Specifications section Inside the sled NOTE Components that are hot swappable have orange touch points and the components that are not hot swappable have blue touch points Dell EMC PowerEdge MX840c overview 9 ...

Page 10: ...al guiding hook 7 Power connector 8 Mezzanine card Fabric B2 card 9 Mini Mezzanine card Fabric C2 card connector Figure 3 Inside the sled with system board 1 Backplane 2 Processor 1 socket 3 PEM connector 4 Processor 2 socket 5 Mezzanine card Fabric A1 card 6 Rotational guiding hook 7 Power connector 8 Mezzanine card Fabric B1 card 10 Dell EMC PowerEdge MX840c overview ...

Page 11: ...ue Express Service Code and Service Tag number The Express Service Code and Service Tag are found on the front of the enclosure by pulling out the Information Tag Dell uses this information to route support calls to the appropriate personnel Figure 4 Information Tag of the sled 1 Information Tag 2 Service Tag System information label Figure 5 PowerEdge MX840c service information Dell EMC PowerEdge...

Page 12: ...Figure 6 PowerEdge MX840c memory information 12 Dell EMC PowerEdge MX840c overview ...

Page 13: ...Figure 7 PowerEdge MX840c system board connections Figure 8 PowerEdge MX840c BBU module Dell EMC PowerEdge MX840c overview 13 ...

Page 14: ...EM removal Figure 10 PowerEdge MX840c mezzanine cards removal Figure 11 PowerEdge MX840c PERC cards removal Figure 12 PowerEdge MX840c iDRAC IDSDM module and optional internal USB key removal 14 Dell EMC PowerEdge MX840c overview ...

Page 15: ... administrators more productive and improve the overall availability of Dell systems iDRAC alerts administrators about system issues and enables them to perform remote system management This reduces the need for physical access to the system Options to set up iDRAC IP address You must configure the initial network settings based on your network infrastructure to enable the communication to and fro...

Page 16: ... intel quickassist technology For more information about logging in to the iDRAC and iDRAC licenses see the latest Integrated Dell Remote Access Controller User s Guide at Dell com poweredgemanuals You can also access iDRAC by using RACADM For more information see the RACADM Command Line Interface Reference Guide at Dell com poweredgemanuals Options to install the operating system If the system is...

Page 17: ...manuals Downloading drivers and firmware Dell EMC recommends that you download and install the latest BIOS drivers and systems management firmware on your system Prerequisite Ensure that you clear the web browser cache before downloading the drivers and firmware Steps 1 Go to Dell com support home 2 In the Drivers Downloads section type the Service Tag of your system in the Enter a Service Tag or ...

Page 18: ... configure the BIOS settings iDRAC settings and Device settings of your system NOTE Help text for the selected field is displayed in the graphical browser by default To view the help text in the text browser press F1 You can access system setup by using two methods Standard graphical browser The browser is enabled by default Text browser The browser is enabled by using Console Redirection Viewing ...

Page 19: ...em Setup NOTE If your operating system begins to load before you press F2 wait for the system to finish booting and then restart your system and try again 3 On the System Setup Main Menu screen click System BIOS System BIOS Settings details The System BIOS Settings screen details are explained as follows Option Description System Information Specifies information about the system such as the syste...

Page 20: ...on You can use the System Information screen to view system properties such as Service Tag system model name and the BIOS version Viewing System Information To view the System Information screen perform the following steps 1 Turn on or restart your system 2 Press F2 immediately after you see the following message F2 System Setup NOTE If your operating system begins to load before you press F2 wait...

Page 21: ...em Setup Main Menu screen click System BIOS 4 On the System BIOS screen click Memory Settings Memory Settings details The Memory Settings screen details are explained as follows Option Description System Memory Size Specifies the memory size in the system System Memory Type Specifies the type of memory installed in the system System Memory Speed Specifies the system memory speed System Memory Volt...

Page 22: ...nd presented to OS data is preserved This option is set to Non Volatile DIMM by default NVDIMM N Read Only Enables or disables the read only option for the NVDIMM N If set to Enable all NVDIMM N is forced to read only Read only is intended to be for debug or maintenance when customers would like to access the NVDIMM N data and also to lock it from being updated This option is set to Disable by def...

Page 23: ...Processor Settings details The Processor Settings screen details are explained as follows Option Description Logical Processor Enables or disables the logical processors and displays the number of logical processors If this option is set to Enabled the BIOS displays all the logical processors If this option is set to Disabled the BIOS displays only one logical processor per core This option is set...

Page 24: ... to Enabled by default Logical Processor Idling Enables you to improve the energy efficiency of a system It uses the operating system core parking algorithm and parks some of the logical processors in the system which in turn allows the corresponding processor cores to transition into a lower power idle state This option can only be enabled if the operating system supports it It is set to Disabled...

Page 25: ...ATA Enables the embedded SATA option to be set to Off AHCI or RAID modes This option is set to AHCI Mode by default Security Freeze Lock Sends Security Freeze Lock command to the embedded SATA drives during POST This option is applicable only for AHCI mode This option is set to Enabled by default Write Cache Enables or disables the command for the embedded SATA drives during POST This option is se...

Page 26: ... to set the boot mode to either BIOS or UEFI It also enables you to specify the boot order BIOS The BIOS Boot Mode is the legacy boot mode It is maintained for backward compatibility UEFI The Unified Extensible Firmware Interface UEFI is a new interface between operating systems and platform firmware The interface consists of data tables with platform related information also boot and runtime serv...

Page 27: ...eholder When set to Enabled a Generic RAID HDD placeholder will be placed in the UEFI boot sequence The entry will remain present until an operating system or a bootable file is installed on the RAID disk This setting is only available in UEFI Boot Mode UEFI Boot Settings The UEFI Boot Settings enables you to specify the UEFI boot order Option Description UEFI Boot Sequence Enables you to change t...

Page 28: ...rm the following steps 1 Turn on or restart your system 2 Press F2 immediately after you see the following message F2 System Setup NOTE If your operating system begins to load before you press F2 wait for the system to finish booting and then restart your system and try again 3 On the System Setup Main Menu screen click System BIOS 4 On the System BIOS screen click Network Settings Network Setting...

Page 29: ... screen details are explained as follows Option Description User Accessible USB Ports Configures the user accessible USB ports Selecting All Ports Off disables all USB ports selecting All Ports Off Dynamic disables all USB ports during POST and front ports can be enabled or disabled dynamically by authorized user without resetting the system The USB keyboard and mouse still function in certain USB...

Page 30: ...e IDSDM When set to Mirror Mode data is written on both SD cards After failure of either card and replacement of the failed card the data of the active card is copied to the offline card during the system boot When Internal SD Card Redundancy is set to Disabled only the primary SD card is visible to the OS This option is set to Disabled by default Internal SD Primary Card When Redundancy is set to...

Page 31: ...tion is set to Auto by default Enables the COM port or Console Redirection options This option is set to Off by default Serial Port Address Enables you to set the port address for serial devices This field sets the serial port address to either COM1 or COM2 COM1 0x3F8 COM2 0x2F8 This option is set to Serial Device 2 COM1 by default NOTE You can use only Serial Device 2 for the Serial Over LAN SOL ...

Page 32: ...t Sets the CPU power management This option is set to System DBPM DAPC by default DBPM is Demand Based Power Management Other options include OS DBPM and Maximum Performance Memory Frequency Sets the speed of the system memory You can select Maximum Performance Maximum Reliability or a specific speed This option is set to Maximum Performance by default Turbo Boost Enables or disables the processor...

Page 33: ...tion is set to Enabled by default System Security You can use the System Security screen to perform specific functions such as setting the system password setup password and disabling the power button Viewing System Security To view the System Security screen perform the following steps 1 Turn on or restart your system 2 Press F2 immediately after you see the following message F2 System Setup NOTE...

Page 34: ...isable or clear the storage and endorsement hierarchies When set to Enabled the storage and endorsement hierarchies can be used When set to Disabled the storage and endorsement hierarchies cannot be used When set to Clear the storage and endorsement hierarchies are cleared of any values and then reset to Enabled Intel R TXT Enables or disables the Intel Trusted Execution Technology TXT option To e...

Page 35: ...icy objects The BIOS allows unauthenticated programmatic transitions between modes Deployed Mode Deployed Mode is the most secure mode In Deployed Mode PK must be installed and the BIOS performs signature verification on programmatic attempts to update policy objects Deployed Mode restricts the programmatic mode transitions Audit Mode In Audit mode PK is not present The BIOS does not authenticate ...

Page 36: ... you to reenter your password You have three attempts to type the correct password After the third unsuccessful attempt the system displays an error message that the system has stopped functioning and must be turned off Even after you turn off and restart the system the error message is displayed until the correct password is entered Deleting or changing system and Setup password Prerequisite NOTE...

Page 37: ...ption you can assign a system password For more information see the System Security Settings screen section You cannot disable or change an existing system password NOTE You can use the password status option with the setup password option to protect the system password from unauthorized changes Redundant OS Control You can use the Redundant OS Control screen to set the redundant OS info for redun...

Page 38: ...an use the Miscellaneous Settings screen to perform specific functions such as updating the asset tag and changing the system date and time Viewing Miscellaneous Settings To view the Miscellaneous Settings screen perform the following steps 1 Turn on or restart your system 2 Press F2 immediately after you see the following message F2 System Setup NOTE If your operating system begins to load before...

Page 39: ...es on the iDRAC settings utility needs the iDRAC Enterprise License upgrade For more information about using iDRAC see Dell Integrated Dell Remote Access Controller User s Guide at Dell com idracmanuals Device Settings Device Settings enables you to configure device parameters Dell Lifecycle Controller Dell Lifecycle Controller LC provides advanced embedded systems management capabilities includin...

Page 40: ...s the system continues with the next item in the boot order until the boot is successful or no more boot options are found One shot UEFI Boot menu Enables you to access the UEFI Boot menu and select an one shot boot option to boot from Launch System Setup Enables you to access System Setup Launch Lifecycle Controller Exits the Boot Manager and invokes the Dell Lifecycle Controller program System U...

Page 41: ...figure the networked systems remotely To access the PXE boot option boot the system and then press F12 during POST instead of using standard Boot Sequence from BIOS Setup It does not pull any menu or allows managing of network devices Pre operating system management applications 41 ...

Page 42: ...g all bays in the system and system fans must be always populated with a component or a blank Before working inside your sled Prerequisite Follow the safety guidelines listed in the Safety instructions section Steps 1 Power off the sled 2 Remove the sled from the enclosure 3 If applicable install the I O connector cover CAUTION To prevent damage to the I O connectors on the sled ensure that you co...

Page 43: ...re The sled features quad processors processor expansion module PEM memory modules mezzanine cards mini mezzanine card PERC cards and onboard storage MicroSD card and M 2 SATA Removing the sled from the enclosure Prerequisites 1 Follow the safety guidelines listed in the Safety instructions section 2 Power off the sled Steps 1 Press the blue lever button on the sled to release the lever 2 Holding ...

Page 44: ...ing the enclosure for extended periods of time without a blank installed can cause the enclosure to overheat NOTE The color of the I O connector cover may differ Next step 1 Install the sled or blank into the enclosure Installing the sled into the enclosure Prerequisite 1 Follow the safety guidelines listed in the Safety instructions section Steps 1 Remove the I O connector cover from the I O conn...

Page 45: ...he blue lever button on the sled to release the lever 3 Holding the sled with two hands align the sled with the bay in the enclosure and slide the sled into the enclosure until firmly seated 4 Rotate the lever up until it clicks into place and secures the sled in the enclosure Installing and removing sled components 45 ...
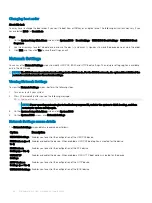
Page 46: ...e sled Removing the sled cover Prerequisites 1 Follow the safety guidelines listed in the Safety instructions section 2 Power off the sled 3 Remove the sled from the enclosure Steps 1 Press the blue release tab on the sled cover and slide the cover towards the rear of the sled 2 Hold the cover on both sides and lift the cover away from the sled 46 Installing and removing sled components ...
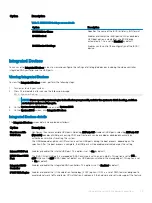
Page 47: ...d in the Safety instructions section 2 Ensure that all internal cables are routed correctly and connected and no tools or extra parts are left inside the sled Steps 1 Align the tabs on the sled cover with the guide slots on the sled 2 Slide the cover towards the front of the sled until it locks in place Installing and removing sled components 47 ...

Page 48: ...processor expansion module PEM Air shroud on the system board Removing the air shroud from the PEM Prerequisites CAUTION Never operate your system with the air shroud removed The system may get overheated quickly resulting in shutdown of the system and loss of data 1 Follow the safety guidelines listed in the Safety instructions section 2 Follow the procedure listed in the Before working inside yo...

Page 49: ... on the PEM Prerequisites 1 Follow the safety guidelines listed in the Safety instructions section 2 Follow the procedure listed in the Before working inside your sled section Steps 1 Align the tabs on the air shroud with the slots on the PEM 2 Place the air shroud on the PEM Installing and removing sled components 49 ...

Page 50: ...e your system with the air shroud removed The system may get overheated quickly resulting in shutdown of the system and loss of data 1 Follow the safety guidelines listed in the Safety instructions section 2 Follow the procedure listed in the Before working inside your sled section 3 Remove the PEM Step Hold the edges of the air shroud lift it up and away from the sled 50 Installing and removing s...

Page 51: ...ard Prerequisites 1 Follow the safety guidelines listed in the Safety instructions section 2 Follow the procedure listed in the Before working inside your sled section Steps 1 Align the slots on the air shroud with the guide pins on the system board 2 Lower the air shroud into the sled until it is firmly seated Installing and removing sled components 51 ...

Page 52: ...ure listed in the Before working inside your sled section 3 Disconnect the cable connecting the processor expansion module PEM to the backplane 4 Remove the air shroud from the PEM Steps 1 Raise the release lever on the PEM until the PEM disengages from the sled 2 Holding the blue handle and release lever lift the PEM away from the sled CAUTION To avoid damage to the components on the edges of the...

Page 53: ...ur sled section Steps 1 Lift the processor expansion module PEM by holding the blue handle and release lever CAUTION To avoid damage to the components on the edges of the PEM board carefully lift and place the PEM by holding only the blue handle and release lever 2 Align the guides on the PEM with the guide slots on the sled and place the PEM on the sled 3 Lower the release lever until it hooks in...

Page 54: ...0c sled CAUTION Before attempting to remove or install a drive while the sled is running see the documentation for the storage controller card to ensure that the host adapter is configured correctly to support hot swap drive removal and insertion CAUTION Do not power off or restart your sled while the drive is being formatted Doing so can cause a drive failure When you format a drive allow enough ...

Page 55: ...orted Step Press the release button and slide the drive blank out of the drive slot Figure 25 Removing a drive blank Next step 1 Install a drive or a drive blank Installing a drive blank Prerequisite Follow the safety guidelines listed in the Safety instructions section CAUTION Mixing drive blanks from previous generations of PowerEdge servers is not supported Step Insert the drive blank into the ...

Page 56: ...ore attempting to remove or install a drive while the system is running see the documentation for the storage controller card to ensure that the host adapter is configured correctly to support drive removal and insertion CAUTION Mixing drives carriers from previous generations of PowerEdge servers is not supported CAUTION To prevent data loss ensure that your operating system supports hot swap dri...

Page 57: ...en installing a drive ensure that the adjacent drives are fully installed Inserting a drive carrier and attempting to lock its handle next to a partially installed carrier can damage the partially installed carrier s shield spring and make it unusable CAUTION To prevent data loss ensure that your operating system supports hot swap drive installation See the documentation supplied with your operati...

Page 58: ... lock the drive in place Figure 28 Installing a drive carrier Removing a drive from the drive carrier Prerequisite Follow the safety guidelines listed in the Safety instructions section CAUTION Mixing drives from previous generations of PowerEdge servers is not supported Steps 1 Using a Phillips 1 screwdriver remove the screws from the slide rails on the drive carrier 2 Lift the drive out of the d...

Page 59: ...r generations of PowerEdge servers is not supported NOTE When installing a drive into the drive carrier ensure that the screws are torqued to 4 in lbs Steps 1 Place the drive into the drive carrier with the connector end of the drive towards the back of the carrier 2 Align the screw holes on the drive with the screws holes on the drive carrier 3 Using a Phillips 1 screwdriver secure the drive to t...

Page 60: ...NVMe front accessible drives in slots 0 to 7 Dual processor sled NVMe drives are supported in the slots 4 to 7 NOTE NVMe is not supported in the slots 0 to 3 Quad processor sled NVMe drives are supported in the slots 0 to 7 Six drives Up to six 2 5 inch SAS SATA Nearline SAS or NVMe front accessible drives in slots 0 to 5 Dual processor sled NVMe drives are supported in the slots 2 to 5 NOTE NVMe ...

Page 61: ...connector 5 AUX 2 cable connector 6 AUX 1 cable connector 7 Power cable connector BP PWR Removing the drive backplane Prerequisites CAUTION To prevent damage to the drives and backplane remove the drives from the sled before removing the backplane CAUTION Note the number of each drive and temporarily label them before you remove the drive so that you can replace them in the same locations 1 Follow...

Page 62: ...33 Removing the drive backplane Next step 1 Install the drive backplane Installing the drive backplane Prerequisites 1 Follow the safety guidelines listed in the Safety instructions section 2 Follow the procedure listed in the Before working inside your sled section Steps 1 Align the hooks and captive screws on the drive backplane with the slots and screw holes on the sled 2 Lower the drive backpl...

Page 63: ... 1 Connect all the cables to the drive backplane connectors 2 Install the drives 3 Install the PEM 4 Install the air shroud on the PEM 5 Follow the procedure listed in the After working inside your sled section Installing and removing sled components 63 ...
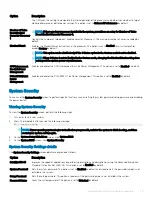
Page 64: ...Cable routing Figure 35 Cable routing 6 x 2 5 inch drive backplane with PERC card Figure 36 Cable routing 6 x 2 5 inch drive backplane with Jumbo PERC card 64 Installing and removing sled components ...

Page 65: ...Figure 37 Cable routing 6 x 2 5 inch drive backplane Figure 38 Cable routing 6 x 2 5 inch drive backplane with PEM board Installing and removing sled components 65 ...
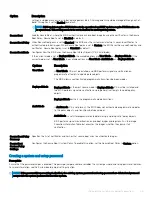
Page 66: ...Figure 39 Cable routing 8 x 2 5 inch drive backplane with PERC card Figure 40 Cable routing 8 x 2 5 inch drive backplane with Jumbo PERC card 66 Installing and removing sled components ...

Page 67: ...ne with PEM board Drive cage The drive cage contains the drives and the battery backup unit module Removing the drive cage Prerequisites CAUTION To prevent damage to the drives and backplane you must remove the drives from the sled before removing the backplane Installing and removing sled components 67 ...
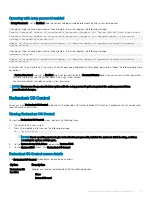
Page 68: ...ed 1 Follow the safety guidelines listed in the Safety instructions section 2 Follow the procedure listed in the Before working inside your sled section 3 Remove all the drives 4 Remove the PEM 5 Disconnect the cables that are connected to the drive backplane 6 Remove the drive backplane Steps 1 Using the Phillips 1 screwdriver remove the screws that secure the drive cage to the sled 2 Lift the dr...

Page 69: ...ted in the Safety instructions section 2 Follow the procedure listed in the Before working inside your sled section Steps 1 Place the drive cage into the sled aligning with the screw holes on the sled 2 Using the Phillips 1 screwdriver secure the drive cage with screws Figure 44 Installing the drive cage Next steps 1 Install the drive backplane 2 Connect the cables to the drive backplane 3 Install...

Page 70: ...he two cables from the battery backup unit BBU to the connectors on the system board 5 Remove the drive cage Steps 1 Press the tab on the side and push the BBU module from the rear end of the drive cage to release the BBU module 2 Holding the BBU module by the edges slide the BBU module out of the drive cage Figure 45 Removing the BBU module Next steps 1 Remove the BBU from the BBU cage 2 Install ...

Page 71: ... Install the drive cage Steps 1 Route the cables on the BBU module through the front end of the sled 2 Slide the BBU module until it firmly locks in place with the drive cage Figure 46 Installing the BBU module 3 Connect the cables on the BBU to the connectors on the system board Next steps 1 Install the PEM 2 Follow the procedure listed in the After working inside your sled section Installing and...

Page 72: ...the BBU cage 2 Lift and slide the BBU out of the BBU cage Figure 47 Removing the BBU from the BBU cage Next step 1 Install the BBU into the BBU cage Installing the BBU into the BBU cage Prerequisites 1 Follow the safety guidelines listed in the Safety instructions section 2 Follow the procedure listed in the Before working inside your sled section Steps 1 Slide the BBU into the BBU cage 2 Using a ...

Page 73: ...safety guidelines listed in the Safety instructions section 2 Follow the procedure listed in the Before working inside your sled section 3 Remove the PEM 4 Remove all the drives 5 Remove the backplane 6 Remove the drive cage 7 Remove the BBU module Steps 1 Pull the blue strap to disconnect the control panel cable connected to the system board 2 Using a Phillips 1 screwdriver remove the screws that...

Page 74: ... Safety instructions section 2 Follow the procedure listed in the Before working inside your sled section Steps 1 Connect the control panel cable to the connector on the system board 2 Align the control panel with the slots on the sled 3 Using a Phillips 1 screwdriver secure the control panel to the sled with the screws 74 Installing and removing sled components ...
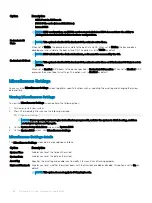
Page 75: ...em memory The sled supports DDR4 registered DIMMs RDIMMs and load reduced DIMMs LRDIMMs System memory holds the instructions that are executed by the processor Memory channels and population The sled supports DDR4 registered DIMMs RDIMMs and load reduced DIMMs LRDIMMs The sled memory holds the instructions that are executed by the processor NOTE MT s indicates DIMM speed in MegaTransfers per secon...

Page 76: ... or Dense Configuration Optimized Maximum supported DIMM frequency of the processors Your sled contains 48 memory sockets split into four sets of 12 sockets one set per processor Each 12 socket set is organized into six channels In each channel the release tabs of the first socket are marked white the second socket black and the third socket green Figure 51 Memory sockets on the system board 76 In...

Page 77: ...12 Processor 2 Slots B1 and B7 Slots B2 and B8 Slots B3 and B9 Slots B4 and B10 Slots B5 and B11 Slots B6 and B12 Processor 3 Slots C1 and C7 Slots C2 and C8 Slots C3 and C9 Slots C4 and C10 Slots C5 and C11 Slots C6 and C12 Processor 4 Slots D1 and D7 Slots D2 and D8 Slots D3 and D9 Slots D4 and D10 Slots D5 and D11 Slots D6 and D12 The following table shows the memory populations and operating f...

Page 78: ...f rank count If memory modules with different speeds are installed they will operate at the speed of the slowest installed memory module s Populate memory module sockets only if a processor is installed For dual processor systems sockets A1 to A12 and sockets B1 to B12 are available For quad processor systems sockets A1 to A12 sockets B1 to B12 sockets C1 to C12 and sockets D1 to D12 are available...

Page 79: ...ons see the NVDIMM N User Guide at Dell com poweredgemanuals Table 9 Supported NVDIMM N for dual processor configurations Configuration Description Memory population rules RDIMMs NVDIMM N Configuration 1 12x 16 GB RDIMMs 1x NVDIMM N Processor1 A1 2 3 4 5 6 Processor2 B1 2 3 4 5 6 Processor1 A7 Configuration 2 12x 32 GB RDIMMs 1x NVDIMM N Same for all 12x RDIMM configurations See Configuration 1 Pr...

Page 80: ... 12 Processor2 B10 11 12 Configuration 13 12x 16 GB RDIMMs 12x NVDIMM Ns Same for all 12x RDIMM configurations See Configuration 1 Processor1 A7 8 9 10 11 12 Processor2 B7 8 9 10 11 12 Configuration 14 12x 32 GB RDIMMs 12x NVDIMM Ns Same for all 12x RDIMM configurations See Configuration 1 Processor1 A7 8 9 10 11 12 Processor2 B7 8 9 10 11 12 Table 10 Supported NVDIMM N for quad processor configur...

Page 81: ... RDIMMs 4x NVDIMM Ns Processor1 A1 2 3 4 5 6 Processor2 B1 2 3 4 5 6 Processor3 C1 2 3 4 5 6 Processor4 D1 2 3 4 5 6 Processor1 A7 8 Processor2 B7 8 Configuration 8 24x 32GB RDIMMs 4x NVDIMMs Processor1 A1 2 3 4 5 6 Processor2 B1 2 3 4 5 6 Processor3 C1 2 3 4 5 6 Processor4 D1 2 3 4 5 6 Processor1 A7 8 Processor2 B7 8 Configuration 9 44x 32GB RDIMMs 4x NVDIMM Ns Processor1 A1 2 3 4 5 6 7 8 9 10 Pr...

Page 82: ... 6 Processor3 C1 2 3 4 5 6 7 8 9 10 11 12 Processor 4 D1 2 3 4 5 6 7 8 9 10 11 12 Processor1 A7 8 9 10 11 12 Processor2 B7 8 9 10 11 12 Mode specific guidelines The configurations allowed depend on the memory mode selected in the System BIOS Table 11 Memory operating modes Memory Operating Mode Description Optimizer Mode The Optimizer Mode if enabled the DRAM controllers operate independently in t...

Page 83: ...ultiplier changes to 1 2 ranks channel NOTE To use memory sparing this feature must be enabled in the BIOS menu of System Setup NOTE Memory sparing does not offer protection against a multi bit uncorrectable error Dell Fault Resilient Mode The Dell Fault Resilient Mode if enabled the BIOS creates an area of memory that is fault resilient This mode can be used by an OS that supports the feature to ...

Page 84: ...Ms must be populated in the order specified Requires two ranks or more per channel Multi rank sparing population order A 1 B 1 A 2 B 2 A 3 B 3 A 4 B 4 A 5 B 5 A 6 B 6 DIMMs must be populated in the order specified Requires three ranks or more per channel Fault resilient population order A 1 2 3 4 5 6 B 1 2 3 4 5 6 A 7 8 9 10 11 12 B 7 8 9 10 11 12 Supported with 6 or 12 DIMMs per processor Quad pr...

Page 85: ...ated in the order specified Requires two ranks or more per channel Multi rank spare population order A 1 B 1 C 1 D 1 A 2 B 2 C 2 D 2 A 3 B 3 C 3 D 3 A 4 B 4 C 4 D 4 DIMMs must be populated in the order specified Requires three ranks or more per channel Fault resilient population order A 1 2 3 4 5 6 B 1 2 3 4 5 6 C 1 2 3 4 5 6 D 1 2 3 4 5 6 A 7 8 9 10 11 12 B 7 8 9 10 11 12 C 7 8 9 10 11 12 D 7 8 9...

Page 86: ...rd or PEM Next steps 1 Install a memory module 2 If you are removing the memory module permanently install a memory module blank The procedure to install a memory module blank is similar to that of the memory module NOTE For the minimum sled configuration two processors are required on the system board Install the processor DIMM blank on the processor 3 4 sockets on the PEM board Installing a memo...

Page 87: ...er installing the memory module on the system board a Install the air shroud into the system board b Install the PEM 2 After installing the memory module on the PEM install the air shroud on the PEM 3 Follow the procedure listed in the After working inside your sled section 4 To verify if the memory module has been installed properly press F2 and navigate to System Setup Main Menu System BIOS Memo...

Page 88: ...on 3 For removing the processor and heat sink module from the PEM remove the air shroud from the PEM 4 For removing the processor and heat sink module from the system board a Remove the PEM b Remove the air shroud on the system board Steps 1 Using a Torx T30 screwdriver loosen the screws on the heat sink in the order below a Loosen the first screw three turns b Loosen the second screw completely c...

Page 89: ... a system board 1 Follow the safety guidelines listed in the Safety instructions section 2 Follow the procedure listed in the Before working inside your sled section 3 Remove the processor and heat sink module Steps 1 Place the heat sink with the processor side facing up 2 Insert a flat blade screwdriver into the release slot marked with a yellow label Twist do not pry the screwdriver to break the...

Page 90: ... processor tray 5 Flex the outer edges of the bracket to release the bracket from the processor NOTE Ensure that the processor and the bracket are placed in the tray after you remove the heat sink Figure 57 Removing the processor bracket Next step 1 Install the processor into the processor and heat sink module 90 Installing and removing sled components ...

Page 91: ...aligned with the pin 1 indicator on the processor before placing the bracket on the processor NOTE Ensure that the processor and the bracket are placed in the tray before you install the heat sink Figure 58 Installing the processor bracket 3 If you are using an existing heat sink remove the thermal grease from the heat sink by using a clean lint free cloth 4 Use the thermal grease syringe included...

Page 92: ... locks onto the heat sink NOTE Ensure that the two guide pin holes on the bracket match the guide holes on the heat sink Do not press on the heat sink fins Ensure that the pin 1 indicator on the heat sink is aligned with the pin 1 indicator on the bracket before placing the heat sink onto the processor and bracket 92 Installing and removing sled components ...

Page 93: ... the Before working inside your sled section 3 If installed remove the processor dust cover Steps 1 Align the pin 1 indicator of the heat sink to the system board or PEM and then place the processor and heat sink module PHM on the processor socket CAUTION To avoid damaging the fins on the heat sink do not press down on the heat sink fins NOTE Ensure that the PHM is held parallel to the system boar...

Page 94: ...uld not be tightened to more than 0 11 kgf m 1 13 N m or 10 0 2 in lbf Figure 61 Installing the processor and heat sink module Next steps 1 After installing the processor and heat sink module on the system board a Install the air shroud into the system board b Install the PEM 2 After installing the processor and heat sink module on the PEM install the air shroud on the PEM 3 Follow the procedure l...

Page 95: ...oard CAUTION If either the system board or iDRAC card fails it is required to replace the system board and iDRAC card simultaneously Step Hold the blue pull tag and lift the iDRAC card away from the sled Figure 62 Removing the iDRAC card NOTE The iDRAC card is not swappable with other MX series sleds in the MX7000 enclosure NOTE The procedure to remove vFlash card is similar to removing a MicroSD ...

Page 96: ...ng inside your sled section CAUTION If either the system board or iDRAC card fails it is required to replace the system board and iDRAC card simultaneously Steps 1 Align the iDRAC card with the connector and guide pin on the system board 2 Lower the iDRAC card on the system board connector and press the blue push points until the iDRAC card is firmly seated on the system board connector 96 Install...

Page 97: ...imilar to installing a MicroSD card Figure 65 Installing a vFlash card Next steps 1 Install the air shroud on the system board 2 Install the PEM 3 Follow the procedure listed in the After working inside your sled section PERC cards The PowerEdge MX840c sled includes dedicated slots on the system board and PEM board for PERC cards Installing and removing sled components 97 ...

Page 98: ...HBA330 MX non RAID card 2 Holding the blue pull tag lift the PERC card away from the sled Figure 66 Removing the PERC card Next step 1 Install the PERC card Installing the PERC card Prerequisites 1 Follow the safety guidelines listed in the Safety instructions section 2 Follow the procedure listed in the Before working inside your sled section Steps 1 Lift the blue pull tag to raise the lever up o...

Page 99: ... section 2 Follow the procedure listed in the Before working inside your sled section 3 Remove the PEM 4 Remove the air shroud from the system board 5 Disconnect the cable that is connected to the Jumbo PERC card Steps 1 Lift the two blue pull tags to raise the lever up on the Jumbo PERC card 2 Holding both the blue pull tags lift the Jumbo PERC card away from the sled 3 Install the connector cap ...

Page 100: ...ection 3 Remove the iDRAC card before installing the Jumbo PERC card Steps 1 Remove the connector cap on the I O connector from the Jumbo PERC card 2 Lift the blue pull tags to raise the lever up on the Jumbo PERC card 3 Align the connector guides and guide slots on the Jumbo PERC card and the sled 4 Lower and press the Jumbo PERC card to firmly seat on the system board connector and close the lev...

Page 101: ...he IDSDM module Removing the optional IDSDM module Prerequisites 1 Follow the safety guidelines listed in the Safety instructions section 2 Follow the procedure listed in the Before working inside your sled section 3 Remove the PEM 4 Remove the air shroud from the system board 5 If you are replacing the IDSDM module remove the MicroSD cards NOTE Temporarily label each MicroSD card with the corresp...

Page 102: ...ion 2 Follow the procedure listed in the Before working inside your sled section Steps 1 Locate the IDSDM module connector on the system board NOTE To locate IDSDM connector see the System board jumpers and connectors section 2 Align the IDSDM module with the connector on the system board 3 Press the IDSDM module until it is firmly seated on the system board 102 Installing and removing sled compon...

Page 103: ...ion Removing a MicroSD card Prerequisites 1 Follow the safety guidelines listed in the Safety instructions section 2 Follow the procedure listed in the Before working inside your sled section 3 Remove the PEM 4 Remove the IDSDM module Steps 1 Locate the MicroSD card slot on the IDSDM module 2 Press the card to partially release from the slot 3 Hold the MicroSD card and remove it from the slot NOTE...

Page 104: ...the Internal SD Card Port is enabled in System Setup NOTE If reinstalling ensure that you install the MicroSD cards into the same slots based on the labels you had marked on the cards during removal Steps 1 Locate the MicroSD card slot on the IDSDM module Orient the MicroSD card appropriately and place the contact pin end of the card into the slot NOTE The slot is keyed to ensure correct installat...

Page 105: ...tem The module supports up to two 6 Gbps M 2 SATA cards The M 2 BOSS module has a x8 connector using PCIe gen 3 0 x2 lanes Removing the M 2 BOSS module Prerequisites 1 Follow the safety guidelines listed in the Safety instructions section 2 Follow the procedure listed in the Before working inside your sled 3 Remove the PEM 4 Remove the air shroud from the system board Step Hold the blue pull tag a...

Page 106: ...fety guidelines listed in the Safety instructions section 2 Follow the procedure listed in the Before working inside your sled Steps 1 Align the M 2 BOSS module connector with the connector and guide on the system board 2 Press on the M 2 BOSS module until it is firmly seated on the system board 106 Installing and removing sled components ...

Page 107: ...d Prerequisites 1 Follow the safety guidelines listed in the Safety instructions section 2 Follow the procedure listed in the Before working inside your sled 3 Remove the PEM 4 Remove the M 2 BOSS module Steps 1 Using the Phillips 1 screwdriver remove the screw on the M 2 BOSS module 2 Pull the SATA card out of the connector and lift the card away from the module Installing and removing sled compo...

Page 108: ... Follow the procedure listed in the Before working inside your sled Steps 1 Align the M 2 SATA card at angle of 45 degrees with the SATA connector on the M 2 BOSS module 2 Press the M 2 SATA card into the SATA connector until firmly seated in place 3 Push down the M 2 SATA card and using Phillips 1 screwdriver secure the M 2 SATA card to the module 108 Installing and removing sled components ...

Page 109: ...n I O module bays C1 and C2 PCIe Mezzanine card slot A B supports Fabric A B This card must match the fabric type of I O modules that are installed in I O module bays A1 B1 and A2 B2 Removing the mini Mezzanine card blank Prerequisites 1 Follow the safety guidelines listed in the Safety instructions section 2 Follow the procedure listed in the Before working inside your sled section 3 For removing...

Page 110: ...listed in the Safety instructions section 2 Follow the procedure listed in the Before working inside your sled section Steps 1 Align the slot on the Mezzanine card blank with the guide on the sled or PEM 2 Place the mini Mezzanine card blank on the mini Mezzanine card slot on the sled or PEM Figure 79 Installing the mini Mezzanine card blank 110 Installing and removing sled components ...
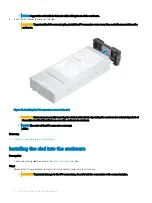
Page 111: ...ise the lever up on the mini Mezzanine card 2 Hold the lever and the edge of the mini Mezzanine card to lift the mini Mezzanine card away from the sled or PEM Figure 80 Removing the mini Mezzanine card 3 Install the connector cap on the I O connector of the mini Mezzanine card NOTE The PowerEdge MX840c sled supports HBA330 MMZ and Fiber channel MMZ which are installed in the mini Mezzanine card sl...

Page 112: ...e installed in the mini Mezzanine card slot Next steps 1 Install the air shroud on the system board 2 Install the PEM 3 Follow the procedure listed in the After working inside your sled section Removing the Mezzanine card Prerequisites 1 Follow the safety guidelines listed in the Safety instructions section 2 Follow the procedure listed in the Before working inside your sled section 3 For removing...

Page 113: ...Figure 82 Removing the Mezzanine card from the system board Figure 83 Removing the Mezzanine card from the PEM Installing and removing sled components 113 ...
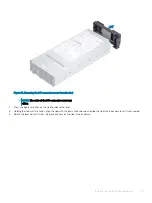
Page 114: ...working inside your sled section Steps 1 Align the connector on the Mezzanine card with the connector on the system board 2 Place the Mezzanine card on the connector and press the blue push point until firmly seated 3 Using the Phillips 2 screwdriver tighten the captive screw on the Mezzanine card Figure 84 Installing the Mezzanine card on the system board 114 Installing and removing sled componen...

Page 115: ...tional USB memory key can be installed in the internal USB 3 0 port and can be used as a boot device security key or mass storage device The internal USB port is on the system board NOTE To locate the internal USB port on the system board see the System board jumpers and connectors section Replacing the optional internal USB memory key Prerequisites CAUTION To avoid interference with other compone...

Page 116: ...rectly installed Replace the battery only with the same or equivalent type recommended by the manufacturer For more information see the safety information that shipped with your system 1 Follow the safety guidelines listed in the Safety instructions section 2 Follow the procedure listed in the Before working inside your sled section 3 Remove the PEM Steps 1 Locate the battery socket For more infor...

Page 117: ...rd or iDRAC card fails it is required to replace the system board and iDRAC card simultaneously NOTE It is required to reactivate the licenses after the system board replacement CAUTION You may find the CMOS battery loss or CMOS checksum error displayed during the first instance of powering on the system after the processor or system board replacement which is expected To fix this simply go to set...

Page 118: ...memory module blanks n Drives o Backplane p Control panel q Drive cage Steps 1 Disconnect all cables from the system board CAUTION Do not lift the system board by holding a memory module processor or other components 2 Using the Phillips 2 screwdriver remove all the screws that secure the system board to the chassis 3 Holding the edges lift the system board out of the sled Figure 88 Removing the s...
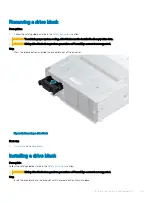
Page 119: ...ement Steps 1 Unpack the replacement system board assembly CAUTION Do not lift the system board by holding a memory module processor or other components 2 Holding the system board by the edges place the system board into the sled 3 Using the Phillips 2 screwdriver secure the system board to the chassis with the screws Figure 89 Installing the system board Next steps 1 Replace the following a TPM N...

Page 120: ... more information see the Entering the system Service Tag by using System Setup section c Update the BIOS and iDRAC versions d Re enable the Trusted Platform Module TPM For more information see the Upgrading the Trusted Platform Module section 5 Import your new or existing iDRAC Enterprise license For more information see Integrated Dell Remote Access Controller User s Guide at Dell com poweredgem...

Page 121: ...ices Software can use a TPM to authenticate hardware devices Because each TPM chip has a unique and secret RSA key which is embedded during the manufacture of the TPM it is capable of performing platform authentication operation This section contains information about installing the TPM and initializing the TPM for BitLocker users and Intel TXT users Upgrading the Trusted Platform Module Prerequis...

Page 122: ... the TPM into the TPM connector such that the plastic rivet aligns with the slot on the system board 3 Press the plastic rivet until the rivet snaps into place Figure 90 Installing the TPM Next steps 1 Install the PEM 2 Follow the procedure listed in the After working inside your sled section Initializing TPM for BitLocker users Initialize the TPM For more information see https technet microsoft c...

Page 123: ...em BIOS System Security Settings 3 From the TPM Security option select On 4 Save the settings 5 Restart your system 6 Enter System Setup again 7 On the System Setup Main Menu screen click System BIOS System Security Settings 8 Select the TPM Advanced Settings option 9 From the TPM2 Algorithm Selection option select SHA256 then go back to System Security Settings screen 10 On the System Security Se...

Page 124: ...e system board to install components and cables correctly Topics System board jumpers and connectors System board jumper settings Disabling forgotten password System board jumpers and connectors Figure 91 System board jumpers and connectors Table 14 System board jumpers and connectors Item Connector Description 1 A7 A1 A8 A2 A9 A3 Memory module sockets 2 TPM_MODULE TPM module connector 3 SATA_CONN...

Page 125: ...PU1 Mezzanine card Fabric A1 card connector 14 CPU2 Processor 2 15 UPI UPI connector 16 INTERNAL USB Internal USB 3 0 17 J_MEZZ_B1 CPU2 Mezzanine card Fabric B1 card connector 18 B10 B4 B11 B5 B12 B6 Memory module sockets 19 SYS_PWR_CONN System power connector 20 J_MINI_MEZZ_C1 CPU2 Mini Mezzanine card Fabric C1 card connector 21 IDRAC_MODULE iDRAC card connector 22 AUX 1 AUX 1 cable connector 23 ...

Page 126: ... D2 D8 D1 D7 Memory module sockets 6 CPU4 Processor 4 7 J_MEZZ_B2 CPU4 Mezzanine card Fabric B2 card connector 8 D10 D4 D11 D5 D12 D6 Memory module sockets 9 SYS_PWR_CONN System power connector 10 J_MINI_MEZZ_C2 CPU4 Mini Mezzanine card Fabric C2 card connector 11 AUX4 AUX 4 connector 12 AUX3 AUX 3 connector System board jumper settings For information on resetting the password jumper to disable a...

Page 127: ... not covered by your warranty Read and follow the safety instructions that are shipped with your product Steps 1 Remove the sled from the enclosure 2 Remove the sled cover 3 Remove the PEM 4 Remove the drive cage 5 Move the jumper on the system board jumper from pins 2 and 4 to pins 4 and 6 6 Install the drive cage 7 Install the PEM 8 Install the sled cover The existing passwords are not disabled ...

Page 128: ...Supported operating systems System battery specifications Memory specifications Drives Ports and connectors specifications Environmental specifications Sled dimensions Figure 93 Dimensions of the PowerEdge MX840c sled Table 17 Dimensions of the PowerEdge MX840c sled X Y Z handle closed 250 2 mm 9 85 inches 85 5 mm 3 37 inches 618 mm 24 33 inches 7 128 Technical specifications ...

Page 129: ...d Remote Access Controller User s Guide at Dell com poweredgemanuals For more information about drivers documentation and white papers on the Intel QAT see https 01 org intel quickassist technology Supported operating systems The PowerEdge MX840c supports the following operating systems Red Hat Enterprise Linux SUSE Linux Enterprise Server Canonical Ubuntu LTS Microsoft Windows Server with Hyper V...

Page 130: ...DIMMs per memory channel Table 21 DIMM performance details DIMM type DIMM ranking Capacity DIMM rated voltage speed 1 DIMM per channel DPC 2 DIMM per channel DPC RDIMM 1R 2R 8 GB 16 GB 32 GB DDR4 1 2 V 2666 2666 2666 LRDIMM 4R 8R 64 GB DDR4 1 2 V 2666 2666 2666 Drives Table 22 Supported drive options for the PowerEdge MX840c sled Drives Specifications Eight drives Up to eight 2 5 inch SAS SATA Nea...

Page 131: ...e MicroSD cards capacity for IDSDM are 16 32 64 GB The IDSDM module is available with single MicroSD card in either slot or in redundant mode with two MicroSD cards installed NOTE The dip switch is on the IDSDM module for write protection NOTE One IDSDM card slot is dedicated for redundancy NOTE It is recommended to use Dell branded MicroSD cards associated with the IDSDM configured systems PERC c...

Page 132: ...ne B is connected to processor 2 and processor 4 Environmental specifications NOTE For additional information about environmental certifications please refer to the Product Environmental Datasheet located with the Manuals Documents on support dell com Table 25 Temperature specifications Temperature Specifications Storage 40 C to 65 C 40 F to 149 F Continuous operation for altitude less than 950 m ...

Page 133: ... 29 Maximum altitude specifications Maximum altitude Specifications Operating 3048 m 10 000 ft Storage 12 000 m 39 370 ft Table 30 Operating temperature derating specifications Operating temperature derating Specifications Up to 35 C 95 F Maximum temperature is reduced by 1 C 300 m 1 F 547 ft above 950 m 3 117 ft 35 C to 40 C 95 F to 104 F Maximum temperature is reduced by 1 C 175 m 1 F 319 ft abo...

Page 134: ... be free of corrosive dust Residual dust present in the air must have a deliquescent point less than 60 relative humidity NOTE This condition applies to data center and non data center environments Table 32 Gaseous contamination specifications Gaseous contamination Specifications Copper coupon corrosion rate 300 Å month per Class G1 as defined by ANSI ISA71 04 1985 Silver coupon corrosion rate 200...

Page 135: ... in the System Event Log Expanded operating temperature restrictions Do not perform a cold startup below 5 C The operating temperature specified is for a maximum altitude of 3050 m 10 000 ft Higher wattage processor Thermal Design Power TDP 165 W are not supported Non Dell qualified peripheral cards and or peripheral cards greater than 30 W are not supported PCIe SSD is not supported NVDIMM is not...

Page 136: ...No restriction No restriction No support for 165 W processors and above DIMM No restriction No restriction No restriction No support for NVDIMM Drive No restriction No restriction No restriction No support for NVMe drive Card No restriction No restriction No restriction No support for card power above 30 W 136 Technical specifications ...

Page 137: ...icator codes The system ID indicator is located on the control panel of your sled Figure 94 System ID and status LED indicators Table 36 System ID and status LED indicator codes System ID indicator code Condition Off Indicates system is in the off state Blinking amber or steady amber Indicates system fault or error condition Steady blue Indicates normal operating state Blinking blue Indicates syst...

Page 138: ... status LED indicator The indicators provide information about the current status of the drive The activity LED indicator indicates whether the drive is currently in use or not The status LED indicator indicates the power condition of the drive Figure 96 Drive indicators 1 Drive activity LED indicator 2 Drive status LED indicator 3 Drive capacity NOTE If the drive is in the Advanced Host Controlle...

Page 139: ...ent ePSA diagnostics The Embedded System Diagnostics provides a set of options for particular device groups or devices allowing you to Run tests automatically or in an interactive mode Repeat tests Display or save test results Run thorough tests to introduce additional test options to provide extra information about the failed device s View status messages that inform you if tests are completed su...

Page 140: ...ption Configuration Displays the configuration and status information of all detected devices Results Displays the results of all tests that are run System health Provides the current overview of the system performance Event log Displays a time stamped log of the results of all tests run on the system This is displayed if at least one event description is recorded 140 System diagnostics and indica...

Page 141: ...neral support a Select your product category b Select your product segment c Select your product The support page that lists the various support categories is displayed 5 For contact details of Dell Global Technical Support a Click Global Technical Support b The Contact Technical Support page is displayed with details to call chat or e mail the Dell Global Technical Support team Documentation feed...

Page 142: ...o the system service tag such as configuration and warranty you can access QR code located on the system Information tag Prerequisites Ensure that your smart phone or tablet has the QR code scanner installed The QRL includes the following information about your system How to videos Reference materials including the Owner s Manual LCD diagnostics and mechanical overview A direct link to Dell to con...

Page 143: ...tion For information about setting up your system see the Getting Started Guide document that is shipped with your system Dell com poweredgemanuals Configuring your system For information about the iDRAC features configuring and logging in to iDRAC and managing your system remotely see the Integrated Dell Remote Access Controller User s Guide For information about understanding Remote Access Contr...

Page 144: ...sentials User s Guide Dell com openmanagemanuals OpenManage Essentials For information about installing and using Dell SupportAssist see the Dell EMC SupportAssist Enterprise User s Guide Dell com serviceabilitytools For information about partner programs enterprise systems management see the OpenManage Connections Enterprise Systems Management documents Dell com openmanagemanuals Working with the...

Reviews: