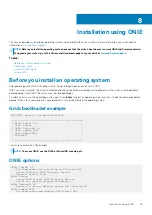
Press <DEL> or <F2> to enter setup.
Welcome to GRUB!
Manual NOS installation
If you do not use the ONIE-based automatic installation of a NOS image and if a DHCP server is not available, you can manually install the
image. Configure the Management port and provide the software image file to start the installation.
1. Save the NOS software image on an SCP/TFTP/FTP server.
2. Power up the switch and select
ONIE Rescue
for manual installation.
3. (optional) Stop DHCP discovery if you were not able to select
ONIE Rescue
mode.
$ onie-discovery-stop
4. Configure the IP addresses on the Management port, where
x.x.x.x
represents your internal IP address. After you configure the
Management port, the response is
up
.
$ ifconfig eth0
x.x.x.x
netmask xxx.xxx.x.x up
5. Install the software on the device. The installation command accesses the NOS from the specified SCP, TFTP, or FTP URL, creates
partitions, verifies installation, and reboots itself.
$ onie-nos-install
image_url
For example, enter
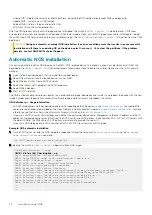
ONIE:/ # onie-nos-install ftp://a.b.c.d/
<NOS-image_name>
.bin
Where
a.b.c.d
represents the location to download the image file from, and
x.x.xx
represents the version number of the software to
install.
The NOS installer image may create multiple partitions during the installation process. After the installation process completes, the switch
automatically reboots into the new OS.
Install manually using a USB drive
You can manually install the NOS software image using a USB device. Verify that the USB device supports a FAT or EXT2 file system. For
instructions to format a USB device in FAT or EXT2 format, see the accompanying Windows documentation for FAT formatting or Linux
documentation for FAT or EXT2 formatting.
1. Plug the USB storage device into the USB storage port on the switch.
2. Power up the switch to automatically boot using the
ONIE: Rescue
option.
3. (Optional) Stop ONIE discovery if the device boots to
ONIE: Install
.
$ onie-discovery-stop
4. Create a USB mount location on the system.
$ mkdir /mnt/media
5. Identify the path to the USB drive.
$ fdisk -l
6. Mount the USB media plugged in the USB port on the device.
$ mount -t vfat
usb-drive-path
/mnt/media
7. Install the software from the USB, where
/mnt/media
specifies the path where the USB partition is mounted.
$ onie-nos-install /mnt/media/
image_file
The ONIE autodiscovery process discovers the image file at the specified USB path, loads the software image, and reboots the switch.
For more information, see the
Installation using ONIE
53

