Pricing, specifications, availability and terms of offers may change without notice, are not transferable and are valid only for new purchases from Dell Small Business for delivery in the 50 United States. Taxes, fees, shipping, handlin
extra, vary, and are not subject to discount. The Small Business site and offers contained herein valid only for end users and not for resellers and/or online auctions. Dell cannot be responsible for pricing or other errors, omissions, o
functions and reserves the right to cancel orders arising from such errors. Offers not necessarily combinable. Discounts cannot be retroactively applied. Orders subject to cancellation by Dell. Software & Accessories and Printers, Di
Recommended Solutions systems in the online system configuration pages (including PowerConnect switches); you must purchase eligible items through the separate Software & Accessories and Printers, Displays & Electronics on
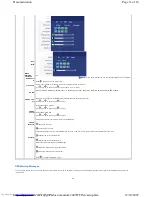
Soundbar Attachment to the Monitor
Back to Contents Page
1.
Attach mechanism
2. Headphone
connectors
3. Power indicator
4. Power/Volume
control
NOTE:
Soundbar Power Connector - 12V DC output is for optional Dell Soundbar only.
NOTICE:
DO NOT USE WITH ANY DEVICE OTHER THAN DELL Soundbar.
1.
Working from the rear of the monitor, attach Soundbar by aligning the two slots with the two tabs along the bottom rear of the monitor.
2. Slide the Soundbar to the left until it snaps into place.
3. Connect the Soundbar with the DC power connector.
4. Insert the mini stereo plug from the rear of the Soundbar into the computer's audio output jack.
You are here:
Dell USA
>
Support Home Page
Page 13 of 14
Documentation
12/10/2007
http://support.dell.com/support/edocs/monitors/2407WFP/en/setup.htm


