Installing System Board Options
8-9
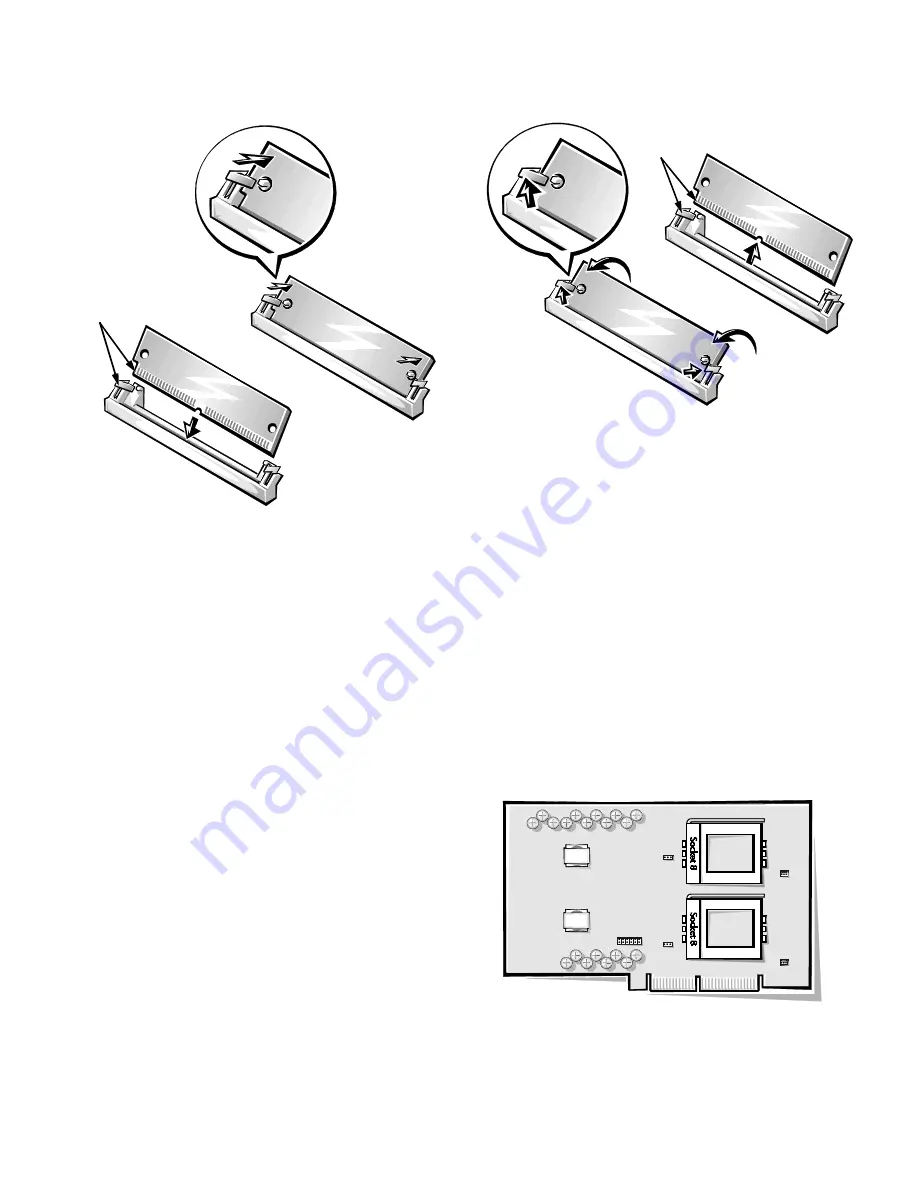
Figure 8-5. Installing a SIMM
4.
Continue with step 7 of “Performing a Memory
Upgrade” earlier in this section.
Removing SIMMs
To remove a SIMM, start from the highest-numbered
socket, open the retaining clips just enough to lift the top
edge of the SIMM away from the clips, and lift the
SIMM out of the socket (see Figure 8-6).
Figure 8-6. Removing a SIMM
U
pgrading the Microprocessor or
Installing Additional
Microprocessors
The system board has two microprocessor module con-
nectors. Each microprocessor module can have one or
two Intel
®
Pentium
®
Pro microprocessors installed for a
total of four microprocessors (see Figure 8-7). All micro-
processors on both modules must be identical. For
example, if the system has a 200 megahertz (MHz)
Pentium Pro microprocessor and you are adding micro-
processors, all additional microprocessors must also be
200 MHz Pentium Pro.
Figure 8-7. Microprocessor Module
pin 1
1.
2.
pin 1
Summary of Contents for 6100
Page 1: ... HOO 3RZHU GJH 6 VWHP 167 7 21 1 7528 6 227 1 8 ...
Page 8: ...x ...
Page 18: ...xx ...
Page 20: ...xxiv DELL CONFIDENTIAL Preliminary 12 17 96 ...
Page 32: ...3 6 Dell PowerEdge 6100 200 System Installation and Troubleshooting Guide ...
Page 52: ...5 18 Dell PowerEdge 6100 200 System Installation and Troubleshooting Guide ...
Page 78: ...7 22 Dell PowerEdge 6100 200 System Installation and Troubleshooting Guide ...
Page 124: ...11 16 Dell PowerEdge 6100 200 System Installation and Troubleshooting Guide ...
Page 134: ...B 8 Dell PowerEdge 6100 200 System Installation and Troubleshooting Guide ...


