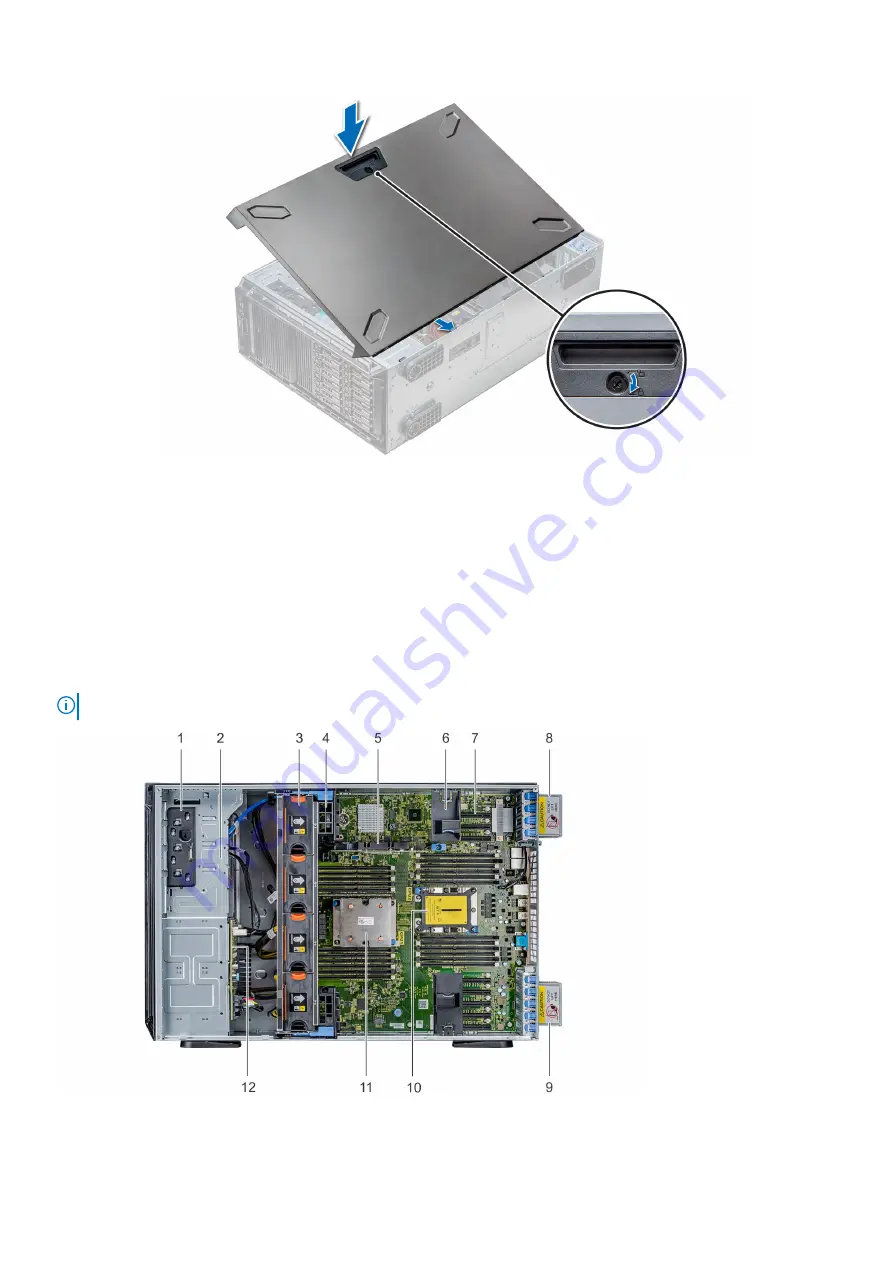
Figure 46. Installing the system cover
Next steps
1. Place the system upright on its feet on a flat and stable surface.
2. If removed,
.
3. Reconnect the peripherals and connect the system to the electrical outlet.
4. Turn on the system, including all attached peripherals.
Inside the system
NOTE:
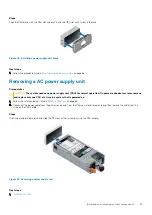
Components that are hot swappable are marked orange and touch points on the components are marked blue.
1. Release latch
2. Drive cage
3. Hot-swappable fans (middle fans)
4. GPU card holder
88
Installing and removing system components
Summary of Contents for 7CX5T
Page 21: ...Figure 16 Configuration and layout Dell EMC PowerEdge T640 overview 21 ...
Page 22: ...Figure 17 Electrical overview 22 Dell EMC PowerEdge T640 overview ...
Page 23: ...Figure 18 Memory information Dell EMC PowerEdge T640 overview 23 ...
Page 24: ...Figure 19 System tasks 24 Dell EMC PowerEdge T640 overview ...


