background image

Documentation


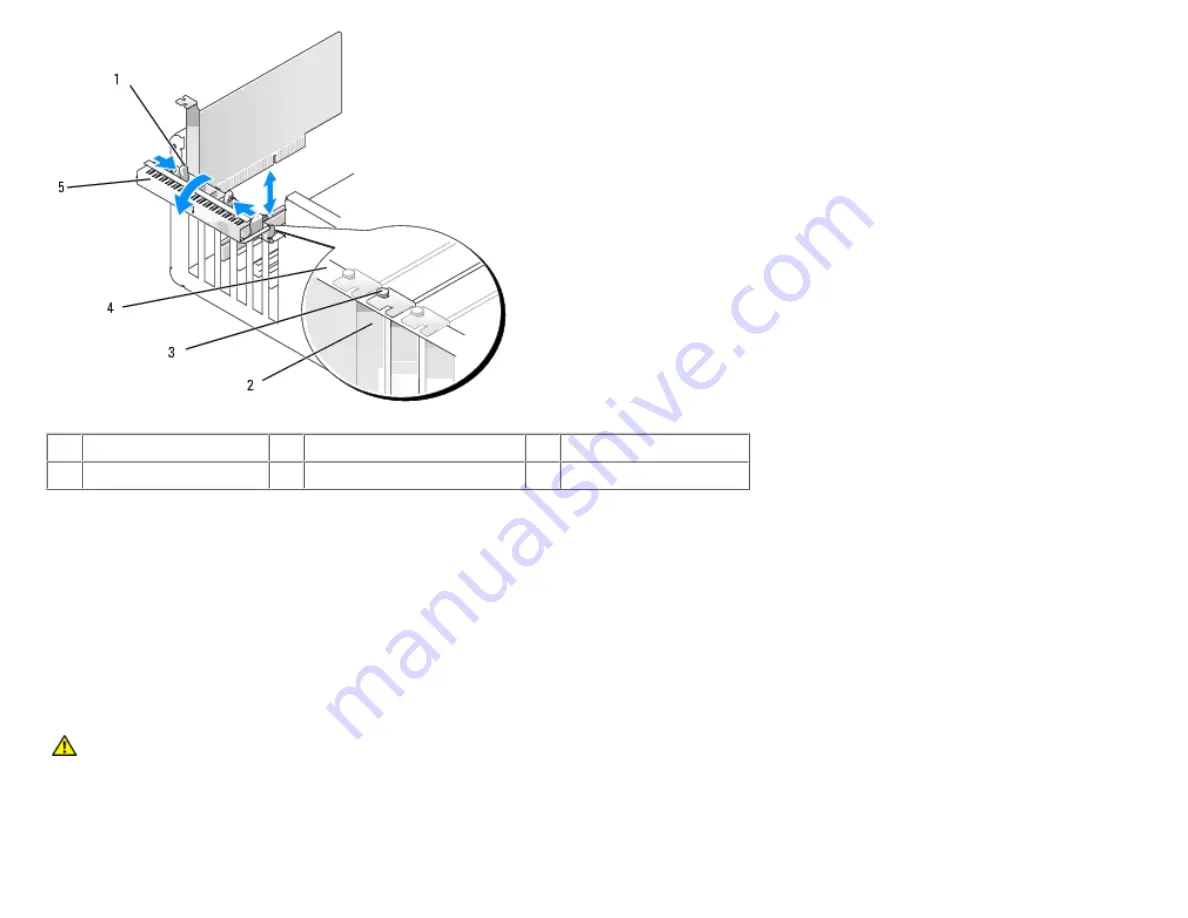
1

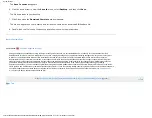
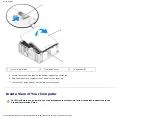
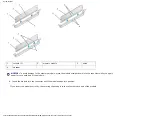
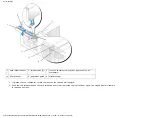
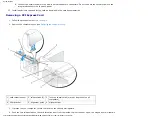
release tabs (2)

2

filler bracket

3

alignment guide

4

alignment bar

5

card retention door


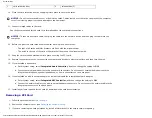
5.  If you are installing a new card, remove the filler bracket to create a card-slot opening. Then continue with 

step 7

.  


6.  If you are replacing a card that is already installed in the computer, remove the card.  


If necessary, disconnect any cables connected to the card. Grasp the card by its top corners, and ease it out of its 

connector.

7.  Prepare the card for installation.  


See the documentation that came with the card for information on configuring the card, making internal connections, or 

otherwise customizing it for your computer.


CAUTION: 

Some network adapters automatically start the computer when they are connected to a 

network. To guard against electrical shock, be sure to unplug your computer from its electrical outlet 

before installing any cards.

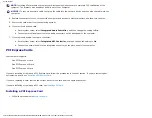
8.  Place the card in the connector and press down firmly. Ensure that the card is seated fully in the slot.  


http://support.dell.com/support/edocs/systems/dim9200/en/SM_EN/parts.htm (13 of 68) [12/9/2007 11:22:24 PM]

Summary of Contents for 9200

Page 1: ... in this document may require the following tools z Small flat blade screwdriver z Phillips screwdriver z Long Phillips screwdriver z Flash BIOS update program download from support dell com Turning Off Your Computer 1 Shut down the operating system a Save and close any open files exit any open programs click the Start button and then click Shutdown b In the Shut Down Windows window select Shut do...

Page 2: ...ter 3 Disconnect your computer and all attached devices from their electrical outlets and then press the power button to ground the system board Back to Contents Page CAUTION Before you begin any of the procedures in this section follow the safety instructions in the Product Information Guide CAUTION Handle components and cards with care Do not touch the components or contacts on a card Hold a car...

Page 3: ... Center Account Technical Support Customer Service Warranty Information Dell Forums Contact Us My Account My Order Status You are here Dell USA Support Home Page Back to Contents Page About Your Computer Dell Dimension 9200 Service Manual Front View of the Computer Back View of the Computer Back Panel Connectors Front View of the Computer Cart Sign In Keyword Search ...

Page 4: ...n when the computer reads data from or writes data to the CD or DVD drive 3 CD or DVD eject button Press the CD or DVD eject button to eject a disc from the CD or DVD drive 4 FlexBay drives 2 Can contain an optional floppy drive or an optional Media Card Reader http support dell com support edocs systems dim9200 en SM_EN about htm 2 of 7 12 9 2007 11 13 43 PM ...

Page 5: ...e computer NOTICE To avoid losing data do not use the power button to turn off the computer Instead perform an operating system shutdown 8 hard drive activity light The hard drive light is on when the computer reads data from or writes data to the hard drive The light may also be on when a device such as a CD player is operating 9 diagnostic lights 4 Use the sequence of the diagnostic lights to he...

Page 6: ...network S PDIF and audio devices into the appropriate connectors see Back Panel Connectors 3 card slots 6 Access connectors for any installed PCI or PCI Express cards Back Panel Connectors http support dell com support edocs systems dim9200 en SM_EN about htm 4 of 7 12 9 2007 11 13 43 PM ...

Page 7: ...ect the other end of the network cable to the network adapter connector on your computer A click indicates that the network cable has been securely attached On computers with an additional network connector card use the connectors on the card and on the back of the computer when setting up multiple network connections such as a separate intra and extranet NOTE It is recommended that you use Catego...

Page 8: ... or VCR On computers with a sound card use the connector on the card 8 line out headphone connector Use the green line out connector to attach headphones and most speakers with integrated amplifiers On computers with a sound card use the connector on the card 9 microphone connector Use the pink microphone connector to attach a personal computer microphone for voice or musical input into a sound or...

Page 9: ...annot be responsible for pricing or other errors omissions or consequences of misuse of site and its functions and reserves the right to cancel orders arising from such errors Offers not necessarily combinable Discounts cannot be retroactively applied Orders subject to cancellation by Dell Software Accessories and Printers Displays Electronics offers do not apply to Recommended Solutions systems i...

Page 10: ...l Forums Contact Us My Account My Order Status You are here Dell USA Support Home Page Back to Contents Page Technical Overview Dell Dimension 9200 Service Manual Inside View of Your Computer System Board Components Power Supply DC Connector Pin Assignments Inside View of Your Computer CAUTION Before you use this information in any of the procedures follow the safety instructions in the Product In...

Page 11: ...ive optional 2 CD or DVD drive 3 power supply 4 system board 5 hard drive 6 media card reader optional System Board Components http support dell com support edocs systems dim9200 en SM_EN techov htm 2 of 9 12 9 2007 11 16 43 PM ...

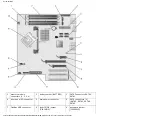
Page 12: ... power connector 6 SATA connectors 4 SATA2 SATA3 SATA4 SATA5 7 FlexBay USB connector 8 clear CMOS jumper CLRCMOS 9 password jumper CLRPSWD 10 PCI Express x1 card connector 11 PCI Express x16 card connector 12 PCI Express x4 card connector http support dell com support edocs systems dim9200 en SM_EN techov htm 3 of 9 12 9 2007 11 16 43 PM ...

Page 13: ... connector 16 rear fan connector 17 thermal sensor connector 18 CPU fan connector 19 processor and heat sink connector 20 processor power connector Power Supply DC Connector Pin Assignments http support dell com support edocs systems dim9200 en SM_EN techov htm 4 of 9 12 9 2007 11 16 43 PM ...

Page 14: ... 7 COM Black 18 AWG 8 POK Gray 18 AWG 9 5 VFP Purple 18 AWG 10 12 VB DC White 18 AWG 11 12VB DC White 18 AWG 12 3 3 VDC Orange 18 AWG 13 3 3 VDC Orange 18 AWG 14 12 VDC Blue 18 AWG 15 COM Black 18 AWG 16 PS ON Green 18 AWG 17 COM Black 18 AWG 18 COM Black 18 AWG 19 COM Black 18 AWG 20 N C N C 18 AWG http support dell com support edocs systems dim9200 en SM_EN techov htm 5 of 9 12 9 2007 11 16 43 P...

Page 15: ... DC Power Connector P2 Pin Number Signal Name 18 AWG Wire 1 COM Black 2 COM Black 3 12 VA DC Yellow 4 12 VA DC Yellow DC Power Connect P4 Pin Number Signal Name 18 AWG Wire 1 N C N C 2 COM Black http support dell com support edocs systems dim9200 en SM_EN techov htm 6 of 9 12 9 2007 11 16 43 PM ...

Page 16: ...in Number Signal Name 18 AWG Wire 1 3 3 VDC Orange 2 COM Black 3 5 VDC Red 4 COM Black 5 12 VB DC White DC Power Connector P7 Pin Number Signal Name 18 AWG Wire 1 5 VDC Red 2 COM Black 3 COM Black 4 12 A VDC Yellow http support dell com support edocs systems dim9200 en SM_EN techov htm 7 of 9 12 9 2007 11 16 43 PM ...

Page 17: ...or is intended for use with PCI Express graphics cards that have power requirements exceeding 75 watts DC Power Connector P12 Pin Number Signal Name 18 AWG Wire 1 12 B VDC White 2 12 B VDC White 3 12 B VDC White 4 COM Black 5 COM Black 6 COM Black http support dell com support edocs systems dim9200 en SM_EN techov htm 8 of 9 12 9 2007 11 16 43 PM ...

Page 18: ...e retroactively applied Orders subject to cancellation by Dell Software Accessories and Printers Displays Electronics offers do not apply to Recommended Solutions systems in the online system configuration pages including PowerConnect switches you must purchase eligible items through the separate Software Accessories and Printers Displays Electronics online stores Limit 5 systems and 5 discounted ...

Page 19: ... are here Dell USA Support Home Page Back to Contents Page Specifications Dell Dimension 9200 Service Manual Processor Processor type Intel Pentium 4 Intel Pentium D Intel Core 2 Duo Level 2 L2 Cache at least 2 MB on Intel Pentium D Pentium 4 and Core processors Memory Type dual channel 533 667 and 800 MHz DDR2 Memory connectors four Memory capacities 512 MB or 1 GB Maximum memory 4 GB BIOS addres...

Page 20: ...udio codec Internal 7 1 channel or PCI option cards Expansion Bus Bus type PCI 32 bit PCI Specification 2 2 PCI Express x1 x4 and x16 PCI express 1 1a Bus speed PCI 33 MHz PCI Express 100 MHz Bus throughput PCI Express x1 slot bidirectional speed 500 MB s x4 slot bidirectional speed 2 GB s x16 slot bidirectional speed 8 GB s PCI connectors three http support dell com support edocs systems dim9200 ...

Page 21: ...m 4 PCI Express lanes PCI Express x16 connector one x16 connector size 164 pins connector data width maximum 16 PCI Express lanes Drives Externally accessible two 3 5 inch drive bays FlexBay two 5 25 inch drive bays Available devices serial ATA drives floppy drive Media Card Reader DVD drive and DVD CD RW combo drive Internally accessible two 3 5 inch hard drive bays Connectors External connectors...

Page 22: ...s Fan 5 pin connectors PCI three 120 pin connectors PCI Express x1 36 pin connector PCI Express x4 x8 98 pin connector PCI Express x16 164 pin connector Thermal sensor 1x2 2 pin connector PS 2 and serial port connector 2x12 24 pin connector Floppy 33 pin connector Controls and Lights Power control push button Power light green light Blinking green in sleep state solid green for power on state ambe...

Page 23: ...ghts on the front panel see Diagnostic Lights Standby power light AUXPWR on the system board Power DC power supply Wattage 375 W Heat dissipation 1280 BTU hr Note Heat dissapation is calculated based upon the power supply wattage rating Voltage see the safety instructions in the Product Information Guide for important voltage setting information 90 to 135 V and 180 to 265 V at 50 60 Hz Backup batt...

Page 24: ...ellers and or online auctions Dell cannot be responsible for pricing or other errors omissions or consequences of misuse of site and its functions and reserves the right to cancel orders arising from such errors Offers not necessarily combinable Discounts cannot be retroactively applied Orders subject to cancellation by Dell Software Accessories and Printers Displays Electronics offers do not appl...

Page 25: ...Documentation sn WEB3 http support dell com support edocs systems dim9200 en SM_EN specs htm 7 of 7 12 9 2007 11 17 51 PM ...

Page 26: ...ents Page Advanced Troubleshooting Dell Dimension 9200 Service Manual Power Lights Diagnostic Lights Beep Codes Dell Diagnostics Drivers Resolving Software and Hardware Incompatibilities Power Lights CAUTION Before you begin any of the procedures in this section follow the safety instructions in the Product Information Guide The power button light located on the front of the computer illuminates a...

Page 27: ...em Board Components If the power light is blinking amber the computer is receiving electrical power but an internal power problem might exist Ensure that the voltage selection switch is set to match the AC power at your location if applicable If the power light is steady amber a device might be malfunctioning or incorrectly installed Remove and then reinstall the memory modules see Installing Memo...

Page 28: ...ithout error If available install properly working memory of the same type into your computer see Installing Memory A possible graphics card failure has occurred Reseat any installed graphics card see Installing a PCI Express Card If available install a working graphics card into your computer A possible floppy drive or hard drive failure has occurred Reseat all power and data cables A possible US...

Page 29: ...d drive and CD DVD cables are properly connected to the system board see System Board Components If there is an error message on your screen identifying a problem with a device such as the floppy drive or hard drive check the device to ensure that it is functioning properly If the operating system is attempting to boot from a device such as the floppy drive or hard drive check system setup see Sys...

Page 30: ...re 3 1 2 Master DMA register failure 3 1 3 Master interrupt mask register failure 3 1 4 Slave interrupt mask register failure 3 2 2 Interrupt vector loading failure 3 2 4 Keyboard Controller Test failure 3 3 1 NVRAM power loss 3 3 2 NVRAM configuration 3 3 4 Video Memory Test failure 3 4 1 Screen initialization failure 3 4 2 Screen retrace failure 3 4 3 Search for video ROM failure 4 2 1 No time t...

Page 31: ...correctly in the system setup program see Entering System Setup Cache Memory Bad Do Not Enable Cache The cache memory is not operating See Contacting Dell in your Owner s Manual for instructions on obtaining technical assistance CH 2 Timer Error An error is occurring on the timer on the system board See Contacting Dell in your Owner s Manual for instructions on obtaining technical assistance CMOS ...

Page 32: ...ard failed to POST The keyboard or system board see Removing the System Board may need to be replaced Invalid Boot Diskette The operating system cannot be located on drive A or drive C Enter the system setup program see Entering System Setup and confirm that drive A or drive C is properly identified Keyboard Error The BIOS has detected a stuck key Ensure that nothing is resting on the keyboard if ...

Page 33: ...xpress Test first to increase the possibility of tracing the problem quickly Extended Test Performs a thorough check of devices This test typically takes an hour or more and requires you to answer questions periodically Custom Test Tests a specific device You can customize the tests you want to run Symptom Tree Lists the most common symptoms encountered and allows you to select a test based on the...

Page 34: ...f your problem and if necessary update the driver Windows XP 1 Click the Start button and click Control Panel 2 Under Pick a Category click Performance and Maintenance 3 Click System 4 In the System Properties window click the Hardware tab 5 Click Device Manager 6 Scroll down the list to see if any device has an exclamation point a yellow circle with a on the device icon If an exclamation point is...

Page 35: ...Click Properties 3 Click the Hardware tab and click Device Manager 4 Double click the type of device for which you are installing the driver 5 Double click the name of the device for which you are installing the driver 6 Click the Driver tab and click Update Driver 7 Click Install from a list or specific location Advanced and click Next 8 Click Browse and browse to the location to which you previo...

Page 36: ...of misuse of site and its functions and reserves the right to cancel orders arising from such errors Offers not necessarily combinable Discounts cannot be retroactively applied Orders subject to cancellation by Dell Software Accessories and Printers Displays Electronics offers do not apply to Recommended Solutions systems in the online system configuration pages including PowerConnect switches you...

Page 37: ...ccount My Order Status You are here Dell USA Support Home Page Back to Contents Page System Setup Program Dell Dimension 9200 Service Manual Overview Entering System Setup System Setup Screens System Setup Options Boot Sequence Clearing Forgotten Passwords Clearing CMOS Settings Flashing the BIOS Overview Use system setup as follows To change the system configuration information after you add chan...

Page 38: ... Your Computer and try again System Setup Screens The system setup screen displays current or changeable configuration information for your computer Information on the screen is divided into three areas the options list active options field and key functions Options List This field appears on the left side of the system setup window The field is a scrollable list containing features that define th...

Page 39: ... or single Date Time Displays current date and time settings Boot Sequence The computer attempts to boot from the sequence of devices specified in this list NOTE If you insert a boot device and restart the computer this option appears in the system setup menu To boot from a USB memory device select the USB device and move it by pressing U so that it becomes the first device in the list Drives Disk...

Page 40: ...y if a FlexBay device is installed Rear Quad USB Enables or disables the 4 stack of USB ports on the back of the computer Real Dual USB Enables or disables the 2 stack of USB ports on the back of the computer Front USB Enables or disables the 2 stack of USB ports on the front of the computer PS 2 mouse port If your computer has the optional PS 2 mouse port then this option is listed Video Primary ...

Page 41: ...erified Password Status This option locks the system password field with the setup password When the field is locked you can no longer disable password security by pressing Ctrl Enter when the computer starts Execute Disable Specifies whether Execute Disable Memory Protection Technology will be on or off Power Management AC Recovery Determines what happens when AC power is restored to the computer...

Page 42: ... event log POST Behavior Fastboot When set to On default your computer starts more quickly because it skips certain configurations and tests Numlock Key This option involves the rightmost bank of keys on your keyboard When set to On default this option activates the numeric and mathematical features shown at the top of each key When set to Off this option activates the cursor control functions lab...

Page 43: ... F12 Boot Menu appears in the upper right corner of the screen press F12 The BIOS detects the device and adds the USB option to the boot menu NOTE To boot to a USB device the device must be bootable To ensure that your device is bootable check the device documentation Changing Boot Sequence for the Current Boot You can use this feature for example to restart your computer to a USB device such as a...

Page 44: ...t boot sequence in case you want to restore it 3 Press the up and down arrow keys to move through the list of devices 4 Press the spacebar to enable or disable a device Enabled devices have a number assigned to them disabled devices have no number assigned 5 Press U or D to move a selected device up or down the list Clearing Forgotten Passwords CAUTION Before you perform any of the procedures in t...

Page 45: ...rom the electrical outlet 7 Disconnect the computer power cable from the electrical outlet then press the power button to ground the system board 8 Remove the computer cover see Removing the Computer Cover 9 Locate the 2 pin password jumper CLRPSWD on the system board see System Board Components and attach the jumper to pins 1 and 2 to re enable the password feature 10 Replace the computer cover s...

Page 46: ...lace it on the password jumper CLRPSWD pins 1 and 2 3 Replace the computer cover see Replacing the Computer Cover NOTICE To connect a network cable first plug the cable into the network wall jack and then plug it into the computer 4 Connect your computer and devices to electrical outlets and then turn them on Flashing the BIOS The BIOS may require a new flash when an update is available or when re...

Page 47: ...errors omissions or consequences of misuse of site and its functions and reserves the right to cancel orders arising from such errors Offers not necessarily combinable Discounts cannot be retroactively applied Orders subject to cancellation by Dell Software Accessories and Printers Displays Electronics offers do not apply to Recommended Solutions systems in the online system configuration pages in...

Page 48: ... 9200 Service Manual Removing the Computer Cover Inside View of Your Computer System Board Components Memory Cards Drive Panels Drives Hard Drive Floppy Drive Media Card Reader CD DVD Drive Battery Power Supply Processor I O Panel Processor Fan Card Fan System Board Replacing the Computer Cover This chapter provides procedures for removing and installing the components in your computer Unless othe...

Page 49: ...re removing the cover NOTICE Before touching anything inside your computer ground yourself by touching an unpainted metal surface such as the metal at the back of the computer While you work periodically touch an unpainted metal surface to dissipate any static electricity that could harm internal components 1 Follow the procedures in Before You Begin 2 If you have installed a security cable remove...

Page 50: ... computer cover and pivot the cover up 7 Lift the cover away and set it aside in a secure location Inside View of Your Computer CAUTION Before you perform any of the procedures in this section follow the safety instructions in the Product Information Guide http support dell com support edocs systems dim9200 en SM_EN parts htm 3 of 68 12 9 2007 11 22 24 PM ...

Page 51: ...e 4 card fan 5 media card reader optional 6 floppy drive optional 7 CD or DVD drive 8 processor fan 9 processor shroud and processor System Board Components http support dell com support edocs systems dim9200 en SM_EN parts htm 4 of 68 12 9 2007 11 22 24 PM ...

Page 52: ...ors SATA0 SATA1 4 front panel I O connector 5 main power connector 6 SATA connectors 4 SATA2 SATA3 SATA4 SATA5 7 FlexBay USB connector 8 clear CMOS jumper CLRCMOS 9 password jumper CLRPSWD http support dell com support edocs systems dim9200 en SM_EN parts htm 5 of 68 12 9 2007 11 22 24 PM ...

Page 53: ...memory supported by your computer see Memory Memory Overview Memory modules should be installed in pairs of matched memory size speed and technology for best performance Otherwise the computer will continue to operate but with a slight reduction in performance See the label on the module to determine the module s capacity 1 memory module 2 memory module capacity label NOTE Always install memory mo...

Page 54: ...M_3 and DIMM_4 black securing clips NOTE Memory purchased from Dell is covered under your computer warranty NOTICE If you remove your original memory modules from the computer during a memory upgrade keep them separate from any new modules that you may have even if you purchased the new modules from Dell If possible do not pair an original memory module with a new memory module Otherwise your comp...

Page 55: ...ctricity from your body before you touch any of your computer s electronic components You can do so by touching an unpainted metal surface on the computer 1 Follow the procedures in Before You Begin 2 Remove the computer cover see Removing the Computer Cover 3 Lay the computer on its side so that the system board is on the bottom of the inside of the computer 4 Press out the securing clip at each ...

Page 56: ...e connector while you apply equal force to each end of the module 6 Insert the module into the connector until the module snaps into position If you insert the module correctly the securing clips snap into the cutouts at each end of the module http support dell com support edocs systems dim9200 en SM_EN parts htm 9 of 68 12 9 2007 11 22 24 PM ...

Page 57: ...s in this section follow the safety instructions in the Product Information Guide NOTICE To prevent static damage to components inside your computer discharge static electricity from your body before you touch any of your computer s electronic components You can do so by touching an unpainted metal surface on the computer 1 Follow the procedures in Before You Begin 2 Remove the computer cover see ...

Page 58: ...One PCI Express x1 card slot One PCI Express x16 card slot One PCI Express x4 card slot PCI Cards If you are installing or replacing a card follow the procedures in the next section If you are removing but not replacing a card see Removing a PCI Card If you are replacing a card remove the current driver for the card from the operating system If you are installing or replacing a PCI Express card se...

Page 59: ...s the release tab downward gently and then pivot the mechanism upward to access the card slots 1 release tab 2 card retention mechanism 3 card retention door 4 Push the two release tabs on the card retention door from the inside to pivot the door open the hinged door will remain in the open position http support dell com support edocs systems dim9200 en SM_EN parts htm 12 of 68 12 9 2007 11 22 24 ...

Page 60: ...ector 7 Prepare the card for installation See the documentation that came with the card for information on configuring the card making internal connections or otherwise customizing it for your computer CAUTION Some network adapters automatically start the computer when they are connected to a network To guard against electrical shock be sure to unplug your computer from its electrical outlet befor...

Page 61: ... alignment guide 9 Before you close the card retention door ensure that The tops of all cards and filler brackets are flush with the alignment bar The notch in the top of the card or filler bracket fits around the alignment guide http support dell com support edocs systems dim9200 en SM_EN parts htm 14 of 68 12 9 2007 11 22 24 PM ...

Page 62: ...d devices to electrical outlets and then turn them on 15 If you installed a sound card a Enter system setup select Integrated Audio Controller and then change the setting to Off b Connect external audio devices to the sound card connectors Do not connect external audio devices to the integrated microphone speaker headphone or line in connectors on the back panel 16 If you installed an add in netwo...

Page 63: ...l of the computer 7 If you removed an add in network connector a Enter system setup select Integrated NIC Controller and then change the setting to On b Connect the network cable to the integrated connector on the back panel of the computer PCI Express Cards Your computer supports One PCI Express x1 card One PCI Express x16 card One PCI Express x4 card If you are installing or replacing a PCI Expr...

Page 64: ...t guide 6 alignment bar 2 If present on your computer rotate the lever on the chassis wall upward 3 Push the two release tabs on the card retention door from the inside to pivot the door open the hinged door will remain in the open position http support dell com support edocs systems dim9200 en SM_EN parts htm 17 of 68 12 9 2007 11 22 24 PM ...

Page 65: ...acket to create a card slot opening Then continue with step 7 5 If you are replacing a card that is already installed in the computer remove the existing card If necessary disconnect any cables connected to the card If your card includes a retention mechanism remove the top of the retention mechanism by pressing the tab and pulling up on the top 6 Pull the securing tab grasp the card by its top co...

Page 66: ...to a network To guard against electrical shock be sure to unplug your computer from its electrical outlet before installing any cards 8 If you are installing the card into the x16 card connector position the card so that the securing slot is aligned with the securing tab NOTICE Ensure that you release the securing tab to seat the card If the card is not installed correctly you may damage the syste...

Page 67: ...ork cable first plug the cable into the network device and then plug the cable into the computer 12 Replace the computer cover reconnect the computer and devices to electrical outlets and then turn them on 13 If you installed a sound card a Enter system setup select Integrated Audio Controller and then change the setting to Off b Connect external audio devices to the sound card s connectors Do not...

Page 68: ... Begin 2 Remove the computer cover see Removing the Computer Cover 1 card retention door 2 release tabs 2 3 lever on chassis wall may not be present on all computers 4 filler bracket 5 alignment guide 6 alignment bar 3 If present on your computer rotate the lever on the chassis wall upward 4 Push the two release tabs on the card retention door from the inside to pivot the door open the hinged door...

Page 69: ...chanism to secure the x16 card press the release tab downward gently and then pivot the mechanism upward to access the card slots 1 PCI Express x16 card slot 2 PCI Express x16 card 3 securing tab 4 PCI Express x1 card 5 PCI Express x1 card slot http support dell com support edocs systems dim9200 en SM_EN parts htm 22 of 68 12 9 2007 11 22 24 PM ...

Page 70: ...to the computer 10 Replace the computer cover reconnect the computer and devices to electrical outlets and then turn them on 11 Remove the card driver from the operating system 12 If you removed a sound card a Enter system setup select Integrated Audio Controller and then change the setting to On b Connect external audio devices to the integrated audio connectors on the back panel of the computer ...

Page 71: ...late 2 sliding plate lever 3 drive panel 3 Pull the sliding plate lever to the right and hold in place while pushing the panel from the inside Pivot the panel to the left to release it from its side hinges 4 Set the drive panel aside in a secure location http support dell com support edocs systems dim9200 en SM_EN parts htm 24 of 68 12 9 2007 11 22 24 PM ...

Page 72: ... latches over a tab on the right side of the drive panel 2 Pull the inner tip of the drive panel insert tab away from the drive panel 3 Pivot the drive panel insert out and away from the drive panel 4 Set the drive panel insert aside in a secure location Installing the Drive Panel Insert http support dell com support edocs systems dim9200 en SM_EN parts htm 25 of 68 12 9 2007 11 22 24 PM ...

Page 73: ...panel tab 2 Rotate the drive panel insert into place and snap the drive panel insert tab over the corresponding tab on the drive panel 3 Ensure that the drive panel insert is correctly seated in the drive panel Installing the Drive Panel 1 Follow the procedures in Before You Begin http support dell com support edocs systems dim9200 en SM_EN parts htm 26 of 68 12 9 2007 11 22 24 PM ...

Page 74: ... hinges 3 Rotate the drive panel toward the computer until the sliding plate lever clicks into place and the drive panel snaps into place on the front panel Drives Your computer supports Two hard drives Serial ATA http support dell com support edocs systems dim9200 en SM_EN parts htm 27 of 68 12 9 2007 11 22 24 PM ...

Page 75: ...s labeled SATA0 and SATA1 starting with SATA0 Connect CD DVD drives to the connectors labeled SATA4 and SATA5 starting with SATA4 Serial ATA hard drives and CD DVD drives are connected to connectors labeled SATA0 to SATA5 on the system board 1 SATA0 2 SATA1 3 SATA2 4 SATA3 5 SATA4 6 SATA5 http support dell com support edocs systems dim9200 en SM_EN parts htm 28 of 68 12 9 2007 11 22 24 PM ...

Page 76: ...as a foam pad that will sufficiently cushion it NOTICE If you are replacing a hard drive that contains data back up your files before you begin this procedure NOTE If removing or installing the hard drive changes the drive configuration you must reflect the changes in the BIOS Go to the Drives section of the BIOS and under SATA 0 through 5 set the SATA ports to the correct configuration Removing a...

Page 77: ...on the tabs on each side of the drive and slide the drive up and out 1 tabs 2 2 hard drive Installing a Hard Drive 1 Follow the procedures in Before You Begin http support dell com support edocs systems dim9200 en SM_EN parts htm 30 of 68 12 9 2007 11 22 24 PM ...

Page 78: ...t have the hard drive bracket attached remove the bracket from the old hard drive by unsnapping it from the drive 6 Snap the hard drive bracket onto the replacement hard drive 7 Install the hard drive into the computer by sliding the drive into place until you feel it click into place 1 hard drive 2 hard drive bracket 8 Connect the power and hard drive cables to the hard drive http support dell co...

Page 79: ...ng any software required for the operation of the hard drive Adding a Second Hard Drive CAUTION Before you perform any of the procedures in this section follow the safety instructions in the Product Information Guide CAUTION To guard against electrical shock always unplug your computer from the electrical outlet before opening the cover NOTICE To avoid damage to the drive do not set it on a hard s...

Page 80: ...Do not install any drive into the lower hard drive bay until you have removed the hard drive bracket from the inside of the hard drive bay 6 Slide the new hard drive into empty bay until you feel a click 1 hard drive 2 hard drive bracket 7 Connect the power and hard drive cables to the drive Refer to General Installation Guidelines to identify the hard drive cable connectors on the system board ht...

Page 81: ...then turn them on See the documentation that came with the drive for instructions on installing any software required for drive operation Floppy Drive CAUTION Before you perform any of the procedures in this section follow the safety instructions in the Product Information Guide CAUTION To guard against electrical shock always unplug your computer from the electrical outlet before opening the cove...

Page 82: ...ps on the processor shroud Disconnect the other end of the floppy drive cable from the system board Remove the floppy drive cable from the computer 1 power cable 2 floppy drive cable 3 floppy drive 4 sliding plate lever 5 sliding plate 6 processor shroud 5 Pull the sliding plate to the right and hold in place 6 Slide the floppy drive out of the floppy drive bay http support dell com support edocs ...

Page 83: ...mputer cover see Removing the Computer Cover 3 If you are installing a new floppy drive remove the shoulder screws from the inside of the drive panel insert and attach the screws to the new drive 1 floppy drive 2 shoulder screws 4 http support dell com support edocs systems dim9200 en SM_EN parts htm 36 of 68 12 9 2007 11 22 24 PM ...

Page 84: ... Enter system setup see Entering System Setup and select the appropriate Diskette Drive option 10 Verify that your computer works correctly by running the Dell Diagnostics see Dell Diagnostics Media Card Reader Removing a Media Card Reader CAUTION Before you perform any of the procedures in this section follow the safety instructions in the Product Information Guide NOTICE To prevent static damage...

Page 85: ...of the Media Card Reader Disconnect the other end of the cable from the USB connector from the system board see System Board Components Remove the cable from any clips and lift out of the computer http support dell com support edocs systems dim9200 en SM_EN parts htm 38 of 68 12 9 2007 11 22 24 PM ...

Page 86: ...nstalling a Media Card Reader CAUTION Before you perform any of the procedures in this section follow the safety instructions in the Product Information Guide NOTICE To prevent static damage to components inside your computer discharge static electricity from your body before you touch any of your computer s electronic components You can do so by touching an unpainted metal surface on the computer...

Page 87: ...om its packaging Remove the shoulder screws from the inside of the drive panel insert and attach the screws to the new drive 1 Media Card Reader 2 shoulder screws 4 7 Gently slide the drive into place until you feel a click or feel the drive securely installed Ensure that the Media Card Reader is installed before the USB cable is connected 8 Connect the USB cable to the back of the Media Card Read...

Page 88: ...llow the safety instructions in the Product Information Guide CAUTION To guard against electrical shock always unplug your computer from the electrical outlet before opening the cover NOTE If removing or installing the drive changes the drive configuration you must reflect the changes in the BIOS Go to the Drives section of the BIOS and under SATA 0 through 5 set the SATA ports to the correct conf...

Page 89: ... back of the drive and the CD DVD drive cable from the back of the drive and the system board 1 CD DVD drive cable 2 power cable 3 system board 4 Slide the drive release mechanism to the right to release the shoulder screw and slide the drive out to remove it from the drive bay http support dell com support edocs systems dim9200 en SM_EN parts htm 42 of 68 12 9 2007 11 22 24 PM ...

Page 90: ...or installation Check the documentation that accompanied the drive to verify that the drive is configured for your computer 4 If you are installing a new drive remove the drive panel insert see Removing the Drive Panel Insert Then remove three shoulder screws from the inside of the drive panel insert and attach the screws to the new drive http support dell com support edocs systems dim9200 en SM_E...

Page 91: ...ive bay until the drive clicks into position 6 Connect the power cable to the drive and the CD DVD cable to the drive and system board 1 CD DVD cable 2 power cable 3 system board http support dell com support edocs systems dim9200 en SM_EN parts htm 44 of 68 12 9 2007 11 22 24 PM ...

Page 92: ...uctions in the Product Information Guide NOTICE To prevent static damage to components inside your computer discharge static electricity from your body before you touch any of your computer s electronic components You can do so by touching an unpainted metal surface on the computer A coin cell battery maintains computer configuration date and time information The battery can last several years If ...

Page 93: ...of its socket with your fingers or with a blunt nonconducting object such as a plastic screwdriver 6 Insert the new battery into the socket with the side labeled facing up and then snap the battery into place 1 battery 2 tab 3 battery socket 7 Replace the computer cover see Replacing the Computer Cover NOTICE To connect a network cable first plug the cable into the network device and then plug it ...

Page 94: ... power cables from the system board and the drives NOTE Note the routing of the DC power cables underneath the tabs in the computer frame as you remove them from the system board and drives You must route these cables properly when you replace them to prevent them from being pinched or crimped 4 Remove any cables from the cable routing clip on the power supply 5 Remove the four screws that attach ...

Page 95: ...ct Information Guide 1 Slide the power supply into place 2 Replace the four screws that secure the power supply to the back of the computer frame 3 Reconnect the DC power cables 4 Connect the AC power cable to the connector 5 Run the cables underneath the clips and press the clips to close them over the cables http support dell com support edocs systems dim9200 en SM_EN parts htm 48 of 68 12 9 200...

Page 96: ...nside your computer discharge static electricity from your body before you touch any of your computer s electronic components You can do so by touching an unpainted metal surface on the computer Removing the Processor 1 Follow the procedures in Before You Begin 2 Remove the computer cover see Removing the Computer Cover 3 If your computer includes a card retention mechanism to secure the x16 card ...

Page 97: ...e on each side of the plastic heat sink assembly shield CAUTION The heat sink assembly may be very hot during normal operation Be sure that it has had sufficient time to cool before you touch it 6 Rotate the heat sink assembly toward the rear of the computer and remove it from the computer http support dell com support edocs systems dim9200 en SM_EN parts htm 50 of 68 12 9 2007 11 22 24 PM ...

Page 98: ...heat sink If you are not installing a processor upgrade kit from Dell reuse the original heat sink when you install your new processor 7 Place your finger upon the hook end of the release lever then push down and out to release it from the tab that secures it http support dell com support edocs systems dim9200 en SM_EN parts htm 51 of 68 12 9 2007 11 22 24 PM ...

Page 99: ...uch any of the pins inside the socket or allow any objects to fall on the pins in the socket 9 Gently remove the processor from the socket Leave the release lever extended in the release position so that the socket is ready for the new processor Installing the Processor NOTICE Ground yourself by touching an unpainted metal surface on the back of the computer NOTICE When replacing the processor do ...

Page 100: ...ment notches on the processor with the front and rear alignment notches on the socket 4 Align the pin 1 corners of the processor and socket 1 processor cover 2 securing tab 3 processor 4 processor socket 5 center cover latch 6 release lever 7 front alignment notch 8 socket and processor pin 1 indicator 9 rear alignment notch NOTICE To avoid damage ensure that the processor aligns properly with the...

Page 101: ...essor If you installed a processor replacement kit from Dell return the original heat sink assembly and processor to Dell in the same package in which your replacement kit was sent 8 Install the heat sink assembly a Place the heat sink assembly back onto the heat sink assembly bracket b Rotate the heat sink assembly down towards the computer base and tighten the two captive screws NOTICE Ensure th...

Page 102: ...le into the computer 11 Connect your computer and devices to electrical outlets and turn them on I O Panel CAUTION Before you begin any of the procedures in this section follow the safety instructions in the Product Information Guide CAUTION To guard against electrical shock always unplug your computer from the electrical outlet before opening the cover I O Panel Components http support dell com s...

Page 103: ... the procedures in Before You Begin 2 Remove the computer cover see Removing the Computer Cover 3 If your computer includes a card retention mechanism to secure the x16 card press the release tab downward gently and then pivot the mechanism upward 4 Unhook the floppy drive cable from clips on processor shroud and move it out of the way http support dell com support edocs systems dim9200 en SM_EN p...

Page 104: ... on each side of the heat sink assembly CAUTION The heat sink assembly may be very hot during normal operation Be sure that it has had sufficient time to cool before you touch it 6 Rotate the heat sink assembly towards the rear of the computer and remove it from the computer http support dell com support edocs systems dim9200 en SM_EN parts htm 57 of 68 12 9 2007 11 22 24 PM ...

Page 105: ... assembly on its side in a safe place 8 Disconnect the system fan cable from the system board 9 Ensure that all cables have been removed from the routing clips on the top of the system fan assembly http support dell com support edocs systems dim9200 en SM_EN parts htm 58 of 68 12 9 2007 11 22 24 PM ...

Page 106: ...If an optional sound card is installed disconnect the cable from the top edge of the I O panel Otherwise a jumper block is installed NOTE If the I O panel has a jumper block installed and the replacement has no jumper block then remove it from this I O panel and install it in the replacement I O panel 16 If an optional IEEE 1394 cable is installed in the front port remove the cable from the front ...

Page 107: ...d the fan Follow the removal procedure Removing the I O Panel in reverse order ensuring that the tabs on the top panel bottom panel and front panel are secure Processor Fan CAUTION Before you begin any of the procedures in this section follow the safety instructions in the Product Information Guide http support dell com support edocs systems dim9200 en SM_EN parts htm 60 of 68 12 9 2007 11 22 24 P...

Page 108: ...res in Before You Begin 2 Remove the computer cover see Removing the Computer Cover 3 If your computer includes a card retention mechanism to secure the x16 card press the release tab downward gently and then pivot the mechanism upward 4 Unhook floppy drive cable from the clips on processor shroud and move out of the way 1 release tab 2 card retention mechanism 3 card retention door 4 heat sink ca...

Page 109: ...er and remove it from the computer 1 heat sink and fan shroud assembly 2 captive screw housing 2 7 Place the heat sink assembly on its side in a safe place 8 Disconnect the system fan cable from the system board 9 Ensure that all cables have been removed from the routing clips on the top of the system fan assembly http support dell com support edocs systems dim9200 en SM_EN parts htm 62 of 68 12 9...

Page 110: ...alling the fan ensure that you do not pinch the wires that run between the system board and the fan NOTICE Ensure that the four fan tabs are fully inserted into the four keyhole slots in the bottom cover so that the fan can slide back fully into position Ensure that the fan release lever tab is seated into its slot in the bottom cover Follow the removal procedure Removing the Processor Fan in reve...

Page 111: ...mputer Cover 3 Disconnect the card fan cable from the system board 4 Remove any cables from the routing clips on the top of the card fan assembly 1 fan release lever 2 fan release lever tab 3 processor fan 4 card fan 5 Lift the fan release lever then slide the fan toward the back of the computer to release the four fan tabs from the four keyhole slots in the bottom cover 6 Remove the fan from the ...

Page 112: ... internal components 1 Shut down the computer through the Start menu 2 Ensure that your computer and attached devices are turned off If your computer and attached devices did not automatically turn off when you shut down your computer turn them off now NOTICE To disconnect a network cable first unplug the cable from your computer and then unplug it from the network port or device 3 Disconnect any ...

Page 113: ... any components and cables that you removed from the system board 4 Install the memory modules that were removed from the old system board see Installing Memory 5 Reconnect all cables to their connectors at the back of the computer 6 Replace the computer cover see Replacing the Computer Cover NOTICE To connect a network cable first plug the cable into the network port or device and then plug the c...

Page 114: ...d States Taxes fees shipping handling and any applicable restocking charges extra vary and are not subject to discount The Small Business site and offers contained herein valid only for end users and not for resellers and or online auctions Dell cannot be responsible for pricing or other errors omissions or consequences of misuse of site and its functions and reserves the right to cancel orders ar...

Page 115: ...07 Dell About Dell Terms of Sale Unresolved Issues Privacy Contact Site Map Visit ID Feedback Top Large Text sn WEB3 http support dell com support edocs systems dim9200 en SM_EN parts htm 68 of 68 12 9 2007 11 22 24 PM ...

Reviews: