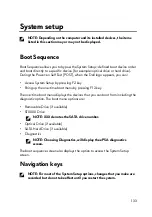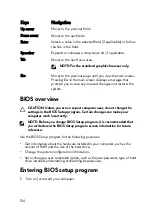
6 Boot to the USB drive from the One Time Boot Menu.
7 Type the BIOS setup program filename and press Enter.
8 The BIOS Update Utility appears. Follow the instructions on the screen to
complete the BIOS update.
Reinstall Windows using a USB recovery
drive
CAUTION: This process formats the hard drive and removes all data on
your computer. Ensure that you back up data on your computer before
beginning this task.
NOTE: Before reinstalling Windows, ensure your computer has more than
2 GB of memory and more than 32 GB of storage space.
NOTE: This process may take up to an hour to complete and your
computer will restart during the recovery process.
1
Connect the USB recovery drive to your computer.
2 Restart your computer.
3 Press F12 after the Dell logo is displayed on the screen to access the boot
menu.
A Preparing one-time boot menu message appears.
4 After the boot menu loads, select the USB recovery device under UEFI
BOOT.
The system reboots and a screen to Choose the keyboard layout is displayed.
5 Choose your keyboard layout.
6 In the Choose an option screen, click Troubleshoot.
7 Click Recover from a drive.
8 Choose one of the following options:
– Just remove my files to do a quick format.
– Fully clean the drive to do a complete format.
9 Click Recover to start the recovery process.
145
Summary of Contents for Alienware 17 R5
Page 20: ...5 Replace the six screws M2 5x13 that secure the base cover to the computer base 20 ...
Page 23: ...7 Disconnect the interposer from the hard drive 23 ...
Page 26: ...7 Connect the hard drive cable to the system board Post requisites Replace the base cover 26 ...
Page 32: ...3 Slide and remove the solid state drive from the solid state drive slot 32 ...
Page 36: ...2 Slide and remove the memory module from the memory module slot 36 ...
Page 38: ...Post requisites Replace the base cover 38 ...
Page 40: ...3 Pull the rear I O cover from the computer base 40 ...
Page 42: ...Post requisites Replace the base cover 42 ...
Page 46: ...6 Lift the computer base off the palm rest assembly 46 ...
Page 51: ...5 Gently peel the coin cell battery along with its cable off the palm rest assembly 51 ...
Page 55: ...3 Lift the speakers along with its cable off the palm rest assembly 55 ...
Page 59: ...4 Turn the I O board over 5 Disconnect the subwoofer cable 59 ...
Page 60: ...6 Lift the I O board off the palm rest assembly 60 ...
Page 64: ...2 Lift the subwoofer along with its cable off the palm rest assembly 64 ...
Page 72: ...25 After performing all the above steps you are left with the system board 72 ...
Page 80: ...8 Lift the heat sink assembly off the system board 80 ...
Page 85: ...5 Remove the cable from the routing guides on the palm rest assembly 85 ...
Page 89: ...2 Lift the power button board along with its cable off the palm rest assembly 89 ...
Page 95: ...7 Lift the display assembly off the computer base 95 ...
Page 100: ...2 Lift the battery off the palm rest assembly 100 ...
Page 108: ...7 Replace the base cover 108 ...
Page 111: ...4 Peel off the macro keys cable and macro keys backlight cable from the keyboard 111 ...
Page 112: ...5 Lift the keyboard at an angle and remove it from the tabs on the palm rest assembly 112 ...
Page 116: ...13 Replace the base cover 116 ...
Page 122: ...Procedure After performing all the prerequisites we are left with the palm rest 122 ...
Page 124: ...19 Replace the base cover 124 ...

