Removing the handle bars
NOTE: Before working inside your computer, read the safety information that shipped with your computer and follow the
steps in
Before working inside your computer
. After working inside your computer, follow the instructions in
. For more safety best practices, see the Regulatory Compliance home page at
.
Prerequisites
1. Remove the
2. Remove the left and right side-panels. See “
Procedure
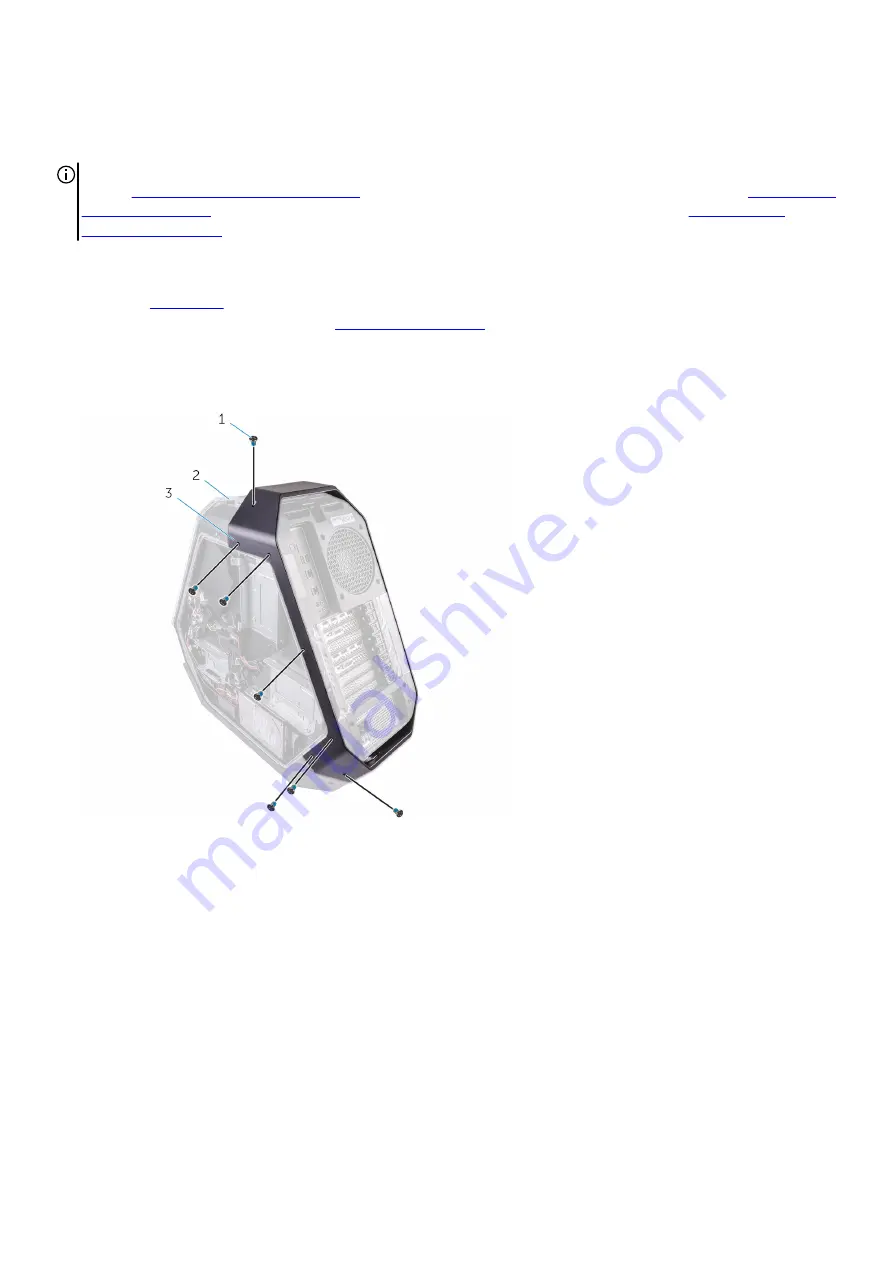
1. Remove the seven screws (#6-32x6.5) that secure the rear handle-bar to the left side of the chassis.
a. screws (7)
b. chassis
c. rear-handle bar
2. Remove the seven screws (#6-32x6.5) that secure the rear handle-bar to the right side of the chassis.
3. Press the rear-handle bar to release the securing tab and remove the rear-handle bar.
87
Summary of Contents for Alienware Area-51 R4
Page 1: ...Alienware Area 51 R4 Service Manual Regulatory Model D03X Regulatory Type D03X003 ...
Page 21: ...21 ...
Page 30: ...a screws 4 b hard drive c hard drive bracket 30 ...
Page 33: ...a screws 2 b optical drive c optical drive bracket 33 ...
Page 36: ...a screws 2 b right AlienFX side panel connector 36 ...
Page 42: ...a I O board b screws 5 42 ...
Page 45: ...a release tab b drive bay heat sensor cable 45 ...
Page 50: ...a graphics card b securing tab 50 ...
Page 65: ...a screws 6 b logo board bracket c logo board 65 ...
Page 71: ...a screws 4 b fan shroud 71 ...
Page 76: ...a processor liquid cooling assembly fan b chassis c processor liquid cooling assembly pump 76 ...
Page 85: ...a screws 9 b system board 5 Remove the processor 85 ...
Page 90: ...a screws 7 b chassis c bottom handle bar 90 ...
Page 101: ...a rear bezel b chassis 101 ...
Page 105: ...b tabs 2 c chassis 6 Remove the base panel from the chassis a base panel b chassis 105 ...
Page 108: ...a chassis b tape c top tron lighting cables 108 ...
Page 111: ...a top tron lighting cables b slot 111 ...
Page 115: ...1 screws 2 slot 3 chassis 4 antenna cables 115 ...


