Steps
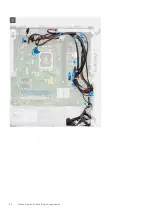
1. Slide and insert the system board at an angle as shown in the image to make the type C toe-in to the hinge saddle.
2. Replace the eight (#6-32) screws and single (M2x4) screw to secure the system-board to the chassis.
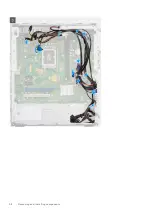
3. Route the SATA cables from the cable routing guide on the metal bracket.
4. Place the side metal bracket and align the screw holes with that of the chassis.
5. Replace the two (#6-32) screws that secure the side metal bracket to the chassis.
6. Route and connect the cables that you disconnected from the system-board assembly.
NOTE:
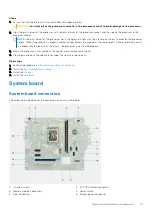
For information on system board connectors, see
.
Next steps
1. Install the
.
2. Install the
3. Install the
4. Install the
.
5. Install the
.
6. Install the
.
7. Install the
.
8. Install the
.
9. Install the
.
10. Install the
11. Install the
.
12. Install the
.
13. Install the
.
14. Install the
.
15. Install the
.
16. Install the
.
17. Install the
.
After working inside your computer
.
NOTE:
Your computer’s Service Tag is stored in the system board. You must enter the Service Tag in the BIOS setup
program after you replace the system board.
Removing and installing components
59

