System setup
CAUTION:
Unless you are an expert computer user, do not change the settings in the BIOS Setup program. Certain
changes can make your computer work incorrectly.
NOTE:
Before you change BIOS Setup program, it is recommended that you write down the BIOS Setup program screen
information for future reference.
Use the BIOS Setup program for the following purposes:
•
Get information about the hardware installed in your computer, such as the amount of RAM and the size of the hard drive.
•
Change the system configuration information.
•
Set or change a user-selectable option, such as the user password, type of hard drive installed, and enabling or disabling base devices.
Topics:
•
•
•
•
•
•
Boot menu
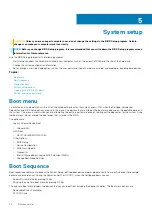
To initiate a one-time boot menu with a list of the valid boot devices for the system, press <F12> when the Dell logo is displayed.
Diagnostics and BIOS Setup options are also in this menu. The devices that are listed on the boot menu depend on the bootable devices in
the system. This menu is useful when you are attempting to boot to a particular device or to bring up the diagnostics for the system. Using
the boot menu, do not change the boot order that is stored in the BIOS.
The options are:
•
Legacy External Device Boot
○
Onboard NIC
•
UEFI Boot:
○
UEFI: TOSHIBA MQ01ACF050
•
Other Options:
○
BIOS Setup
○
Device Configuration
○
BIOS Flash Update
○
Diagnostics
○
Intel (R) Management Engine BIOS Extension (MEBx)
○
Change Boot Mode Settings
Boot Sequence
Boot sequence enables you to bypass the System Setup–defined boot device order and boot directly to a specific device (for example:
optical drive or hard drive). During the Power-on Self-Test (POST), when the Dell logo appears, you can:
•
Access System Setup by pressing F2 key
•
Bring up the one-time boot menu by pressing F12 key.
The one-time boot menu displays the devices that you can boot from including the diagnostic option. The boot menu options are:
•
Removable Drive (if available)
•
STXXXX Drive
5
24
System setup


