#
disk unfail 1.14
The 'disk unfail' command will add the disk to the head unit
and mark it as a spare. Any existing data on this disk will be lost.
Are you sure? (yes|no|?) [no]: yes
ok, proceeding.
4. Enter the
disk show state
command to make sure all the disks are in good state.
NOTE:
When the amber fault light has turned off, all the disk are in good state.
3.5" disk drives
This section describes how to remove and replace 3.5" disk drives.
The drive slot/locations are marked on the chassis 0-11, but the DD OS software still references the slots as 1-12. It is important
to identify the proper drive between the location called out in the FRU, and the location as specified in the software.
Identifying a failed disk drive
About this task
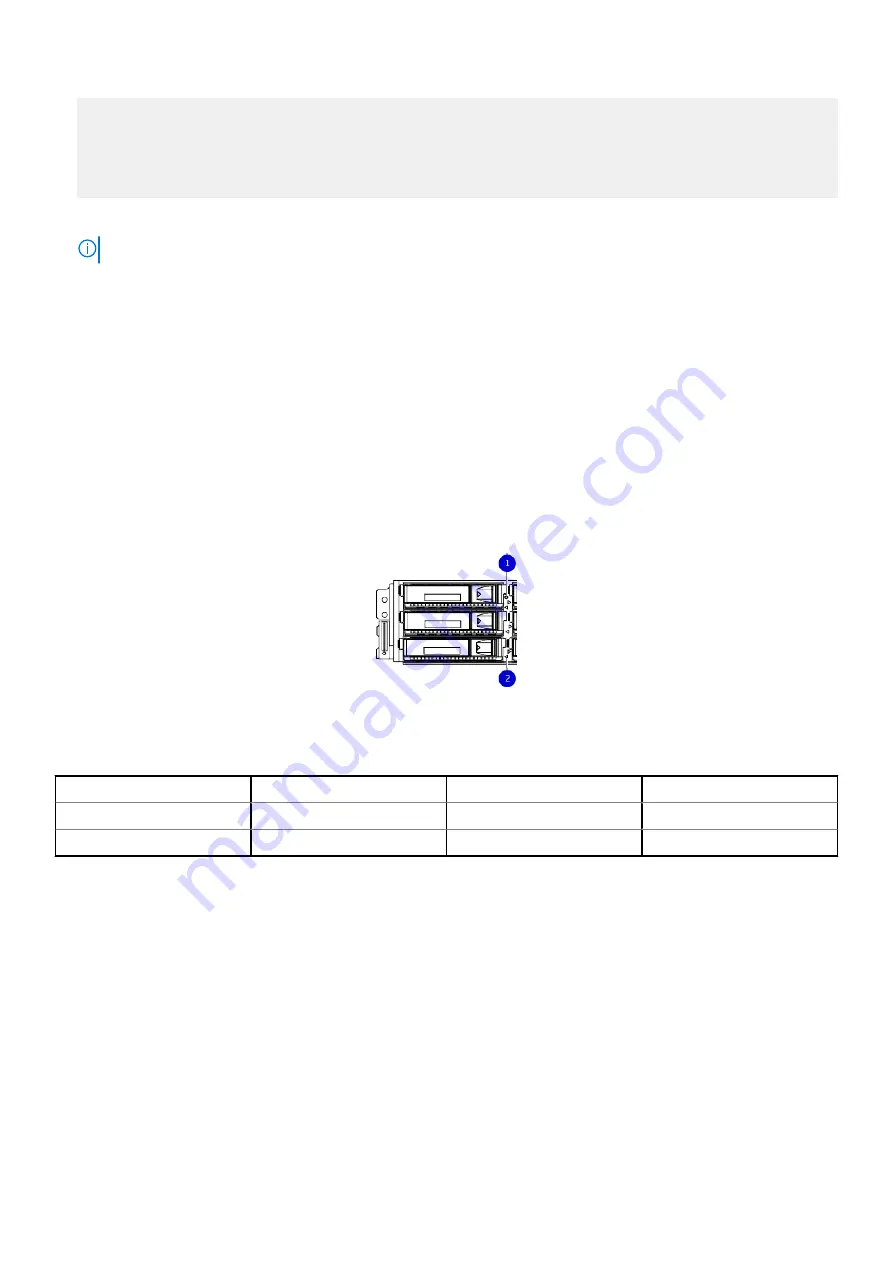
When a 3.5" drive fails, the system service LED and the drive service LED will illuminate amber.
1. System service LED
2. Drive activity/service LED
The following table shows the slot numbering of the front-mounted disk drives.
Slot 0 (Disk 1)
Slot 1 (Disk 2)
Slot 2 (Disk 3)
Slot 3 (Disk 4)
Slot 4 (Disk 5)
Slot 5 (Disk 6)
Slot 6 (Disk 7)
Slot 7 (Disk 8)
Slot 8 (Disk 9)
Slot 9 (Disk 10)
Slot 10 (Disk 11)
Slot 11 (Disk 12)
Steps
1. Use the
disk show state
command to display the status of all disk drives.
# disk show state
2. Locate the failed disk in the system. A steady amber LED light on a disk drive indicates that the disk has faulted.
Removing a 3.5" disk drive
Steps
1. Attach an ESD wristband to your wrist and the enclosure.
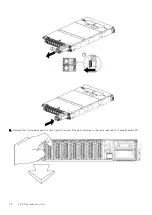
2. Slide the disk's latch button to the right to release the latch.
3. Rotate the latch outward (1) and slowly pull the disk from its slot (2). Place the disk on a padded, static-free surface.
50
Field Replaceable Units


