Installing System Components
85
3
Open the system. See "Opening the System" on page 60.
4
Remove the cooling shroud. See "Removing the Cooling Shroud" on
page 62.
5
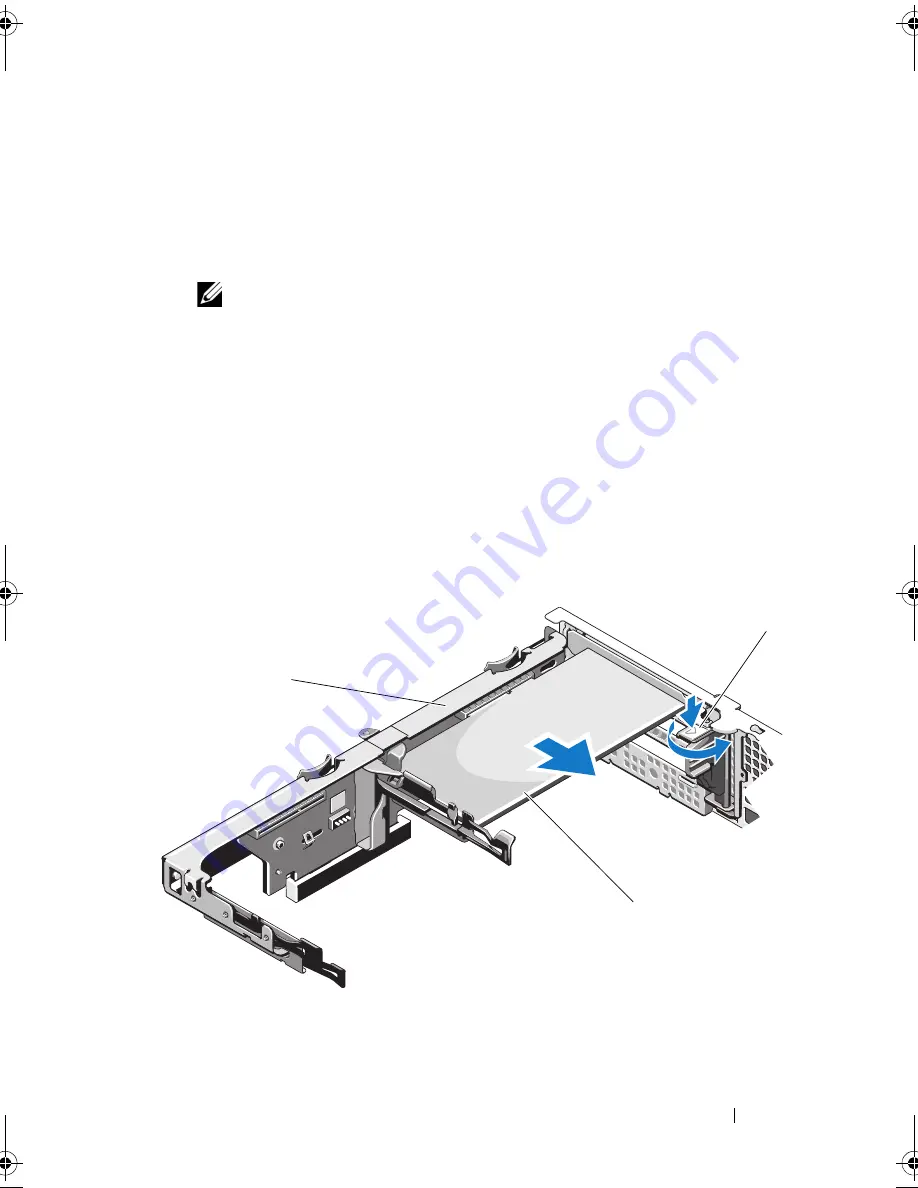
Open the expansion-card latch and remove the filler bracket.
See Figure 3-14.
NOTE:
Keep this bracket in case you need to remove the expansion card.
Filler brackets must be installed over empty expansion-card slots to maintain
FCC certification of the system. The brackets also keep dust and dirt out of the
system and aid in proper cooling and airflow inside the system.
6
Holding the card by its edges, position the card so that the card-edge
connector aligns with the expansion-card connector on the expansion-card
riser.
7
Insert the card-edge connector firmly into the expansion-card connector
until the card is fully seated.
8
Close the expansion-card latch. See Figure 3-14.
Figure 3-14. Removing and Installing an Expansion Card
1
expansion-card riser
2
expansion-card latch
3
expansion card
3
2
1
book.book Page 85 Friday, January 6, 2012 2:11 PM
Summary of Contents for DR4000 Restore Manager
Page 1: ...Dell DR4000 Systems Owner s Manual Regulatory Model E13S Series Regulatory Type E13S001 ...
Page 10: ...10 Contents ...
Page 120: ...120 Installing System Components ...
Page 138: ...138 Troubleshooting Your System ...
Page 142: ...142 Running the System Diagnostics ...
Page 148: ...148 Jumpers and Connectors ...
Page 150: ...150 Getting Help ...
Page 156: ...156 Index ...


