114
Installing System Components
Installing the SAS Backplane
1
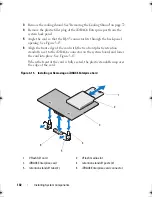
Lower the backplane into the system, being careful to avoid damaging
components on the face of the board.
2
Align the slots in the backplane with the retention hooks on the back of
the drive bays, then move the backplane forward until the retention hooks
fit through the slots in the backplane. See Figure 3-19.
3
Slide the backplane downward until the two blue retention latches snap
into place.
4
Connect the SAS data and power cables to the SAS backplane.
5
Install the hard drives in their original locations.
6
Connect the optical drive cable, USB cable, and the control panel cable to
the system board.
CAUTION:
Handle the cables gently to prevent damage.
7
Close the system. See "Closing the System" on page 71.
8
Reconnect the system to its electrical outlet and turn the system on,
including any attached peripherals.
Power Distribution Board
NOTE:
This section is applicable only to systems with redundant power supply.
The power distribution board is located on your system directly behind the
power supply fan module. See Figure 3-20.
Removing the Power Distribution Board
CAUTION:
Many repairs may only be done by a certified service technician.
You should only perform troubleshooting and simple repairs as authorized in
your product documentation, or as directed by the online or telephone service
and support team. Damage due to servicing that is not authorized by Dell is not
covered by your warranty. Read and follow the safety instructions that came
with the product.
1
If applicable, remove the thumb screw on the support bracket and lift it up
and out of the system.
2
Remove the power supplies from the system. See "Removing a Redundant
Power Supply" on page 81.
book.book Page 114 Friday, February 26, 2010 11:22 AM
Summary of Contents for DX6012S
Page 10: ...10 Contents ...
Page 40: ...40 About Your System ...
Page 62: ...66 Using the System Setup Program and UEFI Boot Manager ...
Page 118: ...122 Installing System Components ...
Page 134: ...144 Troubleshooting Your System ...
Page 144: ...154 Jumpers and Connectors ...
Page 146: ...156 Getting Help ...
Page 152: ...162 Index ...


