Installing System Components
115
3
Remove the expansion cards. See "Removing an Expansion Card" on
page 93.
4
Remove the expansion card riser. See "Removing an Expansion-Card Riser"
on page 94.
5
Disconnect power distribution cables from the system board (see "System
Board" on page 118).
6
Disconnect the fan cable.
7
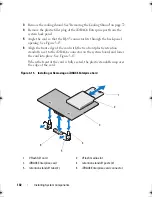
Remove the screws securing the power distribution board to the chassis.
See Figure 3-20.
NOTE:
There are three screws securing the power distribution board to the
chassis.
8
Pull the blue tab, lift the power distribution board, and move it toward the
front of the system to disengage from the tabs on the power supply bay.
See Figure 3-20.
book.book Page 115 Friday, February 26, 2010 11:22 AM
Summary of Contents for DX6012S
Page 10: ...10 Contents ...
Page 40: ...40 About Your System ...
Page 62: ...66 Using the System Setup Program and UEFI Boot Manager ...
Page 118: ...122 Installing System Components ...
Page 134: ...144 Troubleshooting Your System ...
Page 144: ...154 Jumpers and Connectors ...
Page 146: ...156 Getting Help ...
Page 152: ...162 Index ...


