CAUTION:
To avoid damaging the fins on the heat sink, do not press down on the heat sink
fins.
NOTE:
Ensure that the PHM is held parallel to the system board to prevent damaging the components.
2
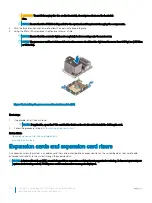
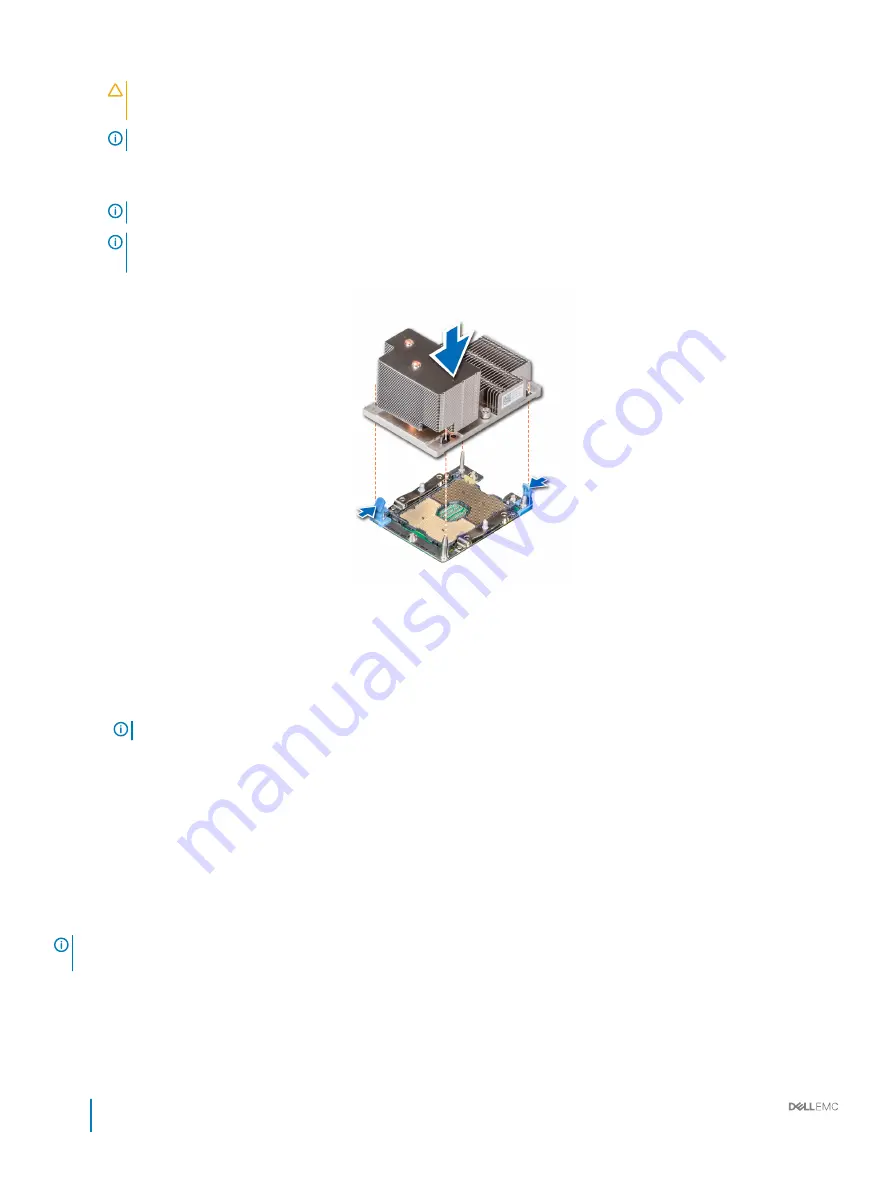
Push the blue retention clips inward to allow the heat sink to drop into place.
3
Using the #Torx T30 screwdriver, tighten one screw at a time.
NOTE:
Ensure that the screw is tightened completely before moving onto the next screw.
NOTE:
The processor and heat sink module retention screws should not be tightened to more than 0.13 kgf-m (1.35 N.m
or 12 in-lbf).
Figure 50. Installing the processor and heat sink module (2U)
Next steps
1
If applicable, install the air shroud.
NOTE:
If applicable, open the PCIe card holder latch on the air shroud to install the full length card.
2
Follow the procedure listed in
After working inside your system
.
Related links
Opening and closing the PCIe card holder latch
Installing the air shroud
Expansion cards and expansion card risers
An expansion card in the system is an add-on card that can be inserted into an expansion slot on the system board or riser card to add
enhanced functionality to the system through the expansion bus.
NOTE:
A System Event Log (SEL) event is logged if an expansion card riser is not supported or missing. It does not prevent your
system from turning on but, F1/F2 pause occurs and an error message is displayed.
102
Dell EMC PowerEdge R740 Installation and Service Manual
Installing and removing system components

