Steps
1
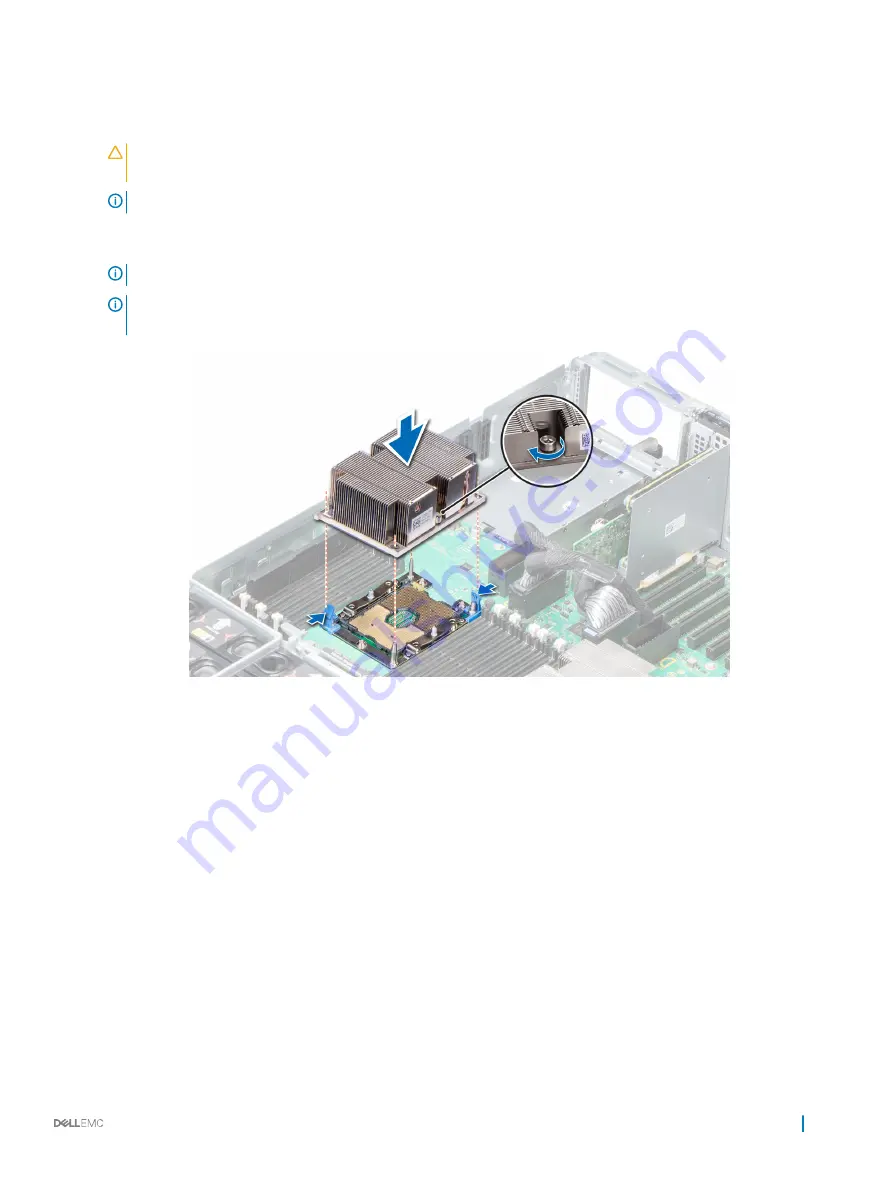
Align the pin 1 indicator of the heat sink to the system board and then place the processor and heat sink module (PHM) on the
processor socket.
CAUTION:
To avoid damaging the fins on the heat sink, do not press down on the heat sink
fins.
NOTE:
Ensure that the PHM is held parallel to the system board to prevent damaging the components.
2
Push the blue retention clips inward to allow the heat sink to drop into place.
3
Using the #Torx T30 screwdriver, tighten one screw at a time.
NOTE:
Ensure that the screw is tightened completely before moving onto the next screw.
NOTE:
The processor and heat sink module retention screws should not be tightened to more than 0.13 kgf-m (1.35 N.m
or 12 in-lbf).
Figure 61. Installing the processor and heat sink module
Next steps
1
If applicable, lower the PEM until it firmly seats in place.
2
If removed, install the expansion card risers.
3
Follow the procedure listed in
After working inside your system
.
Related links
Installing the expansion card riser
Installing and removing system components
107


