WARNING:
When mounting the Edge 640 or Edge 680 platform to the wall, face the Ethernet ports up towards the
ceiling and the system status LED panel down, facing the floor.
NOTE:
When driving the screws into the bracket and platform, verify that you torque to 5 lb-in.
NOTE:
When mounting the platform to the wall using the included wall mount brackets, you do not need to remove the
rubber pads from the bottom of the platform.
NOTE:
Ensure the platform is in a well-ventilated environment with clearance around the exhaust vents.
Depending on the configuration you purchased, one of two wall-mount brackets is included:
•
Wall mount bracket with cross-shaped cutout for the mounting screws for the 610 and 620 platforms.
•
Wall mount bracket with keyhole cutout for the mounting screws for the 640 and 680 platforms.
NOTE:
Before mounting the Edge 600 Series to the wall, verify that the wall surface is strong enough to support the
platform installation and can withstand the weight of the platform, power cable, and network cabling.
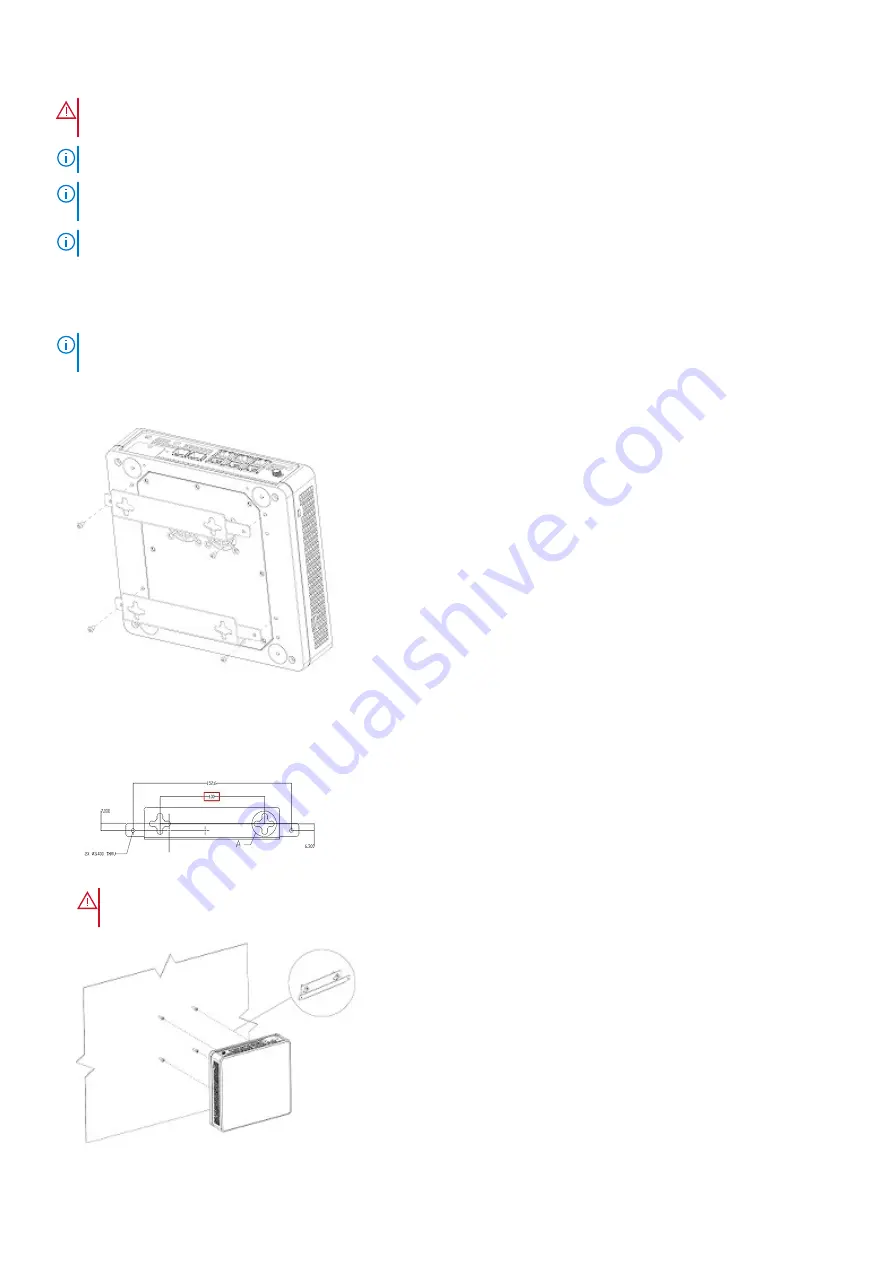
Cross-shaped bracket installation
1. Using a torque screwdriver, attach the wall mount brackets to the platform using the four M3 screws included.
2. Anchor the screws into the wall surface.
Depending on the type of wall surface, use the M3 screw and anchor to ensure a secure installation.
Use the measurement in the red box to mark the distance between the two installation points:
The recommended M3 screw dimensions are as follows:
3. Place the pre-installed platform brackets over the wall-mounted screws. Slide the platform to one side to secure the platform in place.
WARNING:
When mounting the platform to the wall, face the Ethernet ports up towards the ceiling and the system
status LED panel down, facing the floor.
14
Edge 600 Series installation


