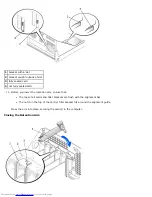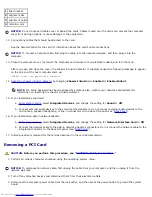
Test the floppy drive light
MS-DOS
®
Insert a floppy disk, type
dir a:
at the DOS prompt, and press <Enter>.
Microsoft
®
Windows
®
operating systems
Insert a floppy disk, double-click
My Computer
on the desktop, and double-click the floppy drive icon.
Run the Dell Diagnostics—
Reboot the computer and run the
Dell Diagnostics
. If any of the tests fail,
contact
Dell
.
NOTICE:
Do not attempt to clean drive heads with a swab. You may accidentally misalign the heads, which can render
the drive inoperable
.
Clean the drive—
Use a commercially available cleaning kit.
CAUTION:
Before you perform this procedure, see "
CAUTION: Safety Instructions
."
Remove and reinstall the floppy drive—
See "
Adding and Replacing Parts"
for your computer type for
information on performing this procedure.
If the computer displays a drive error message,
s
ee "
Error Messages
" for an explanation.
CD drive problems
Adjust the Windows volume control—
Click the speaker icon in the lower-right corner of your screen.
Ensure that the volume is turned up by clicking the slidebar and dragging it up.
Ensure that the sound is not muted by clicking any boxes that are checked.
Test the drive with another CD—
Insert another CD to eliminate the possibility that the original CD is
defective.
Check the speakers and subwoofer—
See "
Sound and Speaker Problems
."
Ensure that Windows recognizes the drive—
Double-click
My Computer
on the desktop. If the CD drive is
not listed, perform a full scan with your antivirus software to check for and remove viruses. Viruses can
sometimes prevent Windows from recognizing the drive.
Clean the disc—
Use a commercially available cleaning kit.
Check for interrupt request conflicts—
See "
Resolving Software and Hardware Incompatibilities
."
Summary of Contents for GX260 - Optiplex Pentium 4 2.0GHz 512MB 40GB CD
Page 6: ......
Page 29: ......
Page 37: ...Back to Contents Page ...
Page 40: ...information on resetting the chassis intrusion detector Back to Contents Page ...
Page 73: ......
Page 76: ......
Page 86: ...2 padlock ring 3 two release buttons one on each side Back to Contents Page ...
Page 111: ......
Page 128: ...1 release buttons 2 security cable slot 3 padlock ring Back to Contents Page ...
Page 155: ...Back to Contents Page ...
Page 186: ...Back to Contents Page ...
Page 210: ...Back to Contents Page ...
Page 232: ...BSMI Notice Taiwan Only ...


