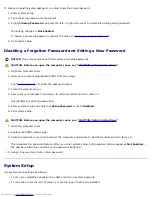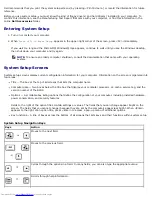
3. When prompted, type the system password.
4. Press <Ctrl><Enter> to disable the existing system password.
5. Confirm that
Not Enabled
is displayed for the
System Password
option.
If
Not Enabled
is displayed, the system password is deleted. If
Not Enabled
is not displayed, press <Alt><b> to
restart the computer, and then repeat steps 3 through 5.
To assign a new password, follow the procedure in "
Assigning a System Password
."
6. Exit system setup.
Setup Password
Option Settings
Enabled
— Does not allow assignment of setup passwords; users must enter a setup password to make changes to
system setup
Not Enabled
— Allows assignment of setup passwords; password feature is enabled but no password is assigned
Assigning a Setup Password
The setup password can be the same as the system password.
NOTE:
If the two passwords are different, the setup password can be used as an alternate system password. However,
the system password cannot be used in place of the setup password.
1. Enter system setup (see "
System Setup
") and verify that
Setup Password
is set to
Not Enabled.
2. Highlight
Setup Password
and press the left- or right-arrow key.
The computer prompts you to type and verify the password. If a character is not permitted, the computer emits a
beep.
3. Type and then verify the password.
After you verify the password, the
Setup Password
setting changes to
Enabled
. The next time you enter system
setup, the computer prompts you for the setup password.
4. Exit system setup.
A change to
Setup Password
becomes effective immediately (no need to restart the computer).
Operating Your Computer With a Setup Password Enabled
When you enter system setup, the
Setup Password
option is highlighted, prompting you to type the password.
If you do not type the correct password, the computer allows you to view, but not modify, system setup options.
NOTE:
You can use Password Status in conjunction with Setup Password to protect the system password from
unauthorized changes.
Deleting or Changing an Existing Setup Password
Summary of Contents for GX260 - Optiplex Pentium 4 2.0GHz 512MB 40GB CD
Page 6: ......
Page 29: ......
Page 37: ...Back to Contents Page ...
Page 40: ...information on resetting the chassis intrusion detector Back to Contents Page ...
Page 73: ......
Page 76: ......
Page 86: ...2 padlock ring 3 two release buttons one on each side Back to Contents Page ...
Page 111: ......
Page 128: ...1 release buttons 2 security cable slot 3 padlock ring Back to Contents Page ...
Page 155: ...Back to Contents Page ...
Page 186: ...Back to Contents Page ...
Page 210: ...Back to Contents Page ...
Page 232: ...BSMI Notice Taiwan Only ...


