5. Memory modules
6. Keyboard FFC connector
7. Keyboard-backlight FFC connector
8. Battery connector
9. Touchpad FFC connector
10. Hard drive FFC connector
11. Wireless connector
12. Speaker cable connector
13. Solid-state drive connector
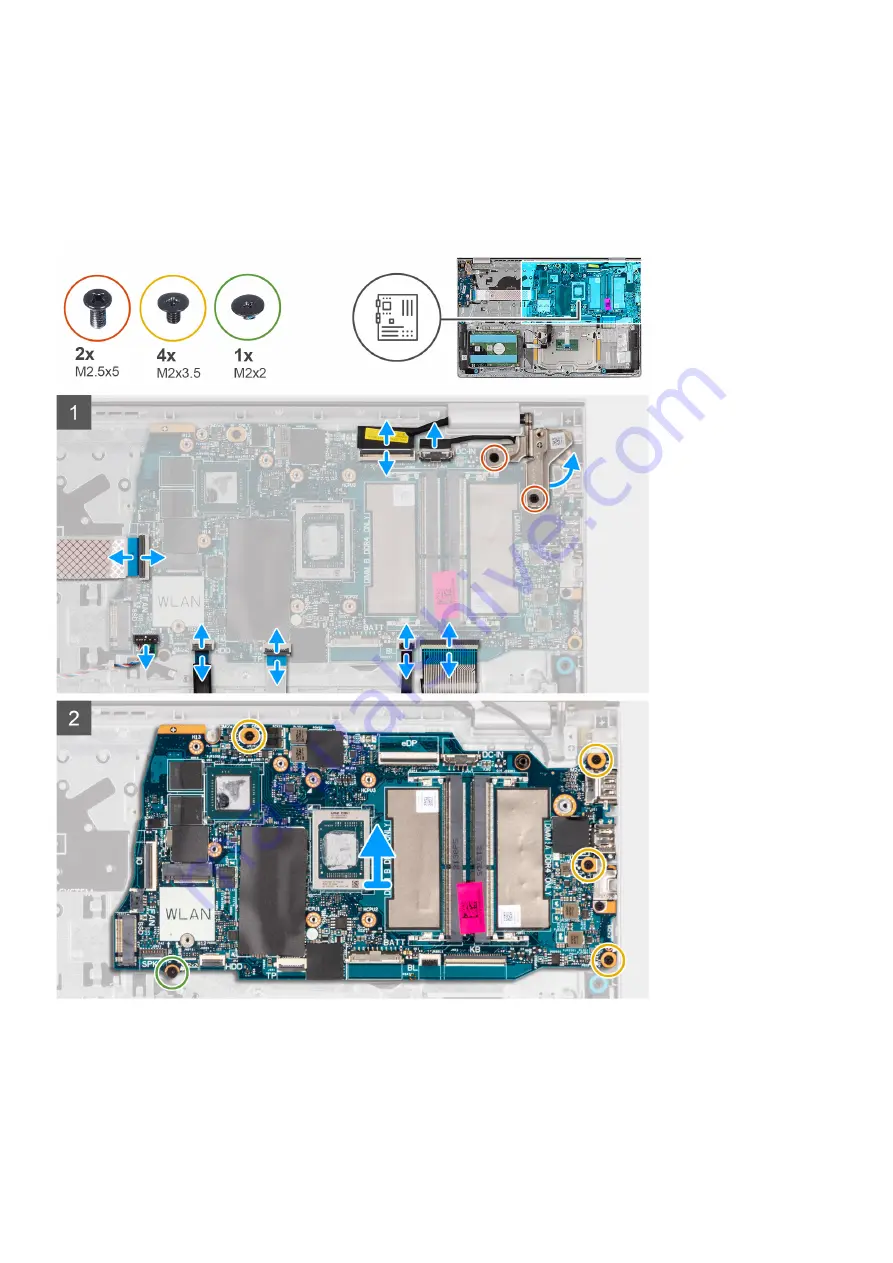
The following images indicate the location of the system board and provide a visual representation of the removal procedure.
Steps
1. Remove the two (M2.5x5) screws from the right hinge.
2. Pry open the right-display hinge at an angle of 90 degrees.
3. Disconnect the following cables from the system board:
a. I/O board Flexible Flat cable
b. Speaker cable
Removing and installing components
75


