


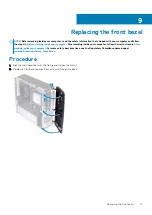


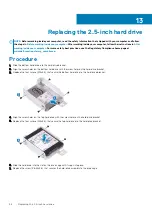


Replacing the 2.5-inch hard drive
NOTE:
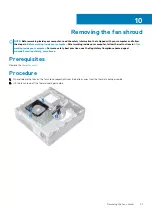
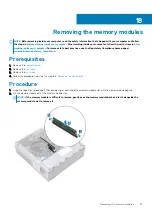
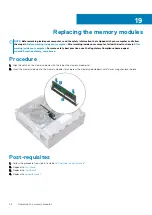
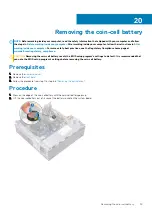
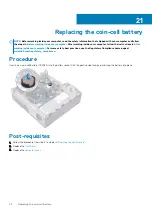
Before working inside your computer, read the safety information that shipped with your computer and follow
the steps in
Before working inside your computer
. After working inside your computer, follow the instructions in
. For more safety best practices, see the Regulatory Compliance home page at
www.dell.com/regulatory_compliance
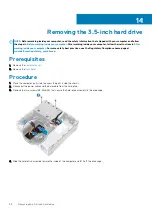
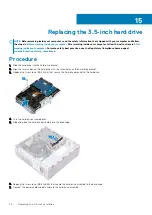
Procedure
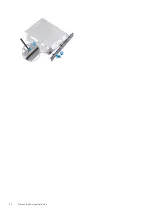
1. Slide the bottom hard drive into the hard-drive bracket.
2. Align the screw holes on the bottom hard drive with the screw holes on the hard-drive bracket.
3. Replace the four screws (M3x3.5) that secure the bottom hard-drive to the hard-drive bracket.
4. Align the screw holes on the top hard drive with the screw holes on the hard-drive bracket.
5. Replace the four screws (M3x3.5) that secure the top hard drive to the hard-drive bracket.
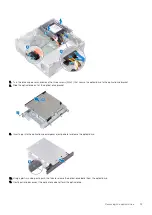
6. Slide the hard drive into the slot on the drive cage until it snaps into place.
7. Replace the screw (#6-32x3.6) that secures the hard-drive assembly to the drive cage.
13
26
Replacing the 2.5-inch hard drive
Summary of Contents for Inspiron 3471
Page 1: ...Inspiron 3471 Service Manual Regulatory Model D13S Regulatory Type D13S003 ...
Page 18: ...Prerequisites Remove the computer cover 18 Removing the front bezel ...
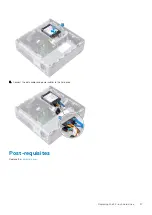
Page 20: ...Post requisites Replace the computer cover 20 Replacing the front bezel ...
Page 25: ...Prerequisites Remove the computer cover Removing the 2 5 inch hard drive 25 ...
Page 34: ...34 Removing the optical drive ...
Page 42: ...42 Removing the wireless card ...
Page 45: ...Removing the solid state drive 45 ...
Page 50: ...50 Removing the power button module ...
Page 54: ...54 Removing the power supply unit ...
Page 63: ...Removing the system board 63 ...
Page 66: ...7 Replace the computer cover 66 Replacing the system board ...
Page 77: ...Post requisites Replace the computer cover System setup 77 ...


