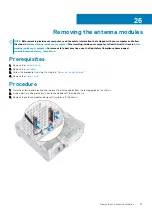


Removing the system board
NOTE:
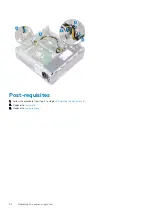
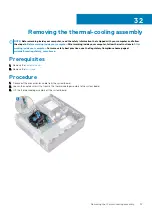
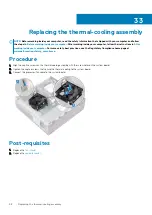
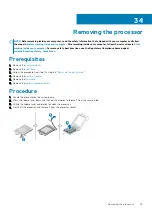
Before working inside your computer, read the safety information that shipped with your computer and follow
the steps in
Before working inside your computer
. After working inside your computer, follow the instructions in
. For more safety best practices, see the Regulatory Compliance home page at
www.dell.com/regulatory_compliance
NOTE:
Your computer’s Service Tag is stored in the system board. You must enter the Service Tag in the BIOS setup
program after you replace the system board.
NOTE:
Replacing the system board removes any changes you have made to the BIOS using the BIOS setup program. You
must make the appropriate changes again after you replace the system board.
NOTE:
Before disconnecting the cables from the system board, note the location of the connectors so that you can
reconnect the cables correctly after you replace the system board.
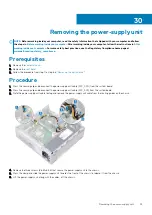
Prerequisites
1. Remove the
.
2. Remove the
.
3. Follow the procedure from step 1 to step 6 in “
4. Remove the
.
5. Remove the
.
6. Remove the
.
7. Remove the
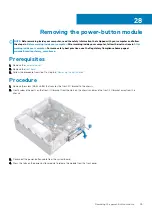
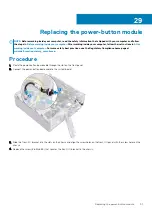
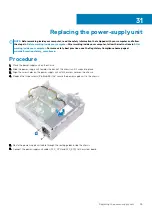
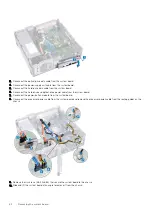
Procedure
NOTE:
Note the routing of all cables as you remove them so that you can reroute them correctly after you replace the
system board. For information on system board connectors, see “
".
1. Remove the screw (#6-32x6.35) that secures the front-I/O bracket to the chassis.
2. Swivel open the front-I/O bracket away from the chassis.
36
Removing the system board
61
Summary of Contents for Inspiron 3471
Page 1: ...Inspiron 3471 Service Manual Regulatory Model D13S Regulatory Type D13S003 ...
Page 18: ...Prerequisites Remove the computer cover 18 Removing the front bezel ...
Page 20: ...Post requisites Replace the computer cover 20 Replacing the front bezel ...
Page 25: ...Prerequisites Remove the computer cover Removing the 2 5 inch hard drive 25 ...
Page 34: ...34 Removing the optical drive ...
Page 42: ...42 Removing the wireless card ...
Page 45: ...Removing the solid state drive 45 ...
Page 50: ...50 Removing the power button module ...
Page 54: ...54 Removing the power supply unit ...
Page 63: ...Removing the system board 63 ...
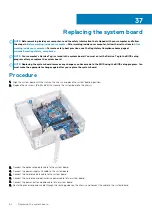
Page 66: ...7 Replace the computer cover 66 Replacing the system board ...
Page 77: ...Post requisites Replace the computer cover System setup 77 ...


