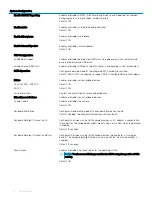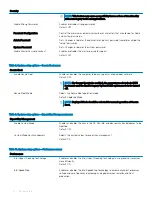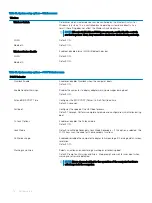
Table 12. System setup options—Wireless menu
Wireless
Wireless Switch
Determines which wireless devices can be controlled by the Wireless Switch. For
Windows 8 systems, this is controlled by an operating system drive directly. As a
result, the setting does not affect the Wireless Switch behavior.
NOTE:
When both WLAN and WiGig are present, enable/disable controls
are tied together. Thus, they cannot be enabled or disabled independently.
WLAN
Default: ON.
Bluetooth
Default: ON.
Wireless Device Enable
Enable or disable internal WLAN/Bluetooth devices.
WLAN
Default: ON.
Bluetooth
Default: ON.
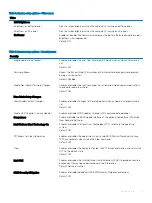
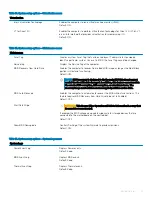
Table 13. System setup options—POST Behavior menu
POST Behavior
Numlock Enable
Enables or disables Numlock when the computer boots.
Default: ON.
Enable Adapter Warnings
Enables the computer to display adapter warning messages during boot.
Default: ON.
Extend BIOS POST Time
Configures the BIOS POST (Power-On Self-Test) load time.
Default: 0 seconds.
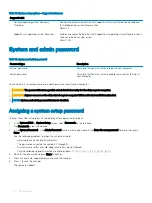
Fastboot
Configures the speed of the UEFI boot process.
Default: Thorough. Performs complete hardware and configuration initialization during
boot.
Fn Lock Options
Enables or disables the Fn lock mode.
Default: ON.
Lock Mode
Default: Lock Mode Secondary. Lock Mode Secondary = If this option is selected, the
F1-F12 keys scan the code for their secondary functions.
Pull Screen Logo
Enabled or disabled the computer to display full screen logo if the image match screen
resolution.
Default: OFF.
Warnings and Errors
Selects an action on encountering a warning or error during boot.
Default: Prompt on Warnings and Errors. Stop, prompt and wait for user input when
warnings or errors are detected.
NOTE:
Errors deemed critical to the operation of the computer hardware
will always halt the computer.
76
System setup
Summary of Contents for Inspiron 7390 2n1
Page 20: ...20 Removing the battery ...
Page 23: ...Removing the wireless card 23 ...
Page 25: ...Post requisites Replace the base cover Replacing the wireless card 25 ...
Page 36: ...Post requisites Replace the base cover 36 Replacing the solid state drive ...
Page 46: ...10 Lift the display assembly off the palm rest assembly 46 Removing the display assembly ...
Page 48: ...Post requisites 1 Replace the fan 2 Replace the base cover 48 Replacing the display assembly ...
Page 57: ...Removing the keyboard 57 ...
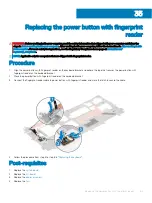
Page 62: ...62 Removing the power button with fingerprint reader ...


